BEFORE YOU SEND - UPDATE MAILING LISTS
Before you start sending postcards, we need to pull and update the postcard contact mailing lists in Quantum for our clients.
A) Check the client records in Airtable. If you’re sending Postcard A, check the list at this link. If you’re sending Postcard B, check the list at this link.
B) For the clients whose record says, “Download from Command” we need to login to the client’s KW Command account and download their postcard list. The procedure to do that can be found at this link.
C) For the clients whose record says, “Email Client” we need to create a new support request and email the client and ask them to send us their most recent list.
Back to TopLogin to the Client's Account
Each of our clients has their own QuantumDigital account. All logins can be found in 1Password.
A) Go to https://quantumdigital.com
B) Login using the client’s username & password
Back to TopUpload the Postcard Image Files
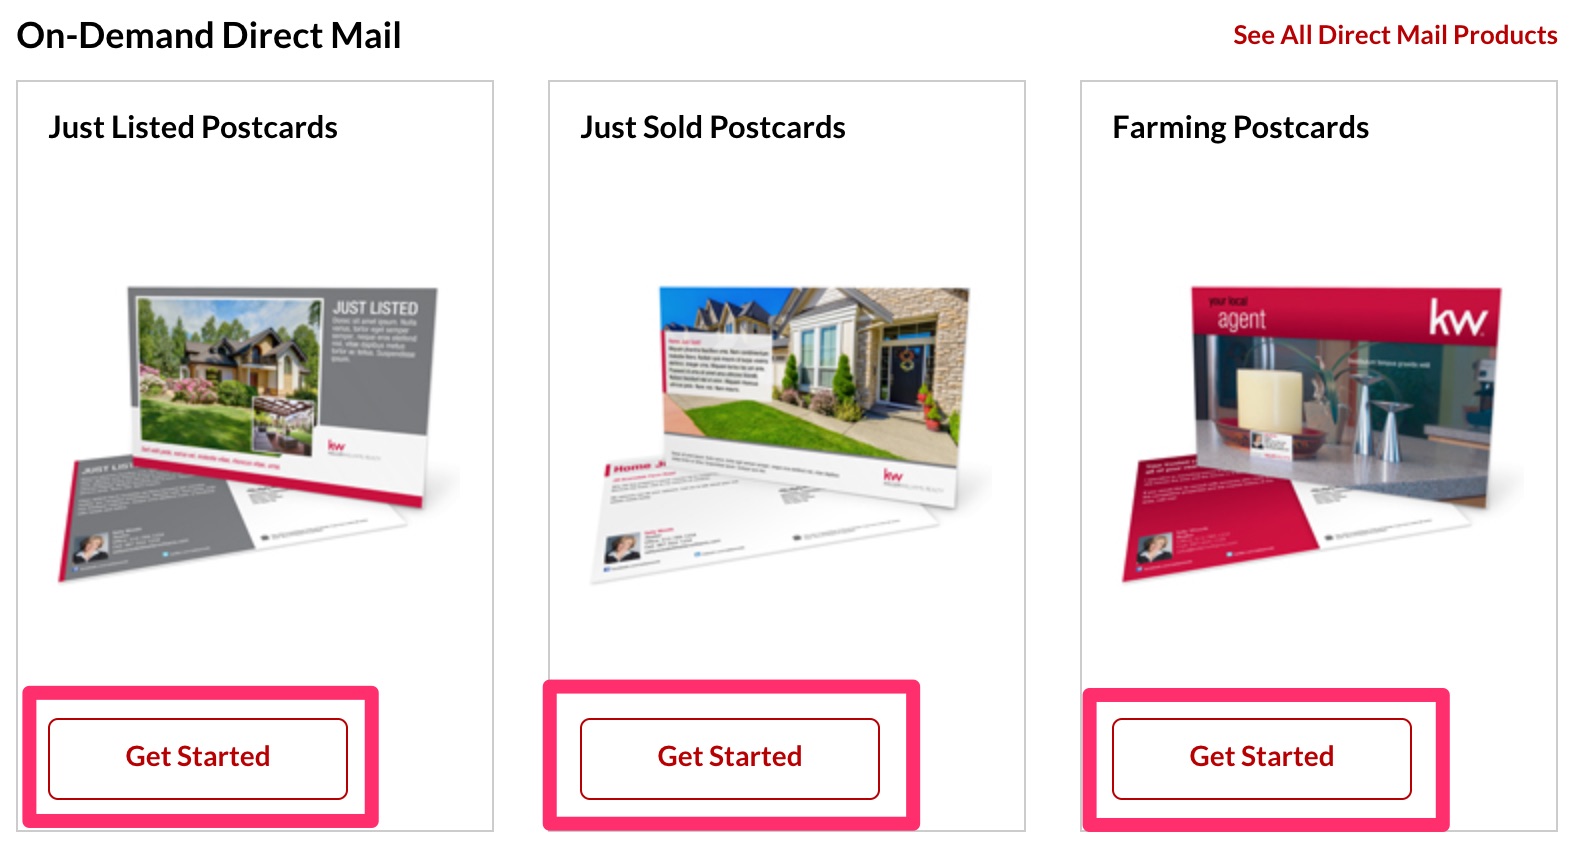
A) Under the “On-Demand Direct Mail” heading, click “Get Started” for the postcard type you’re sending.
- If it’s Just Listed, choose Just Listed.
- If it’s Just Sold, choose Just Sold.
- If it’s a Postcard A or B for Product Illuminate, choose Farming.
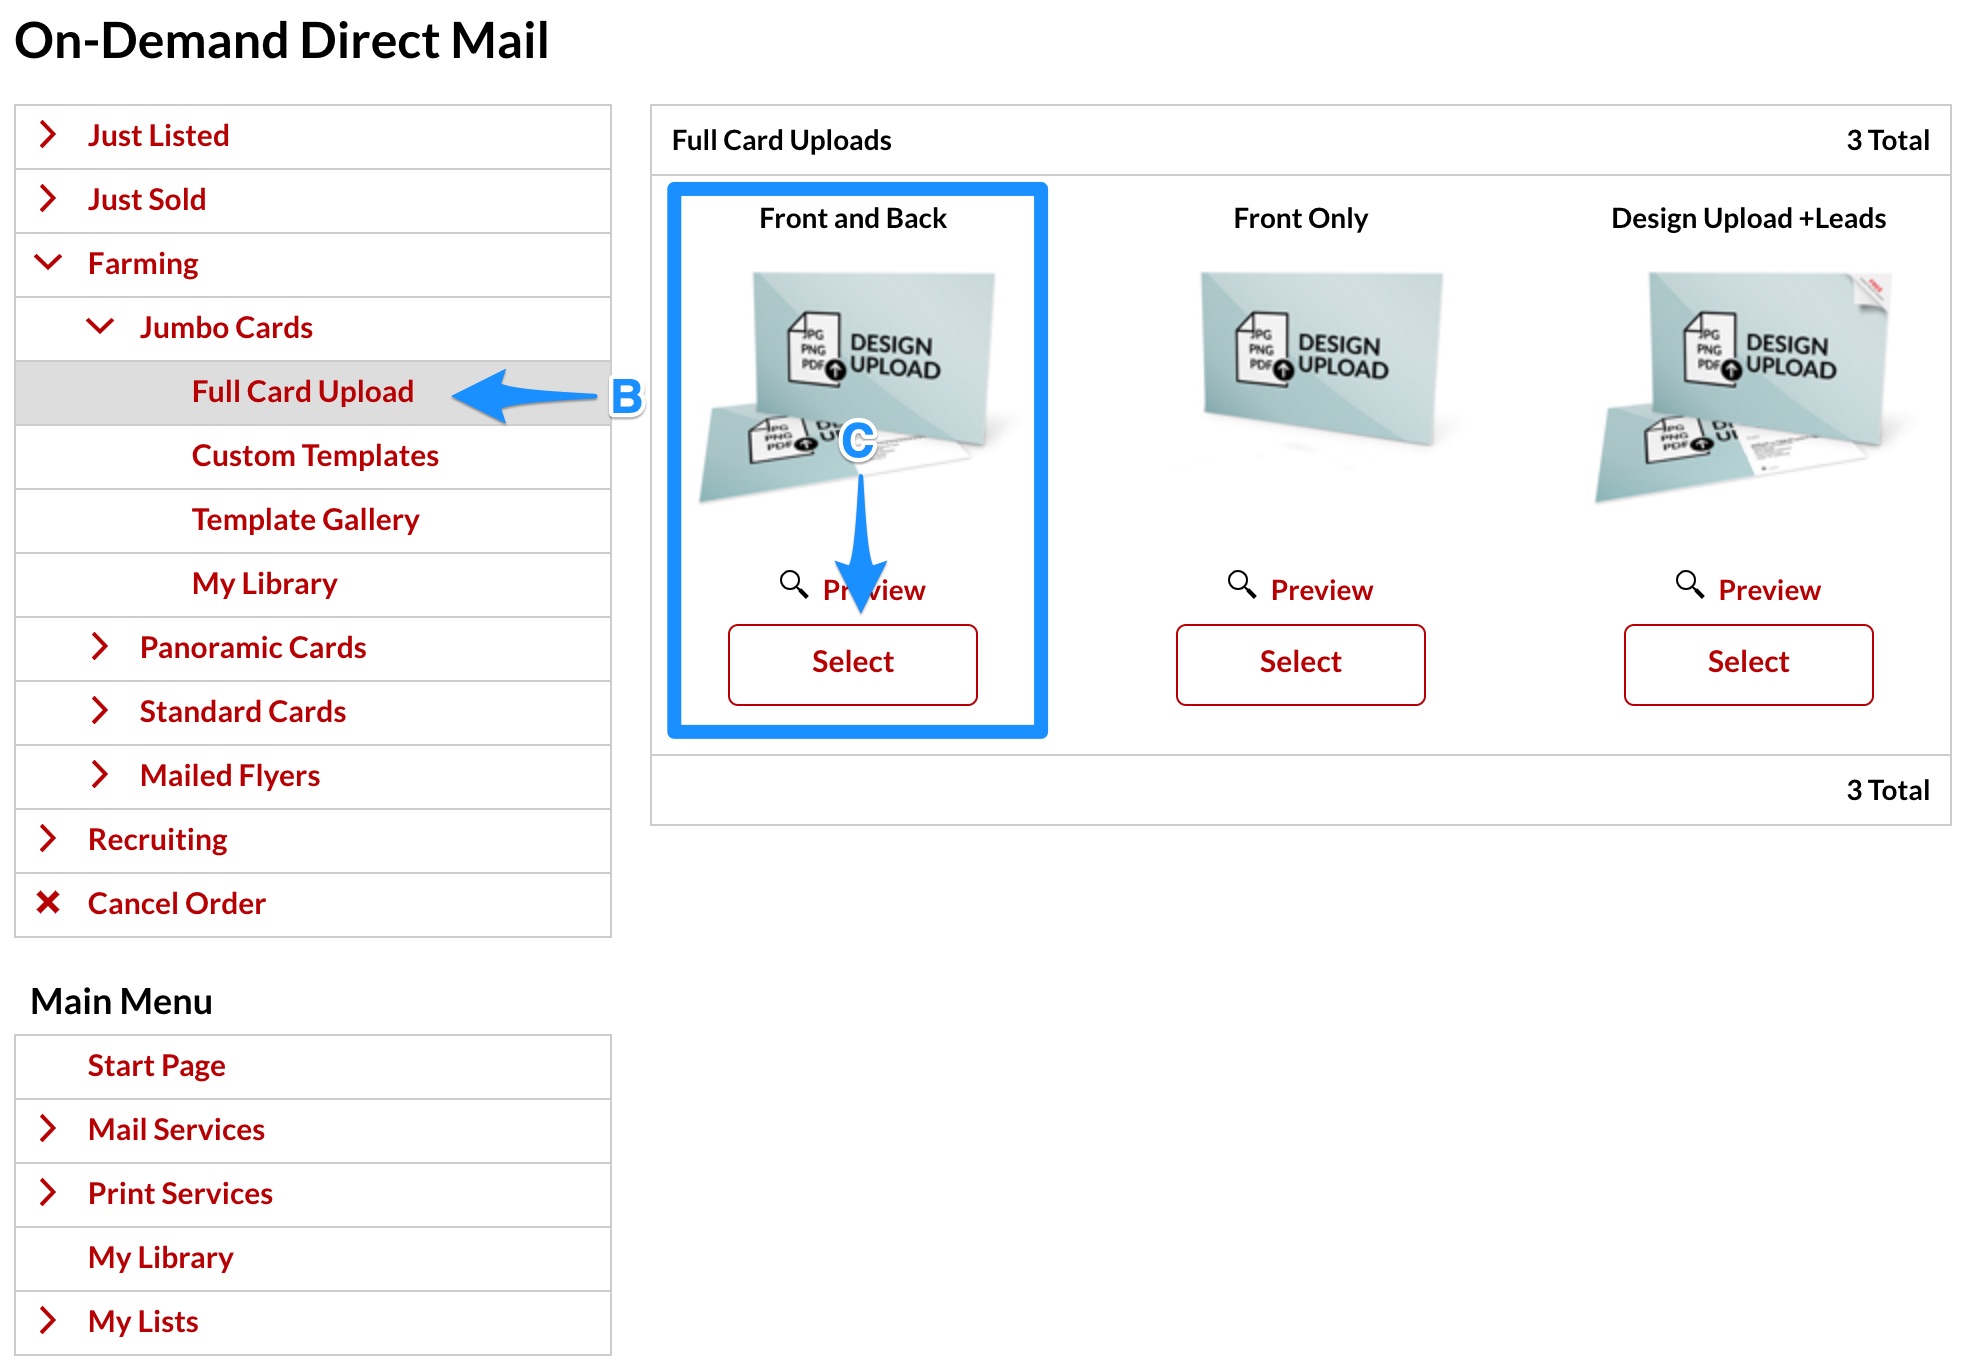
B) On the left, click “Full Card Upload” under “Jumbo Postcards”
C) Click “Select” under the “Front and Back” option
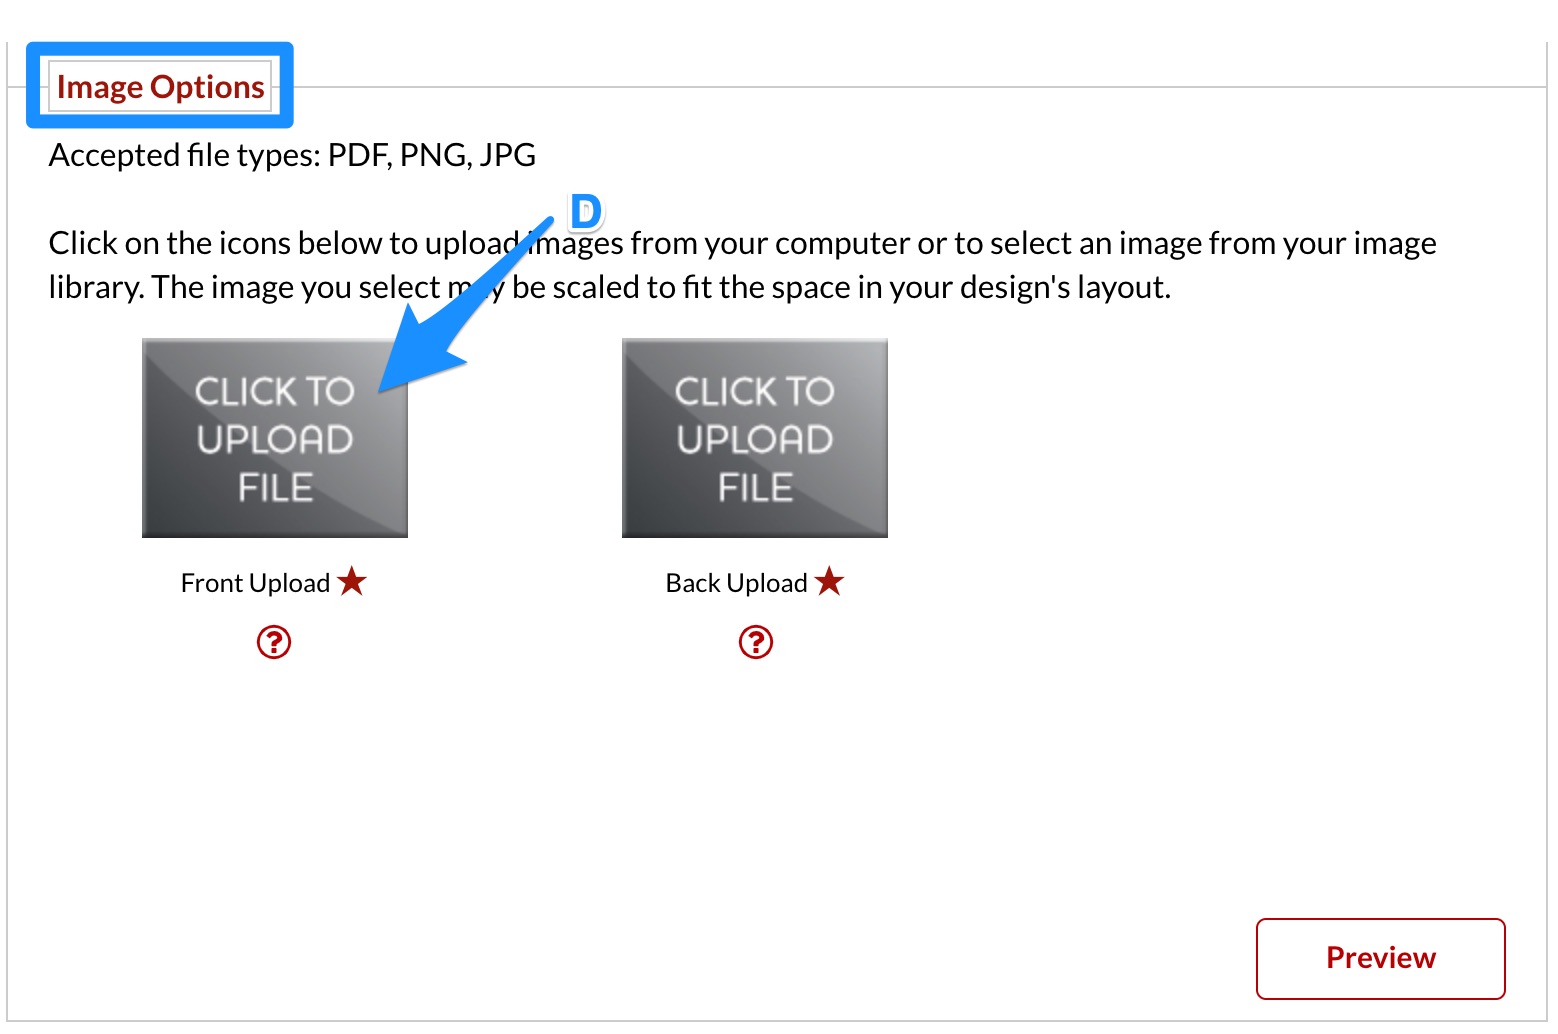
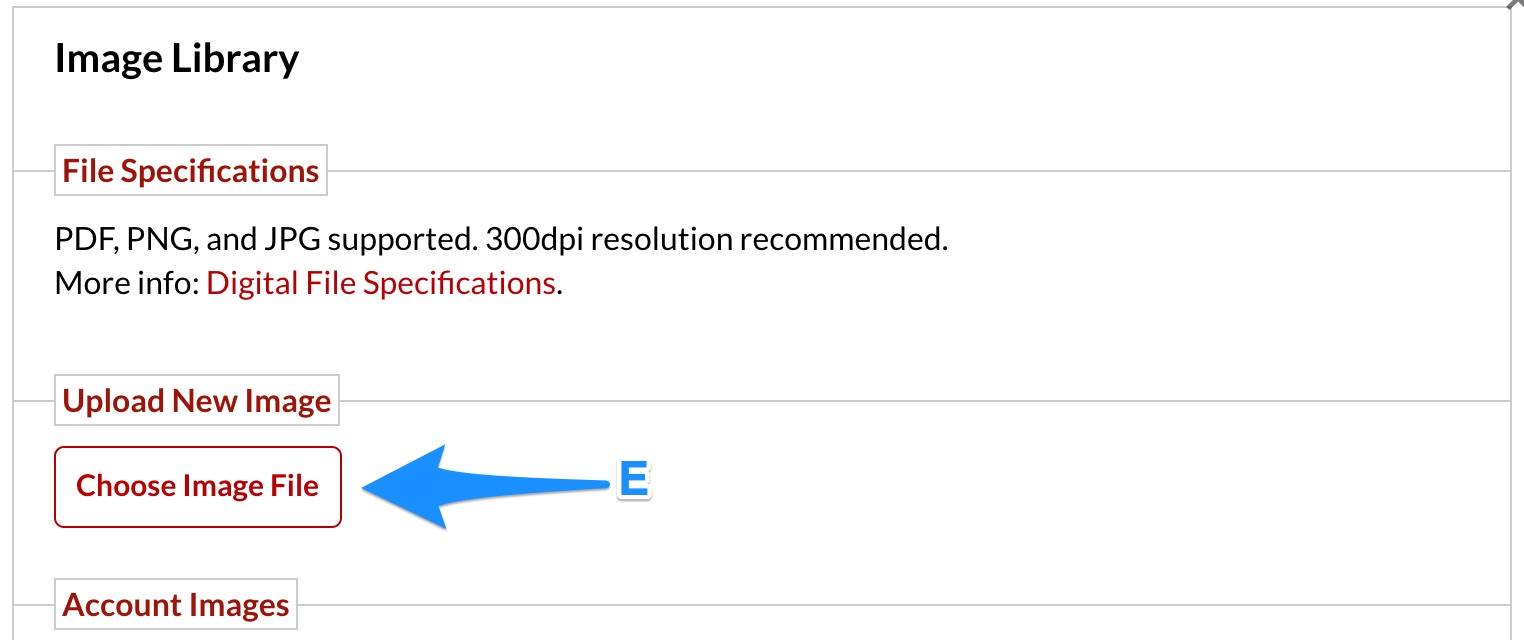
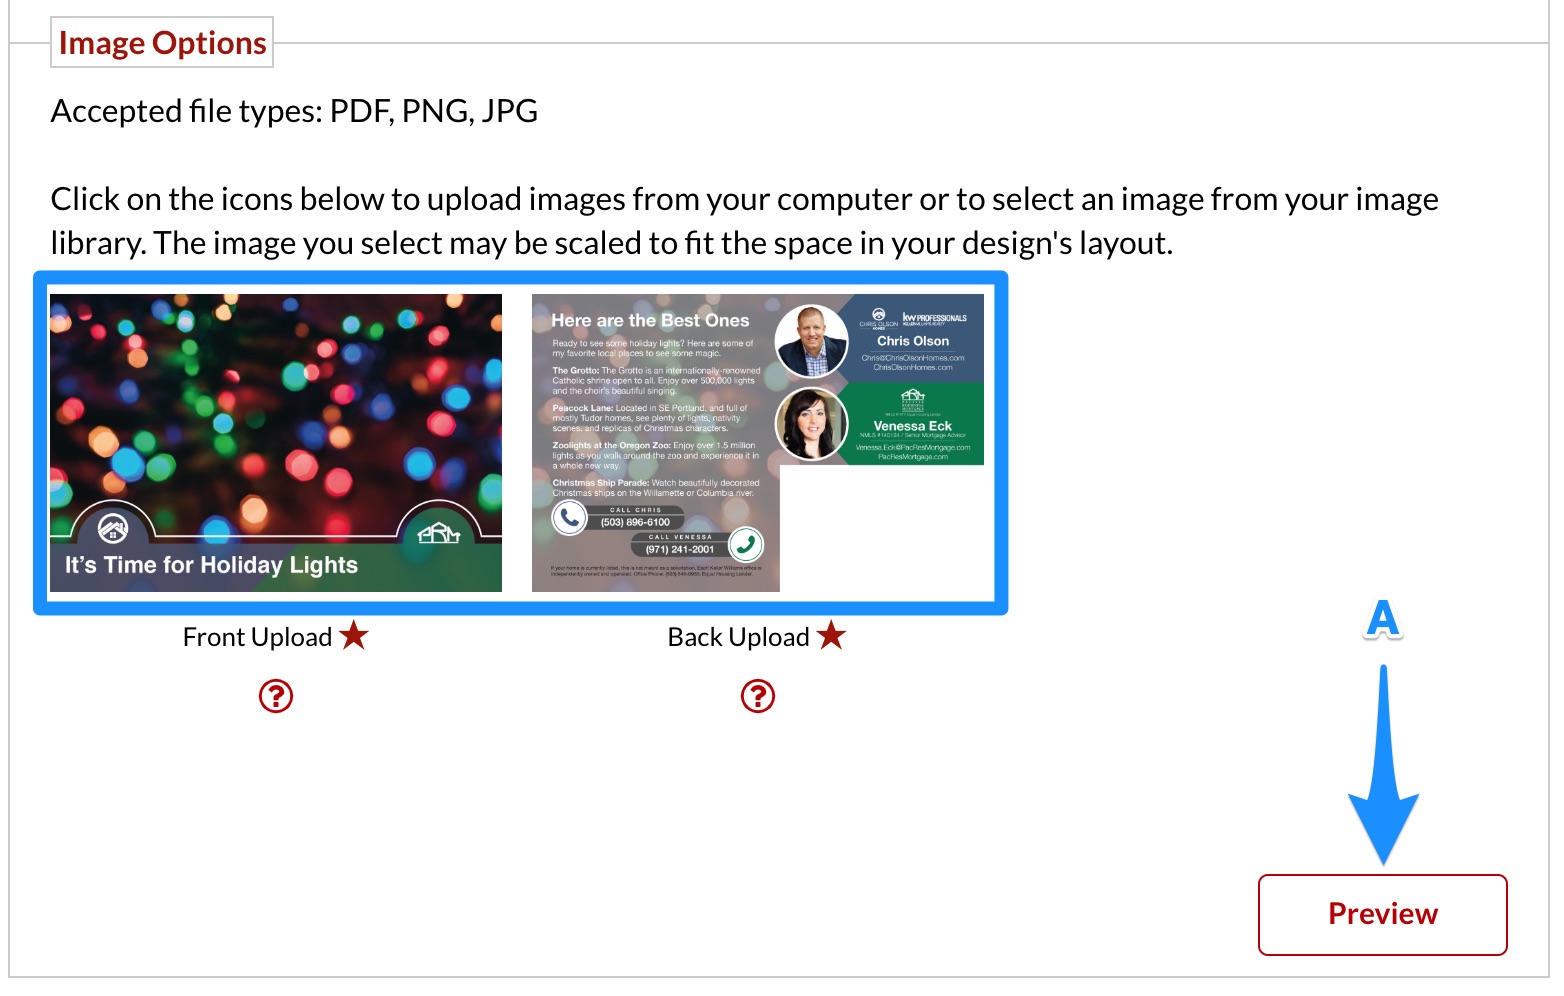
D) Under “Image Options”, click the first “Click to Upload File” button
E) In the dialog box that appears, click “Choose Image File”
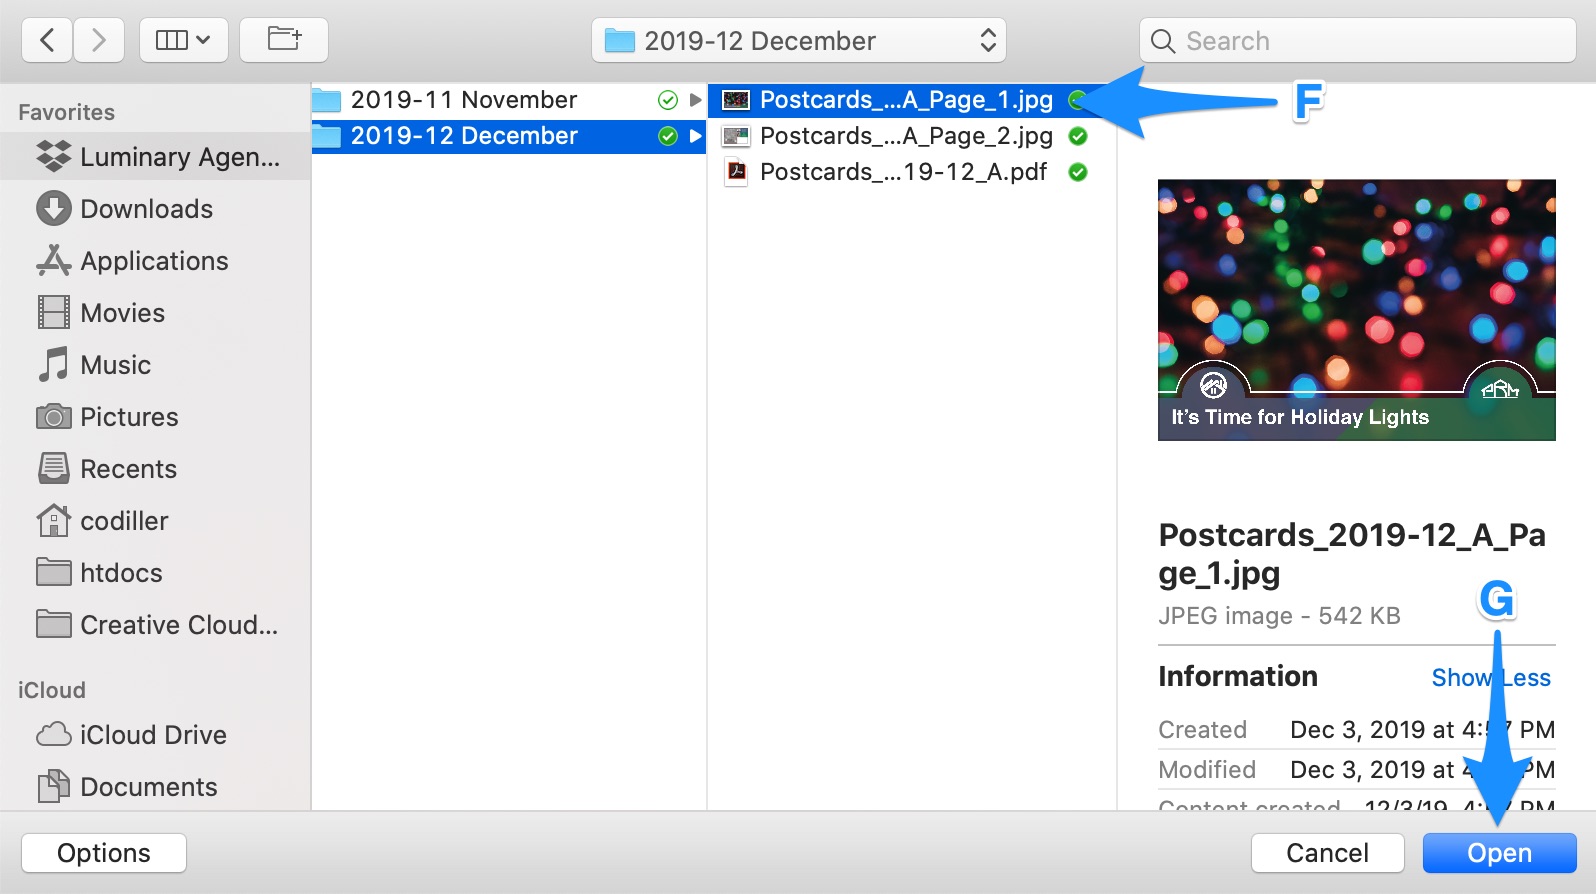
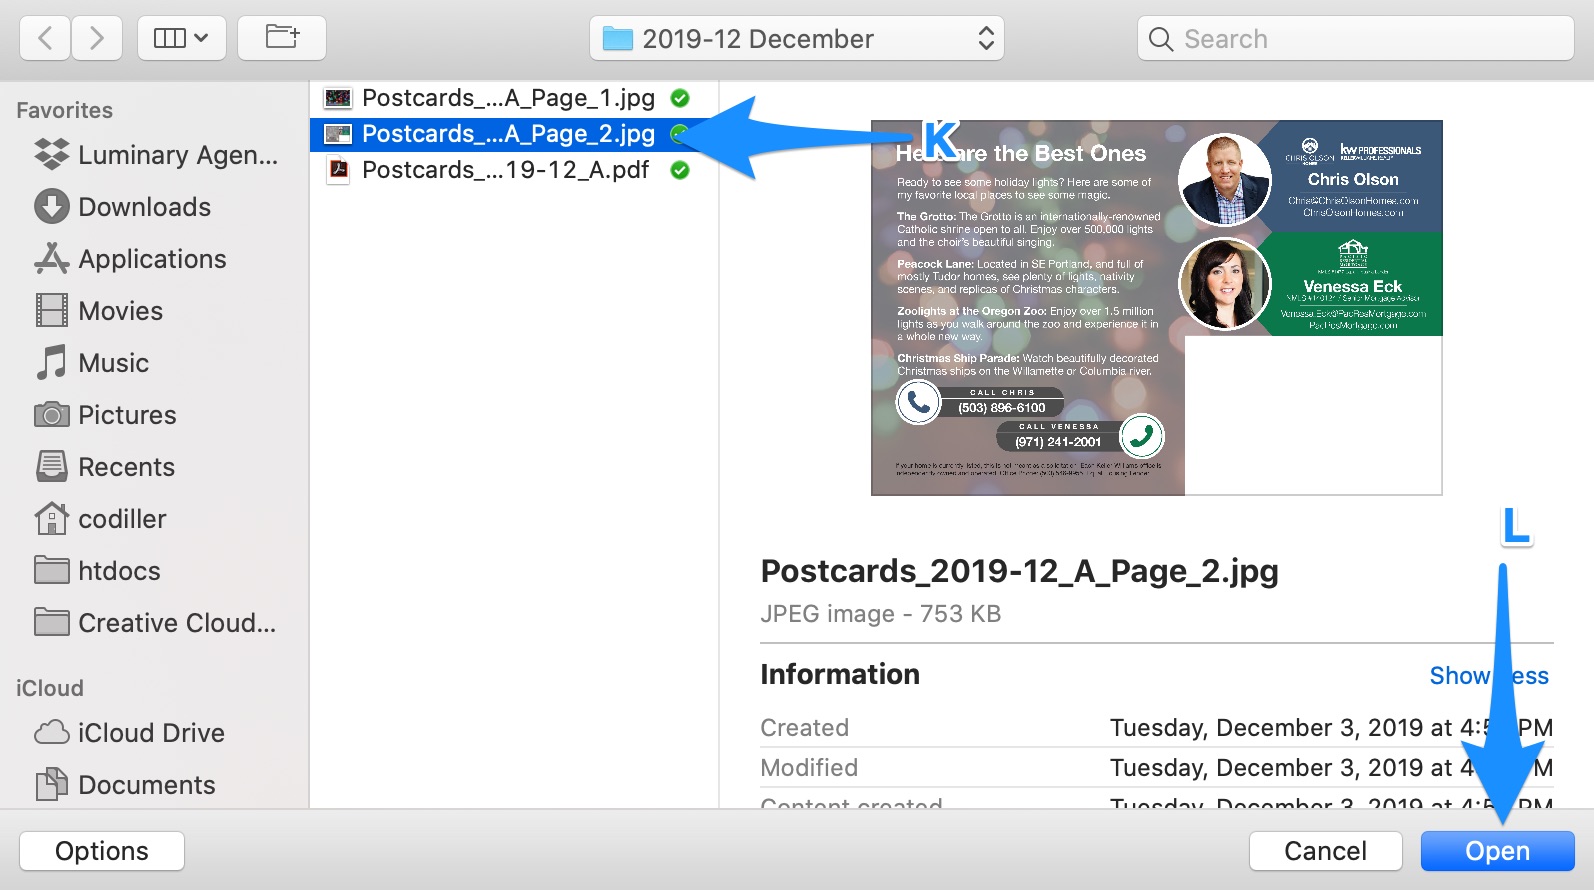
F) Navigate to the client’s postcard folder and select the .jpg image you saved ending in “Page_1.jpg”
G) Click “Open”
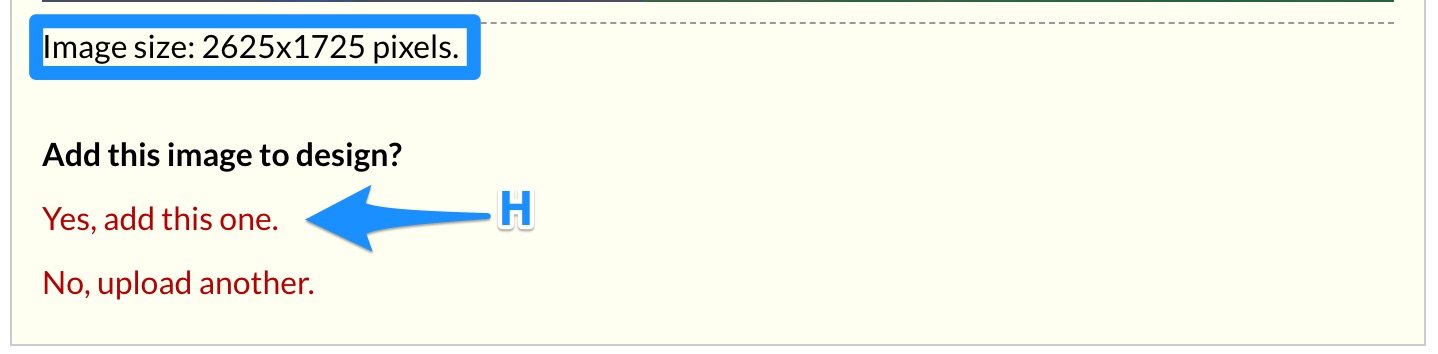
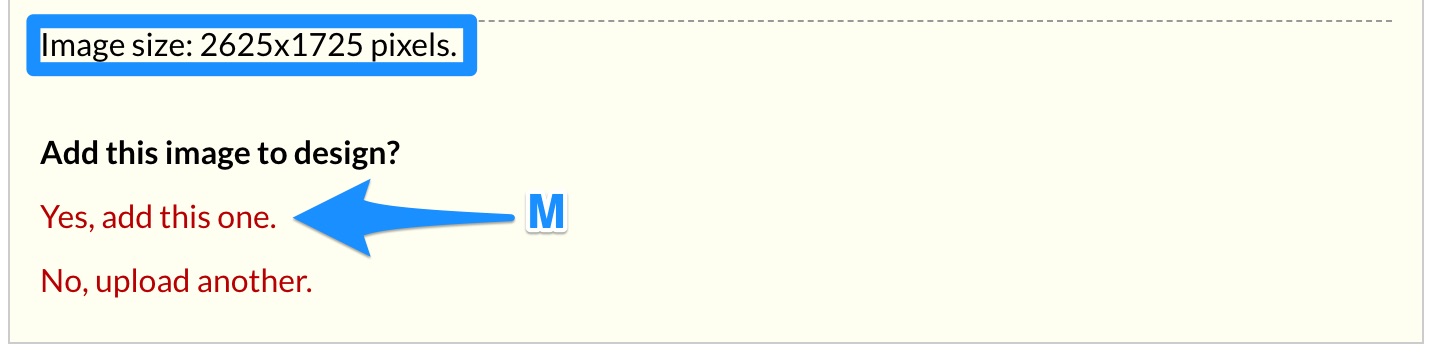
H) Make sure the image size is 2625×1725 pixels and click “Yes, add this one.”
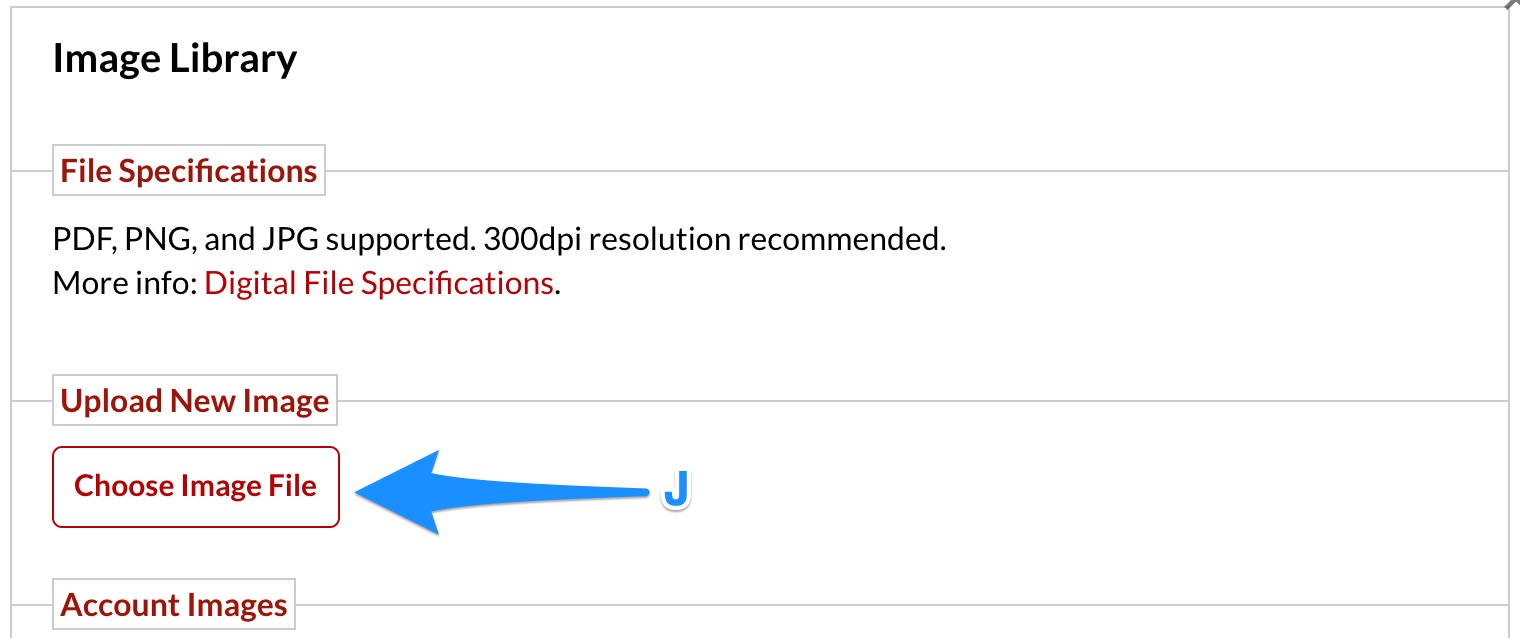
I) Back under “Image Options”, click the second “Click to Upload File” button

J) In the dialog box that appears, click “Choose Image File”
K) Navigate to the client’s postcard folder and select the .jpg image you saved ending in “Page_2.jpg”
L) Click “Open”
M) Make sure the image size is 2625×1725 pixels and click “Yes, add this one.”
Preview and Review Upload
A) With both images uploaded, continue by clicking “Preview”
B) Click “Review Now”
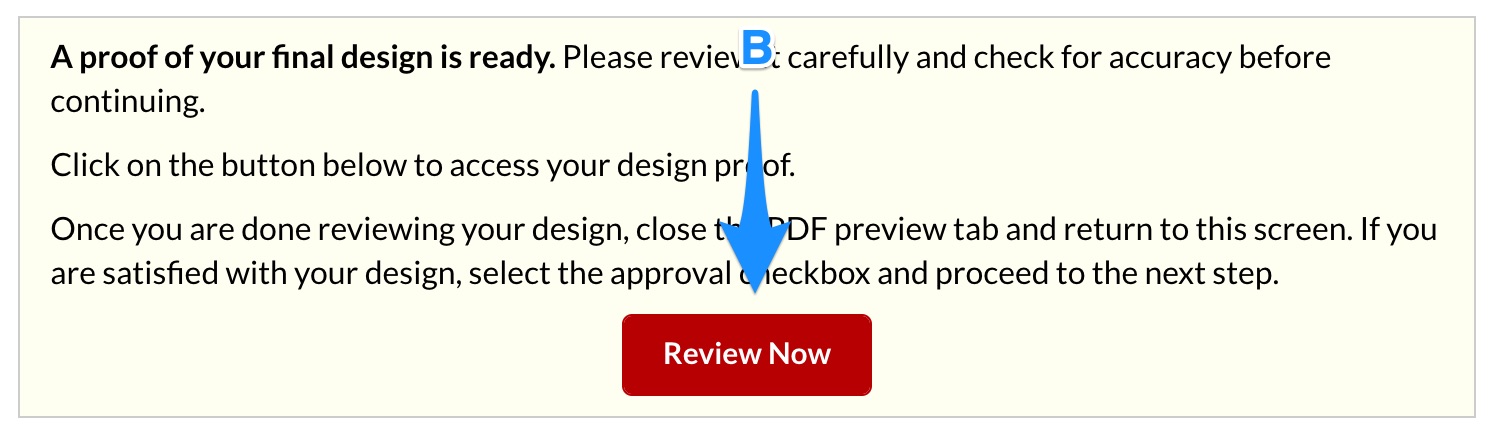
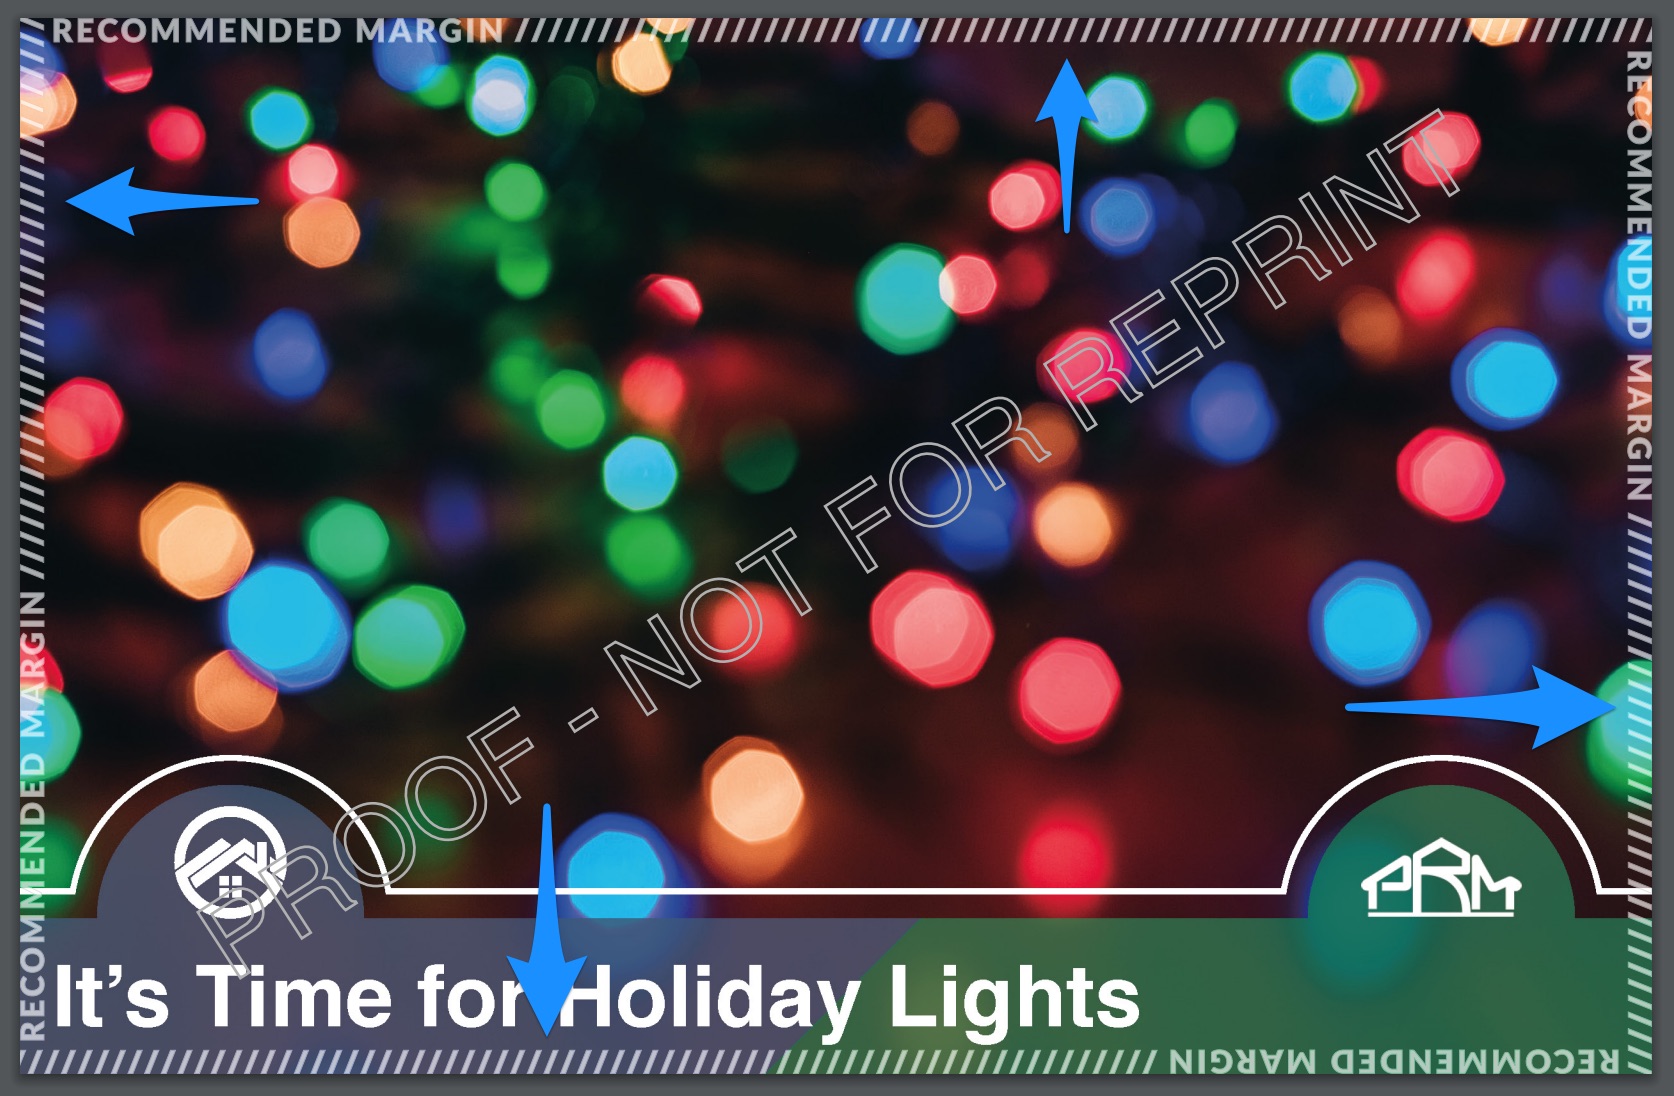
C) A PDF will download. Open it and verify no text or graphics are overlapping into the “Recommended Margin”
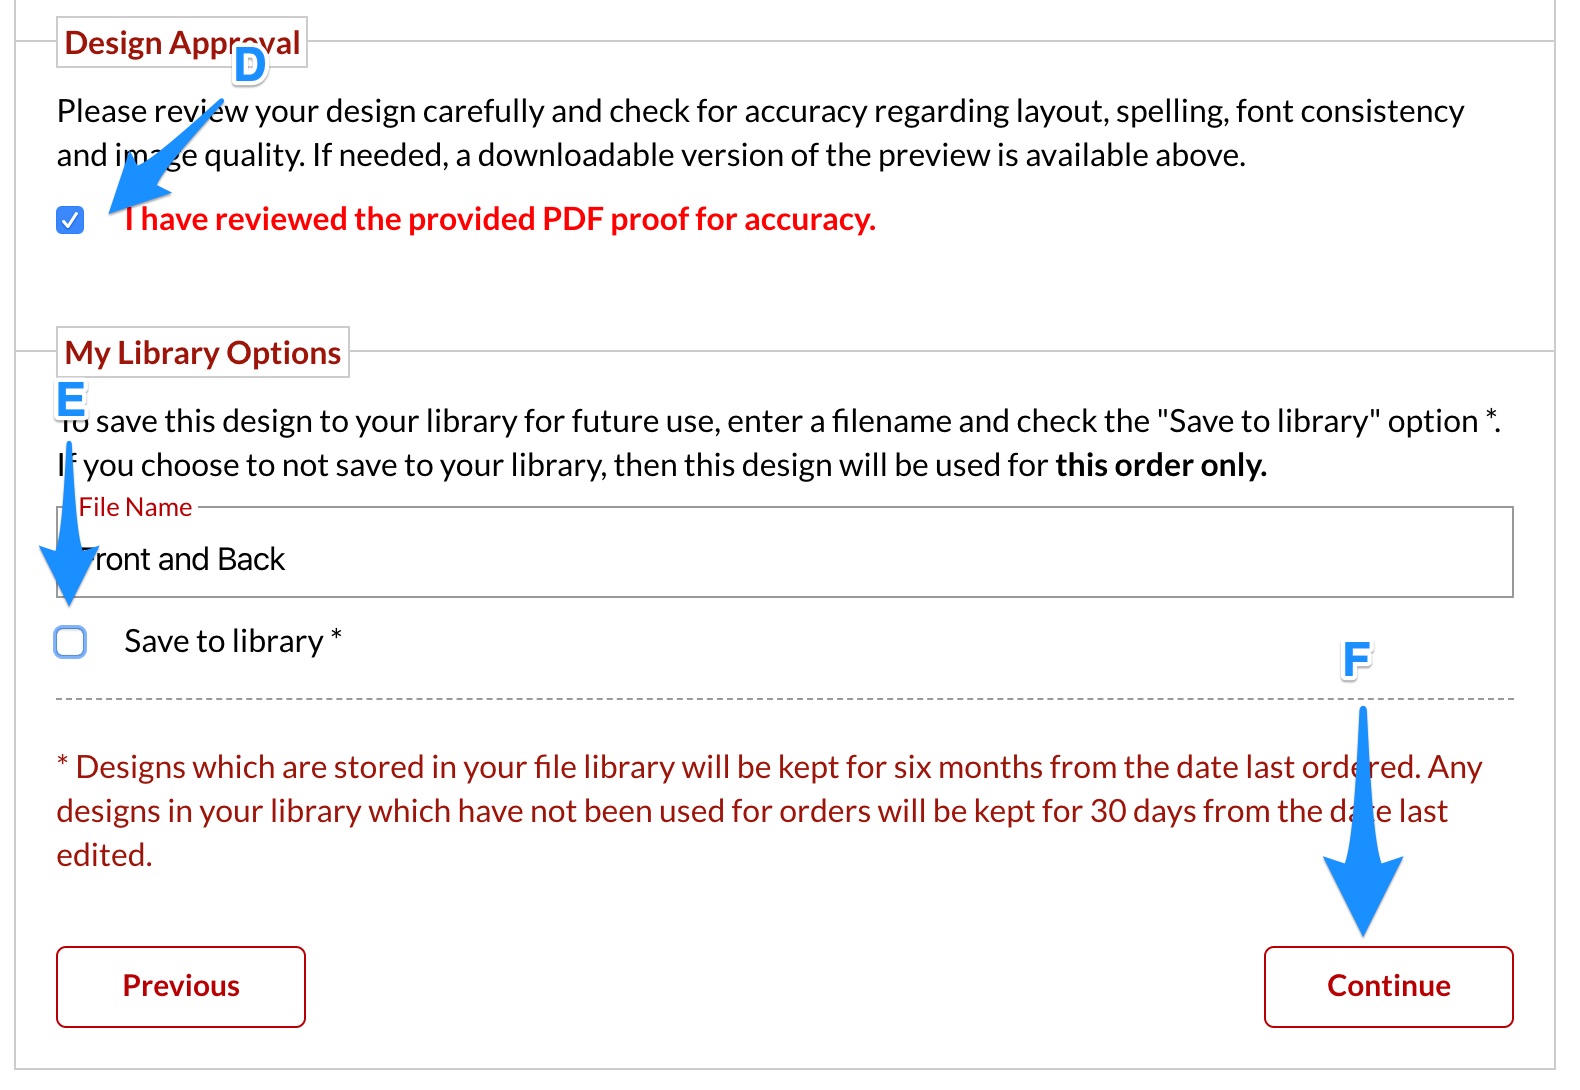
D) If it is correct, check “I have reviewed the provided PDF proof for accuracy.”
E) Uncheck “Save to library”
F) Click “Continue”
[CONDITIONAL] Select the Client List
If you are sending an A or B postcard for Product Illuminate, follow this step. Otherwise, skip to the next step.
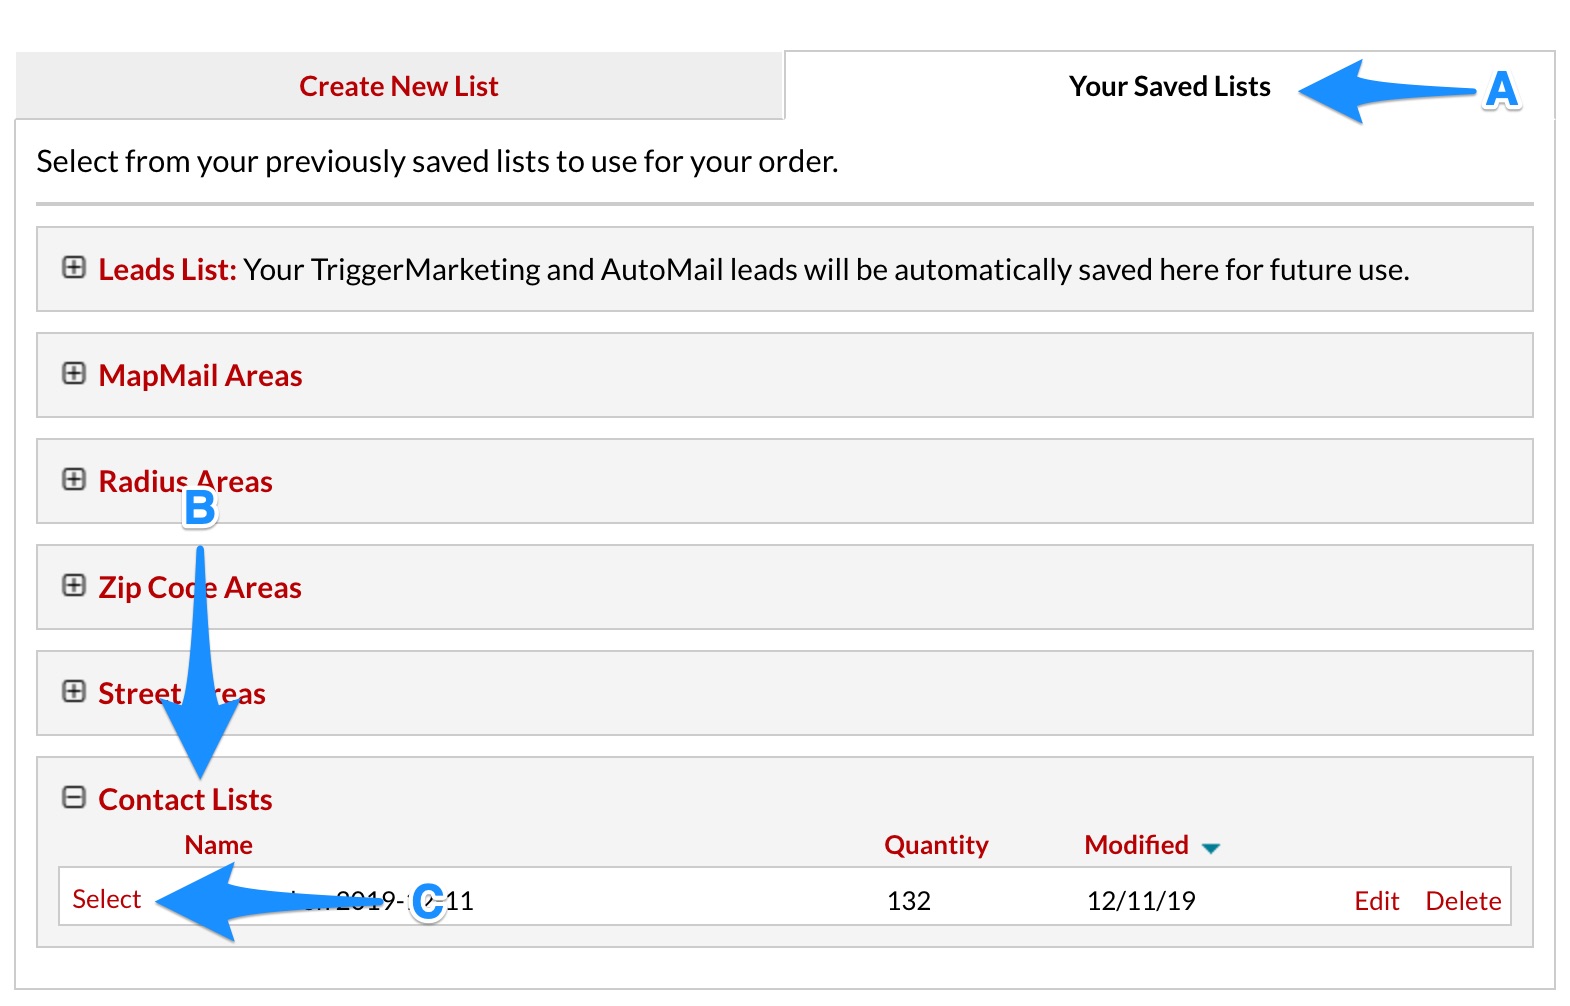
A) Click the “Your Saved Lists” tab
B) Click the “Contact Lists” accordion
C) Click “Select” next to the contact list
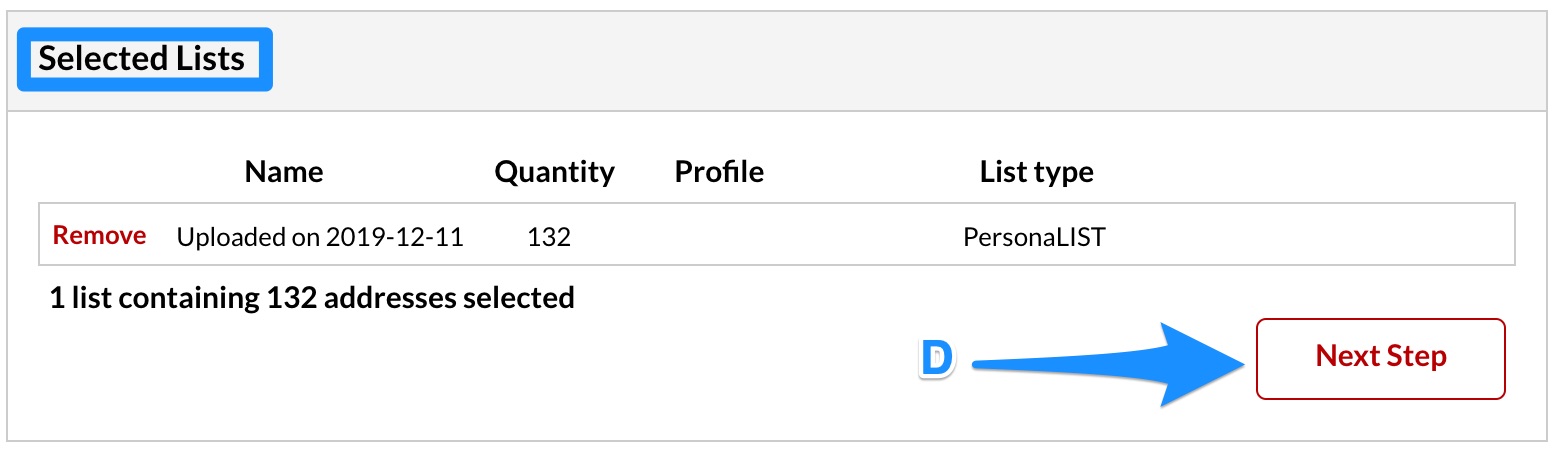
D) Above, in the “Selected Lists” box, click “Next Step”
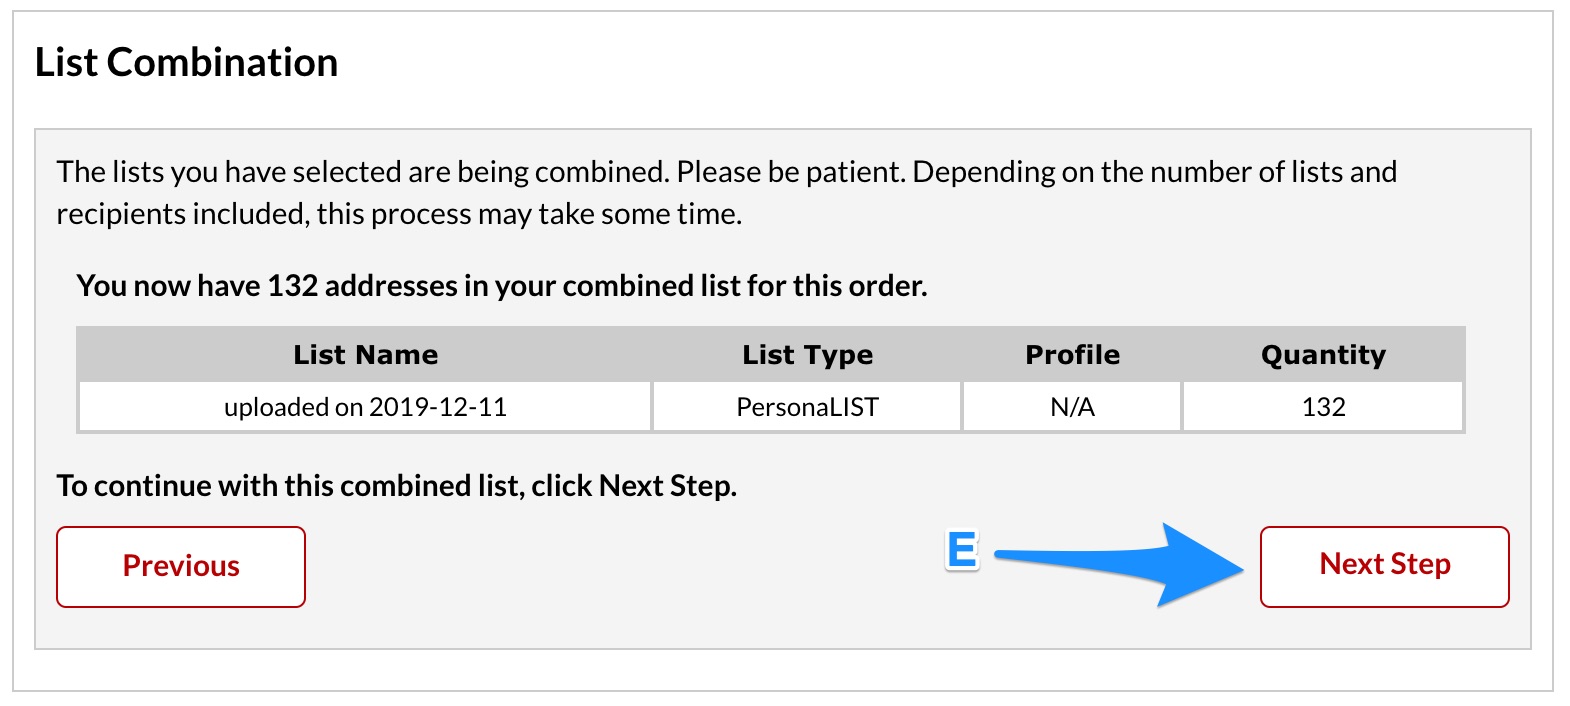
E) In the “List Combination” box, click “Next Step”
[CONDITIONAL] Create Geographic Area
If you are sending a Just Listed or Just Sold postcard to a specific geographic area, follow this step. Otherwise, please skip.
A) Click “Create Geographic Area”
B) Select “MapMail”
C) Make sure the “APPLIED PROFILE” is “Home Owners Only”
D) Select “Map a mailing radius around a central location.”
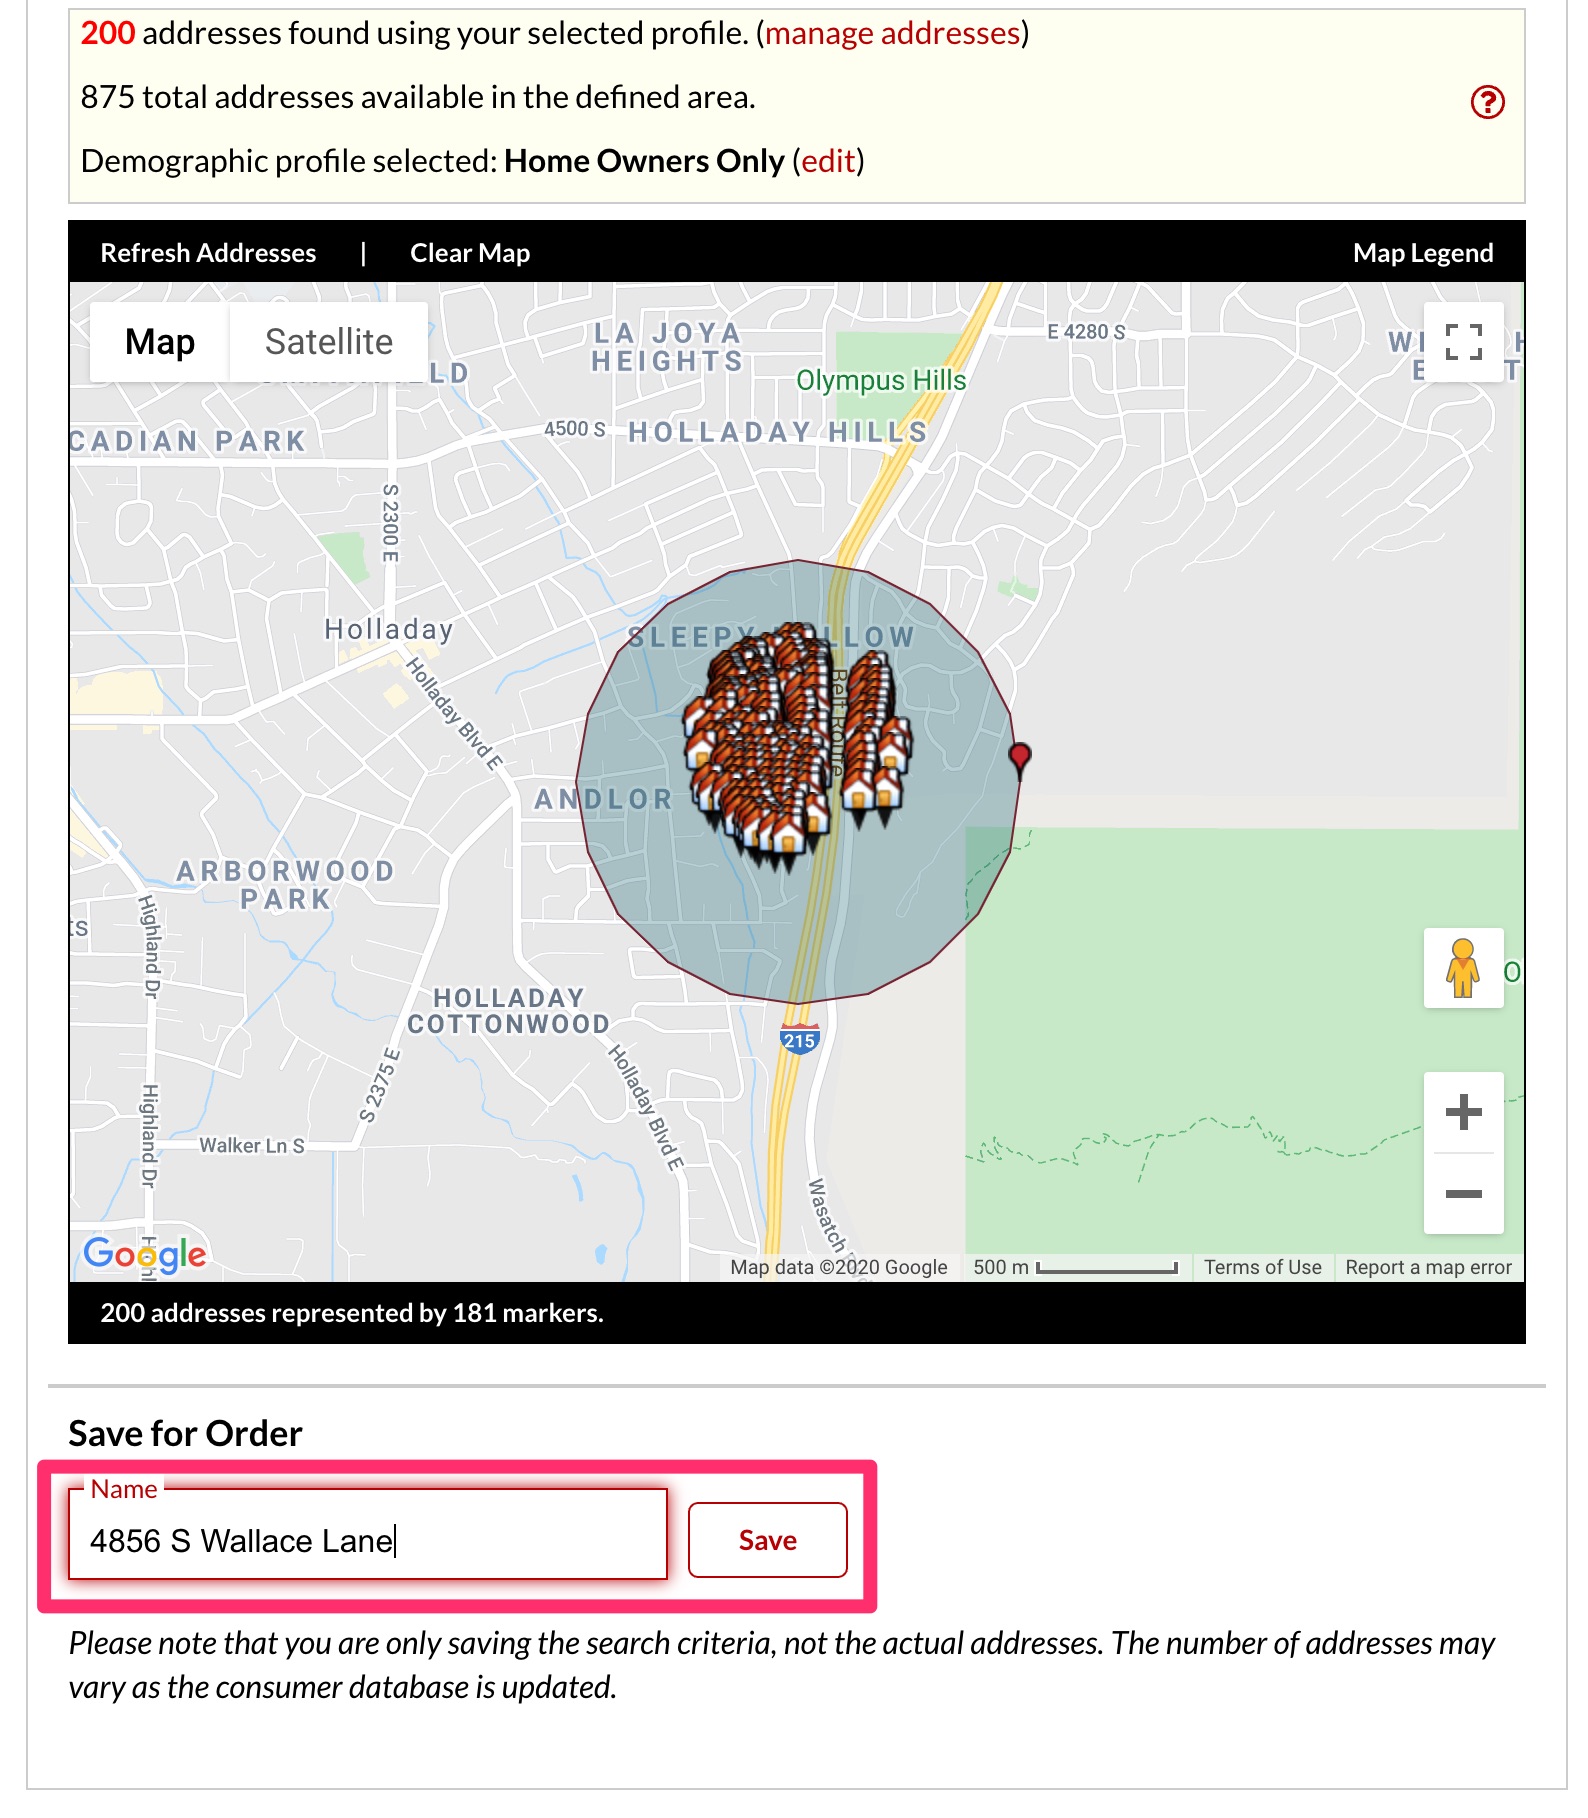
E) Enter the address of the property on the postcard, type the quantity the client wants and 0.5 for the radius and click “Locate”
F) Make sure it found the correct number of addresses. NOTE: If it did not find enough, expand the radius to 1 mile and click “Locate” again. Keep expanding the radius until it finds the correct quantity.
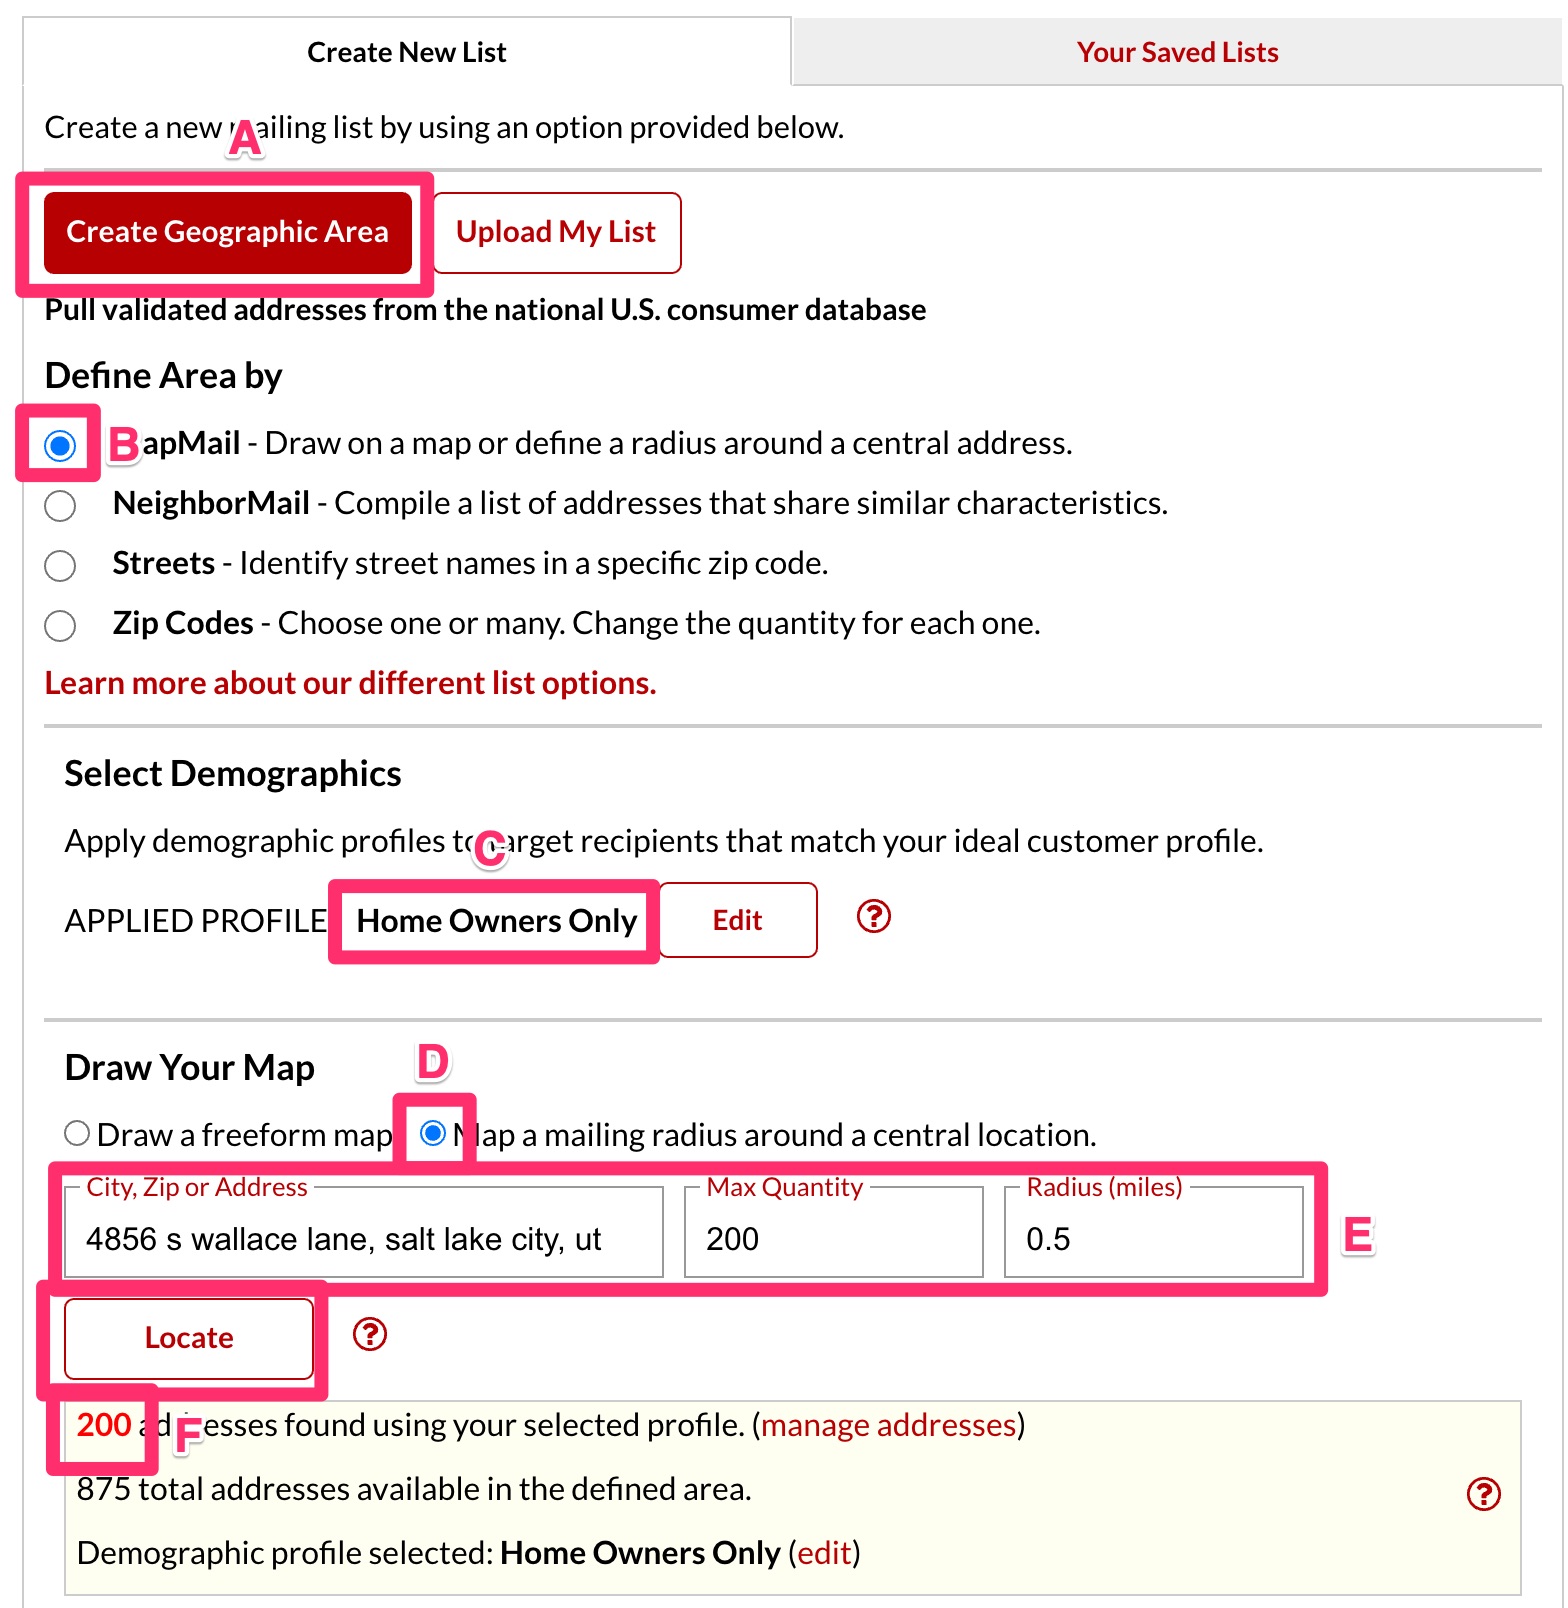
G) Type the name of the address in the “Save for Order – Name” field and click “Save”
H) Click “Next Step” and then, after it’s finished compiling the list and removing duplicates, click “Next Step” again
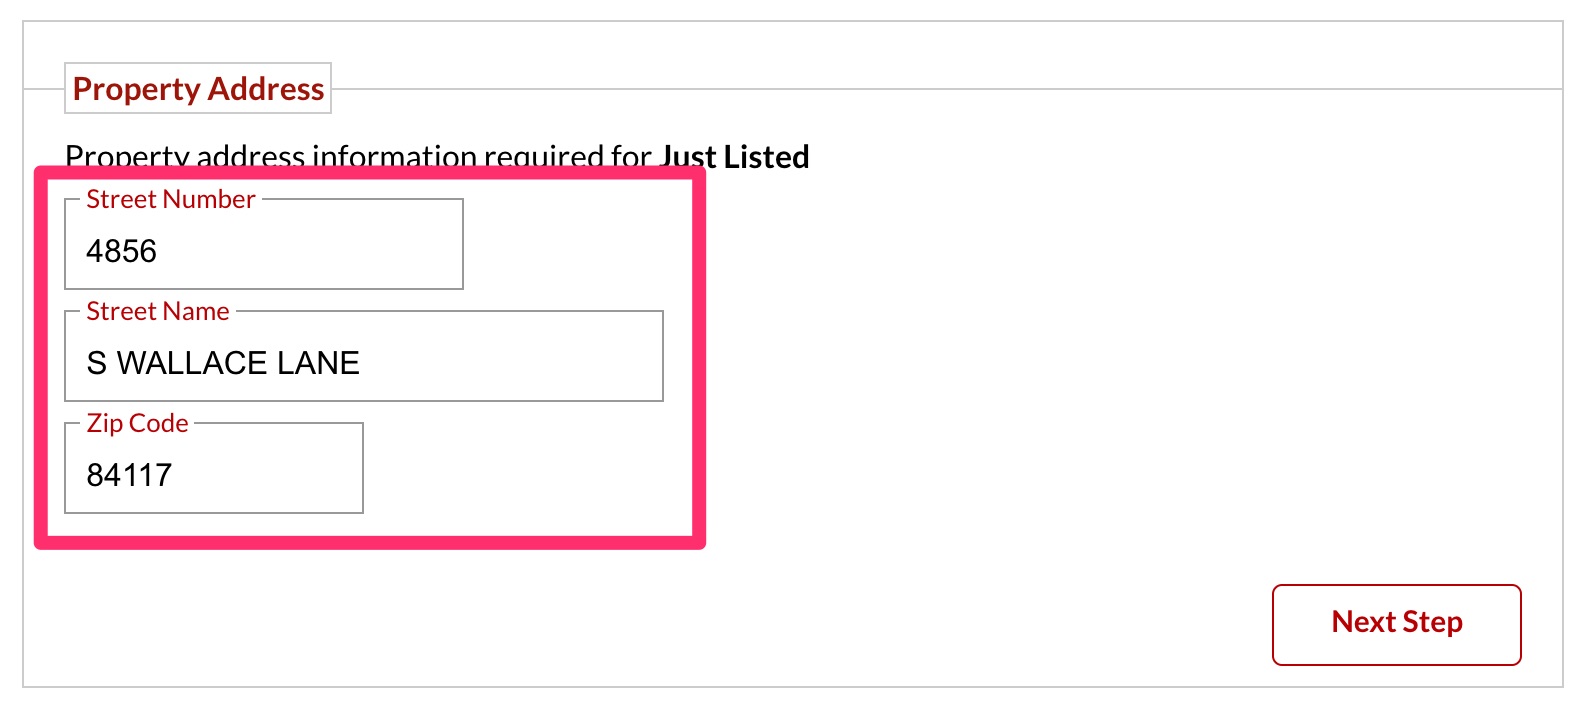
I) Enter the address of the property and click “Next Step”
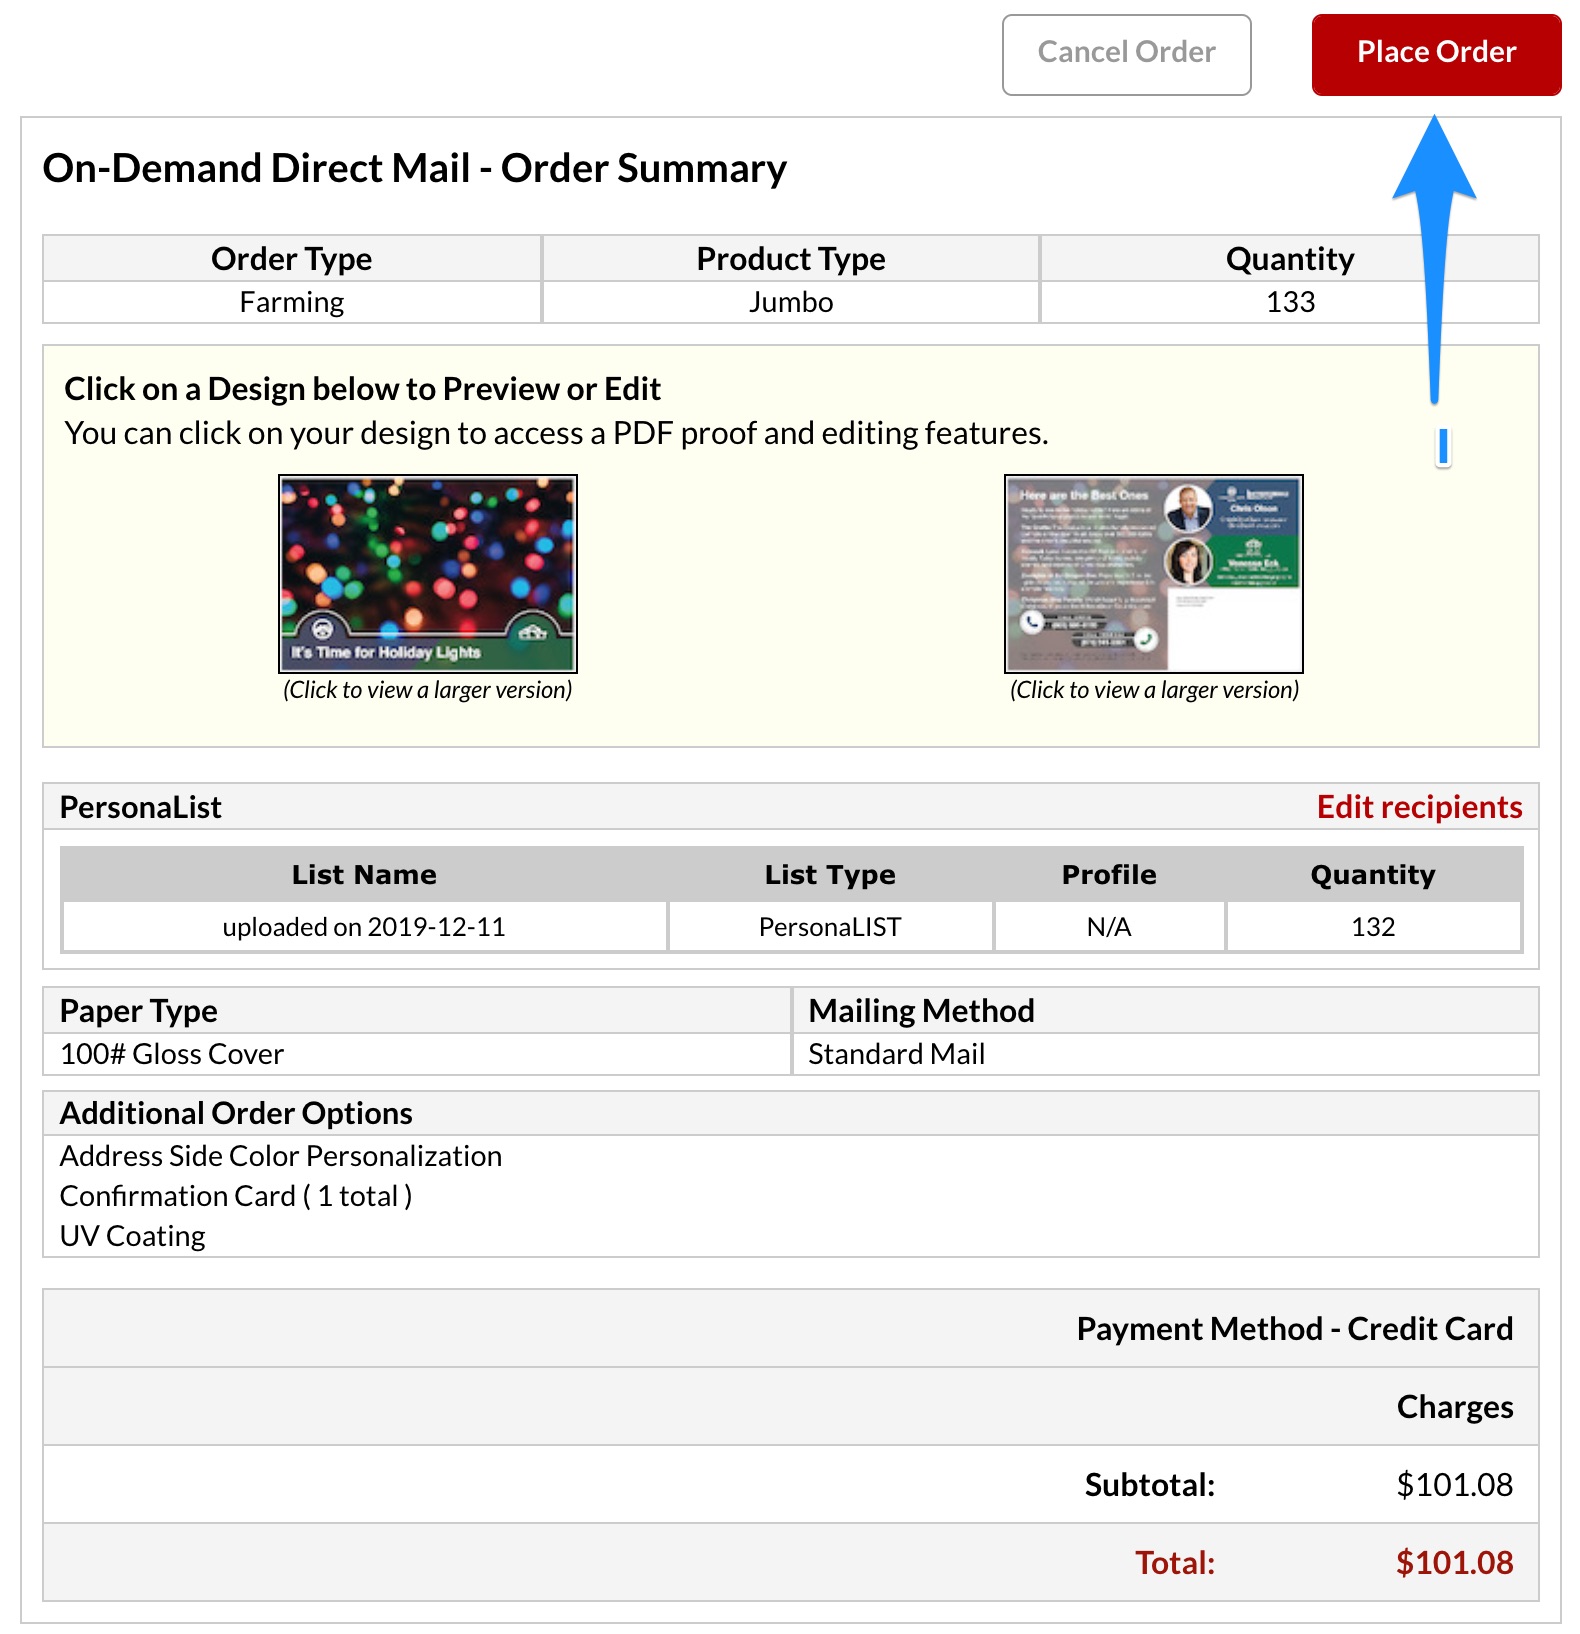
Finish Order Details and Place Order
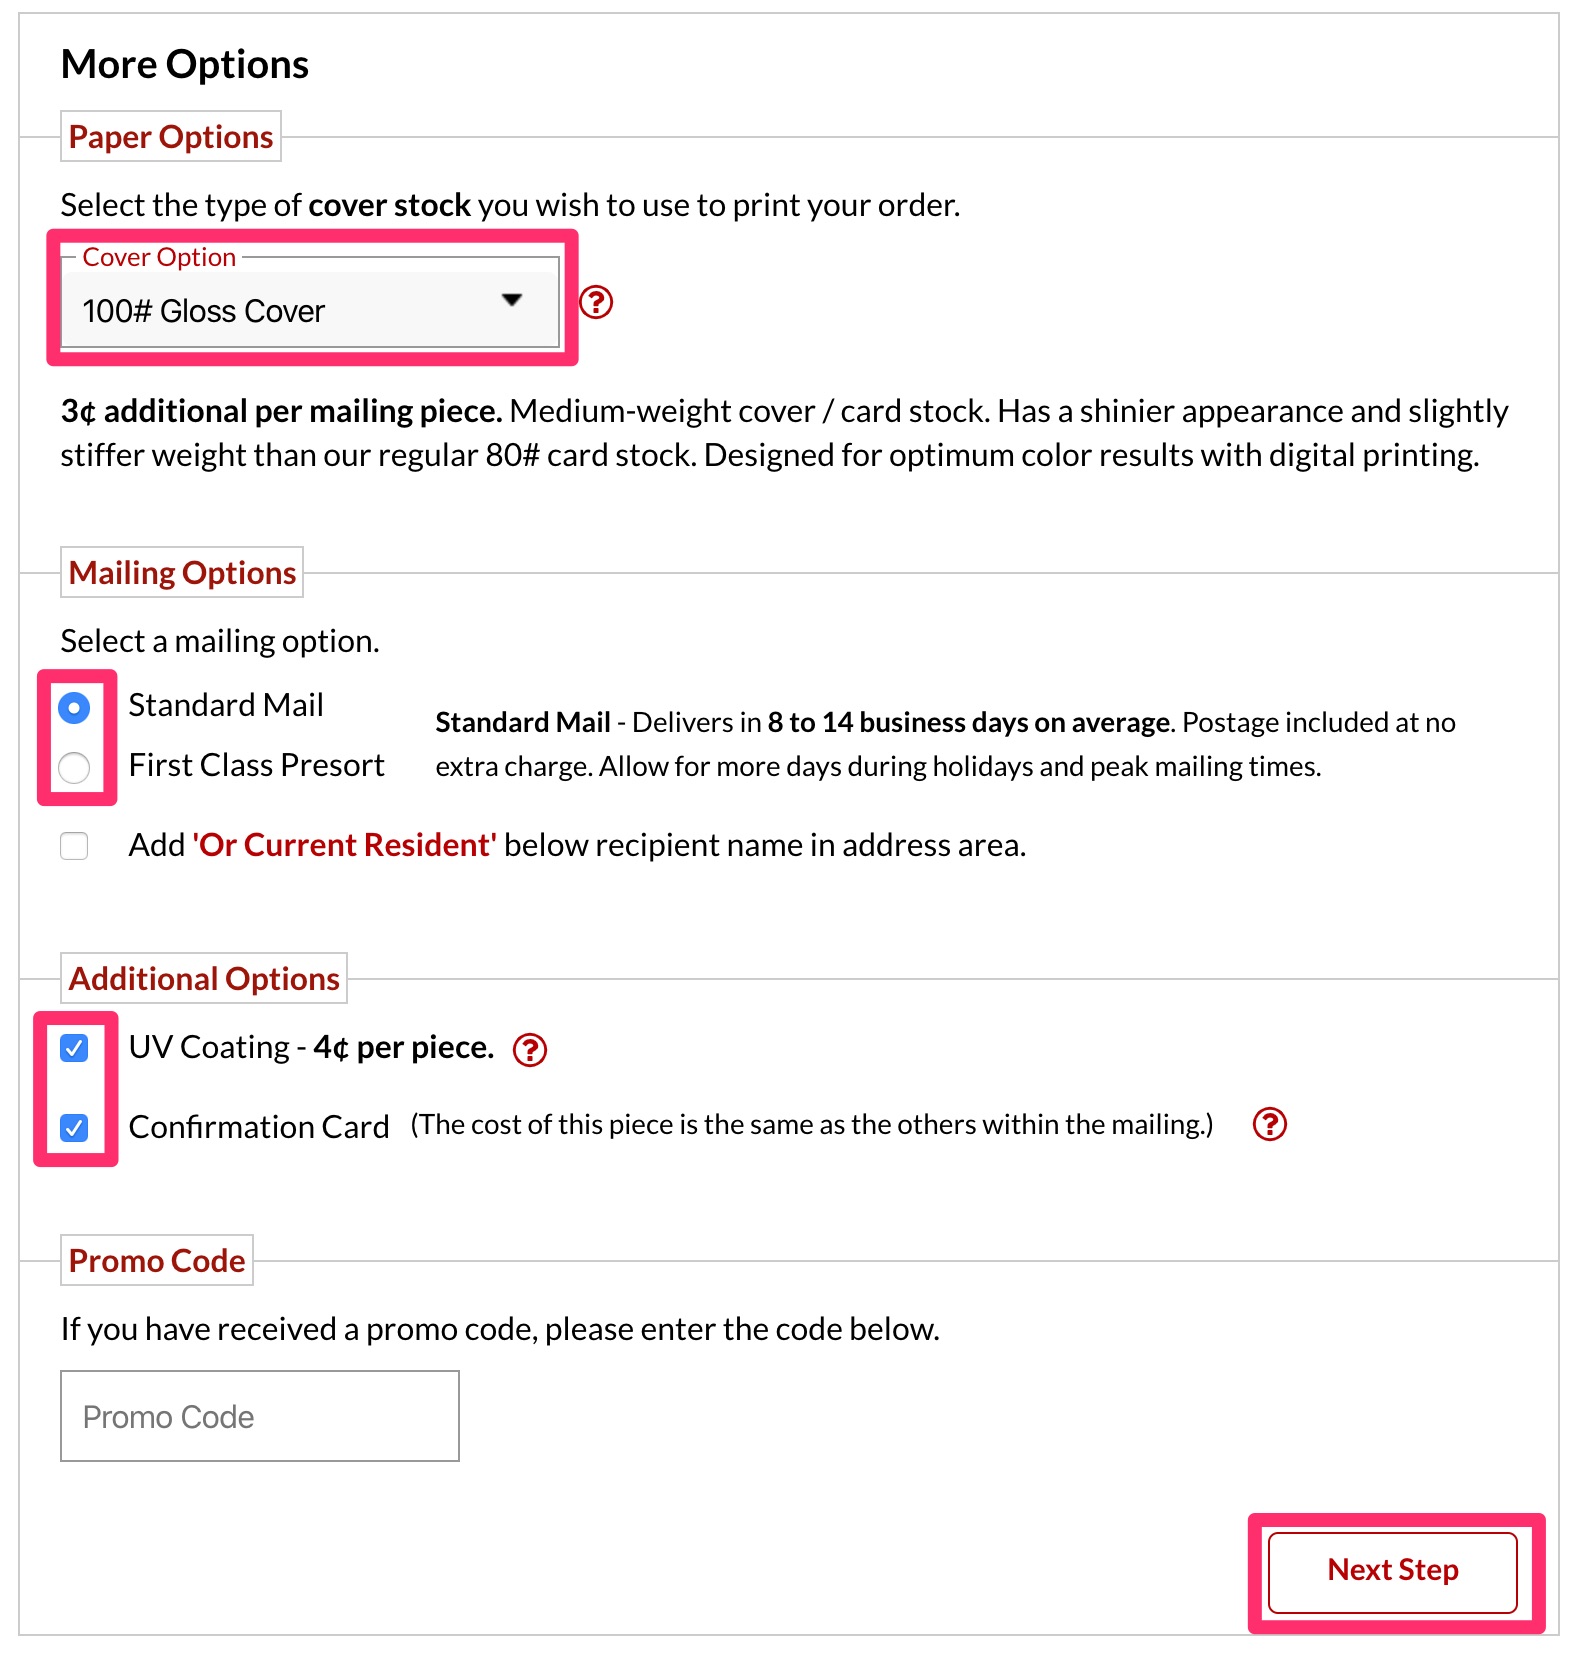
A) Under “Paper Options”, select “100# Gloss Cover”
B) Under “Mailing Options”:
- Select “Standard Mail” for A and B Illuminate Postcards
- Select “First Class Presort” for Just Listed and Just Sold postcards
B) Under “Additional Options”, select “UV Coating” AND “Confirmation Card”
C) Click “Next Step”
D) Review the order and click “Place Order”