Find and Open the Google Doc
A) Navigate to the project’s folder in Google Drive. There should be a link in the Teamwork task list.
B) Open the Google Doc in this folder. It will have everything you need for the next steps.
Back to TopCreate the Featured Image
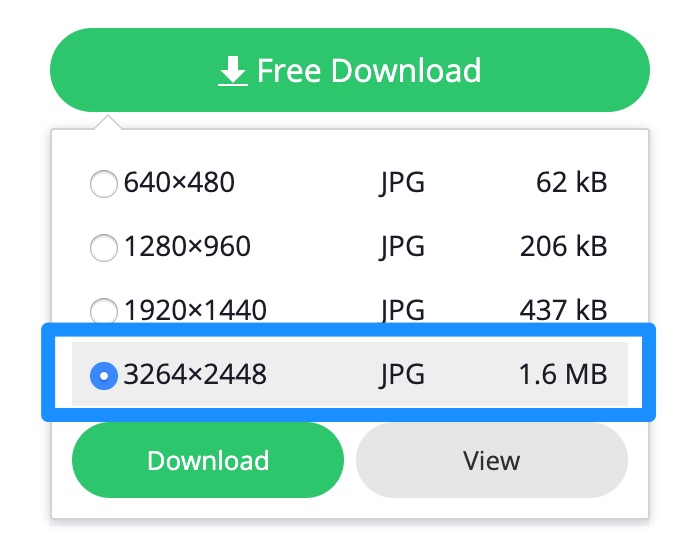
A) Click on the Featured Image link in the doc. If you’re downloading the image from online, download the highest resolution available.
B) Open this image in Photoshop or your photo editor of choice.
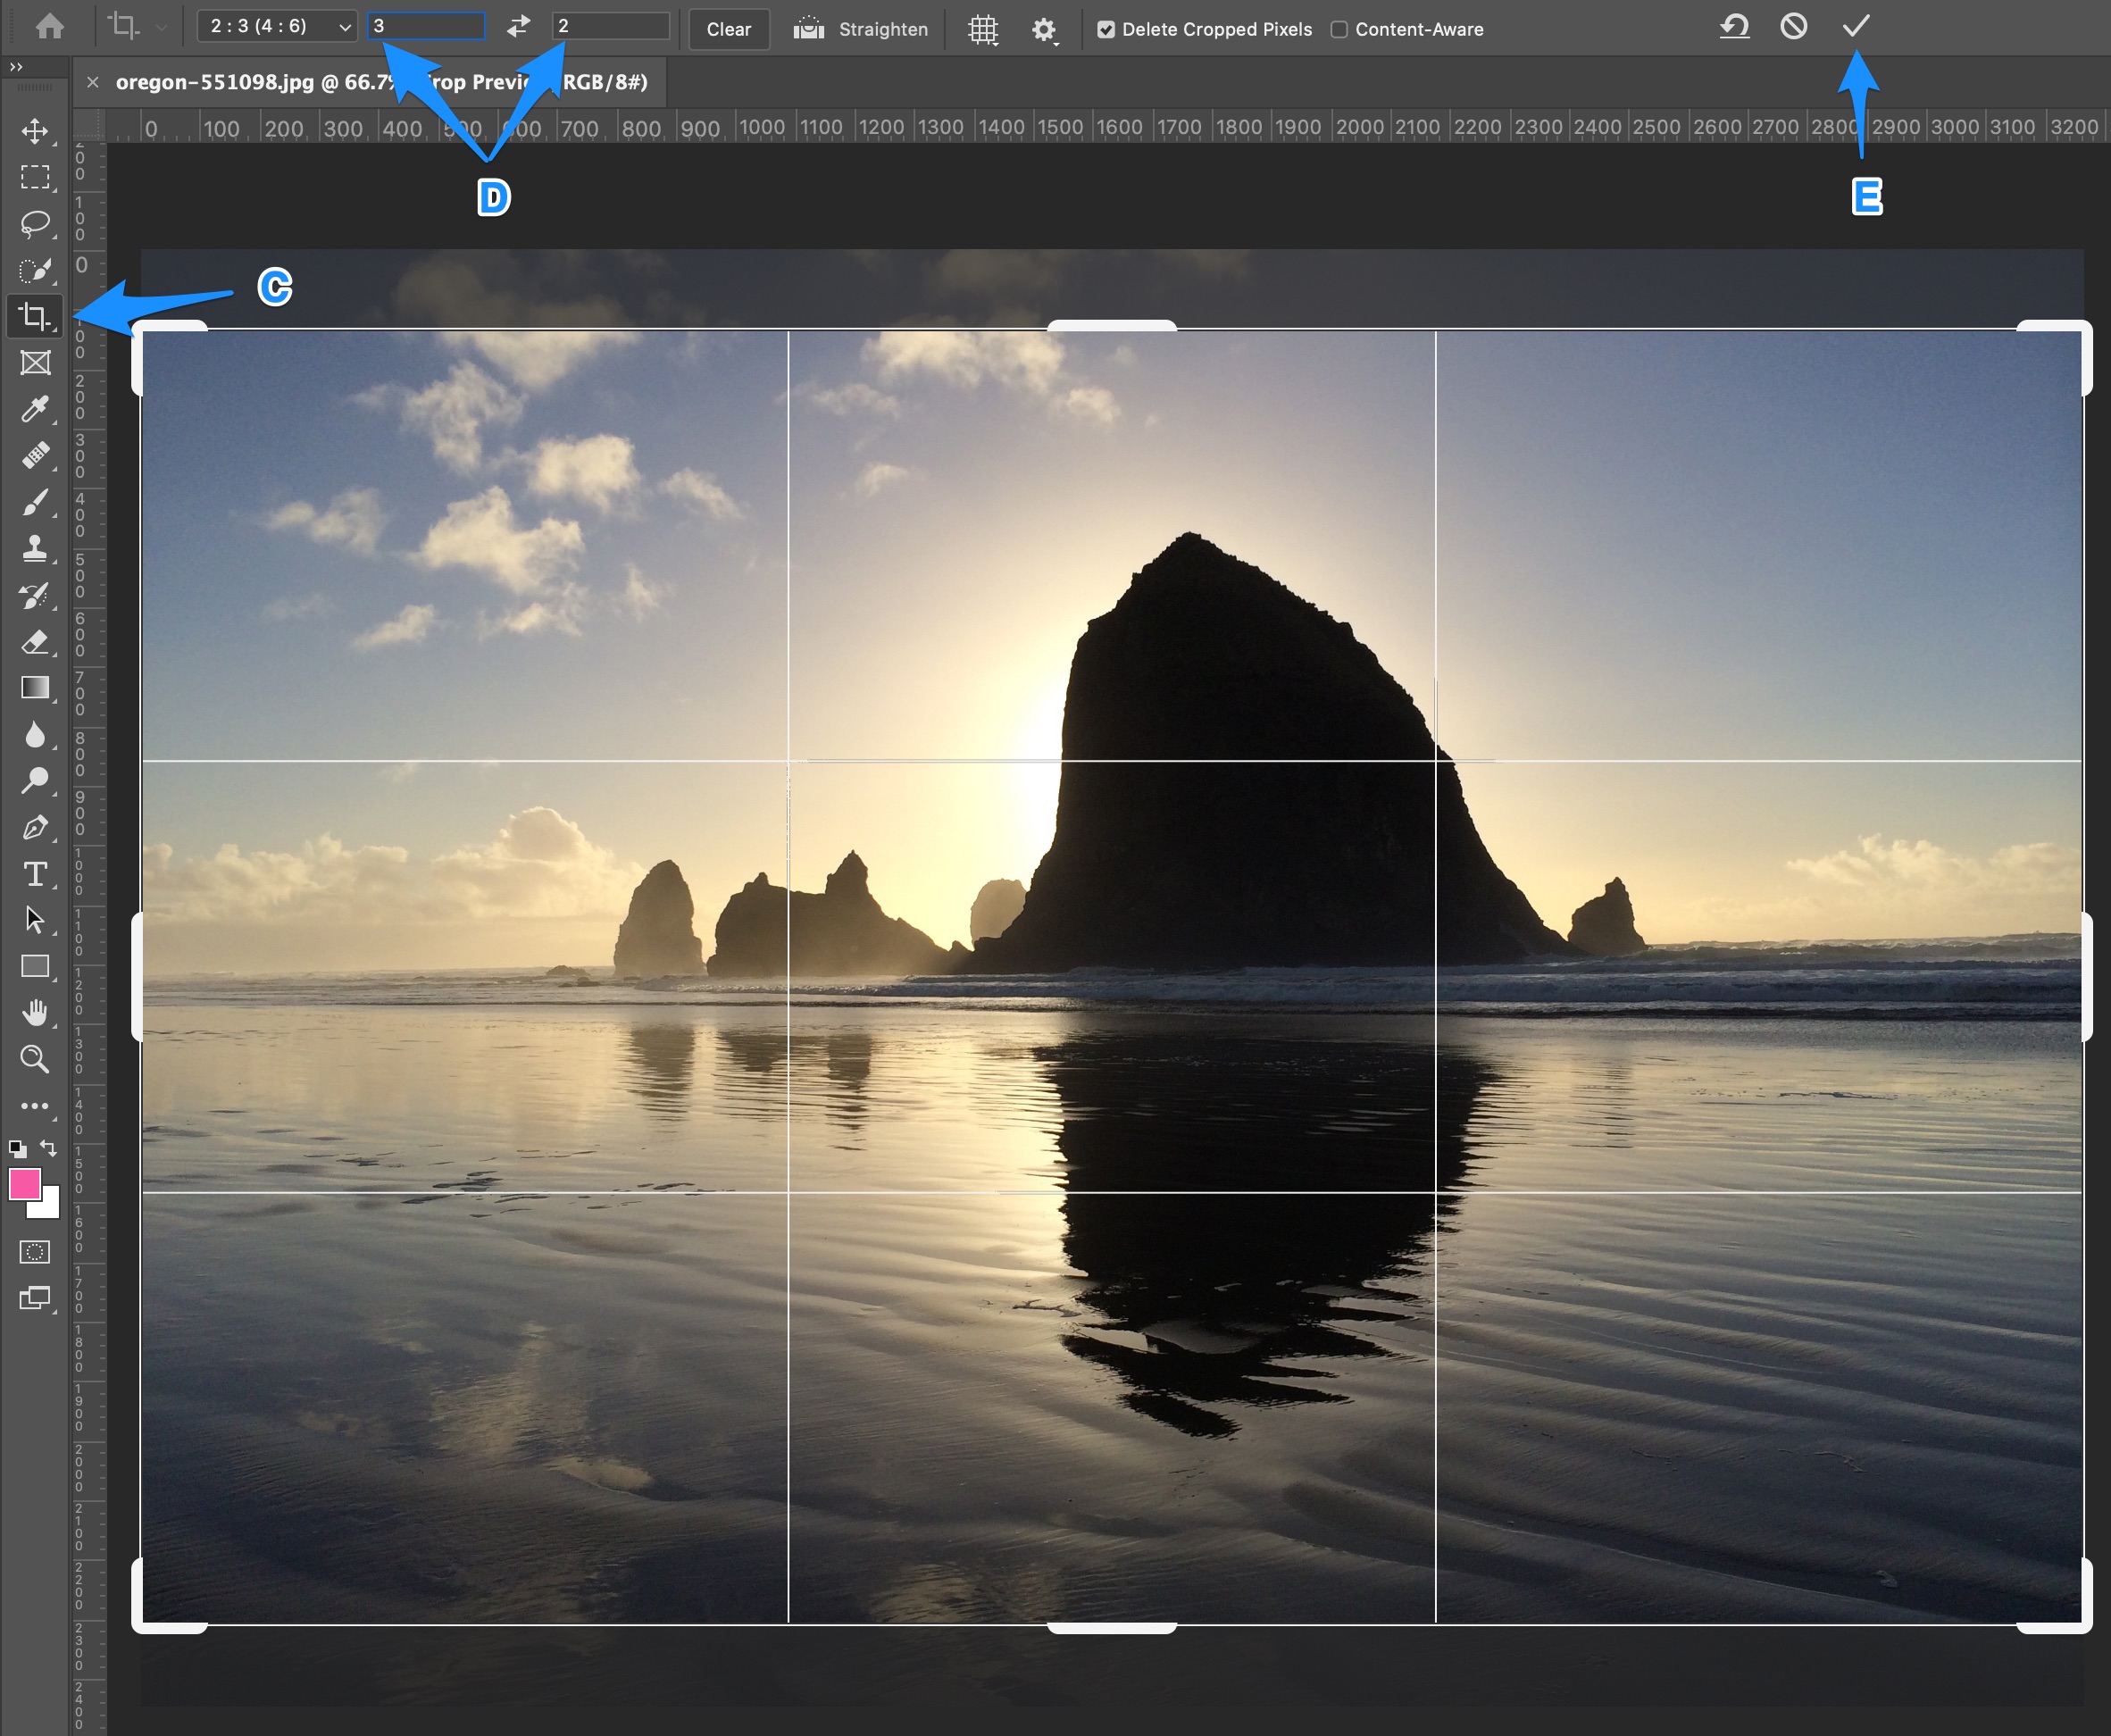
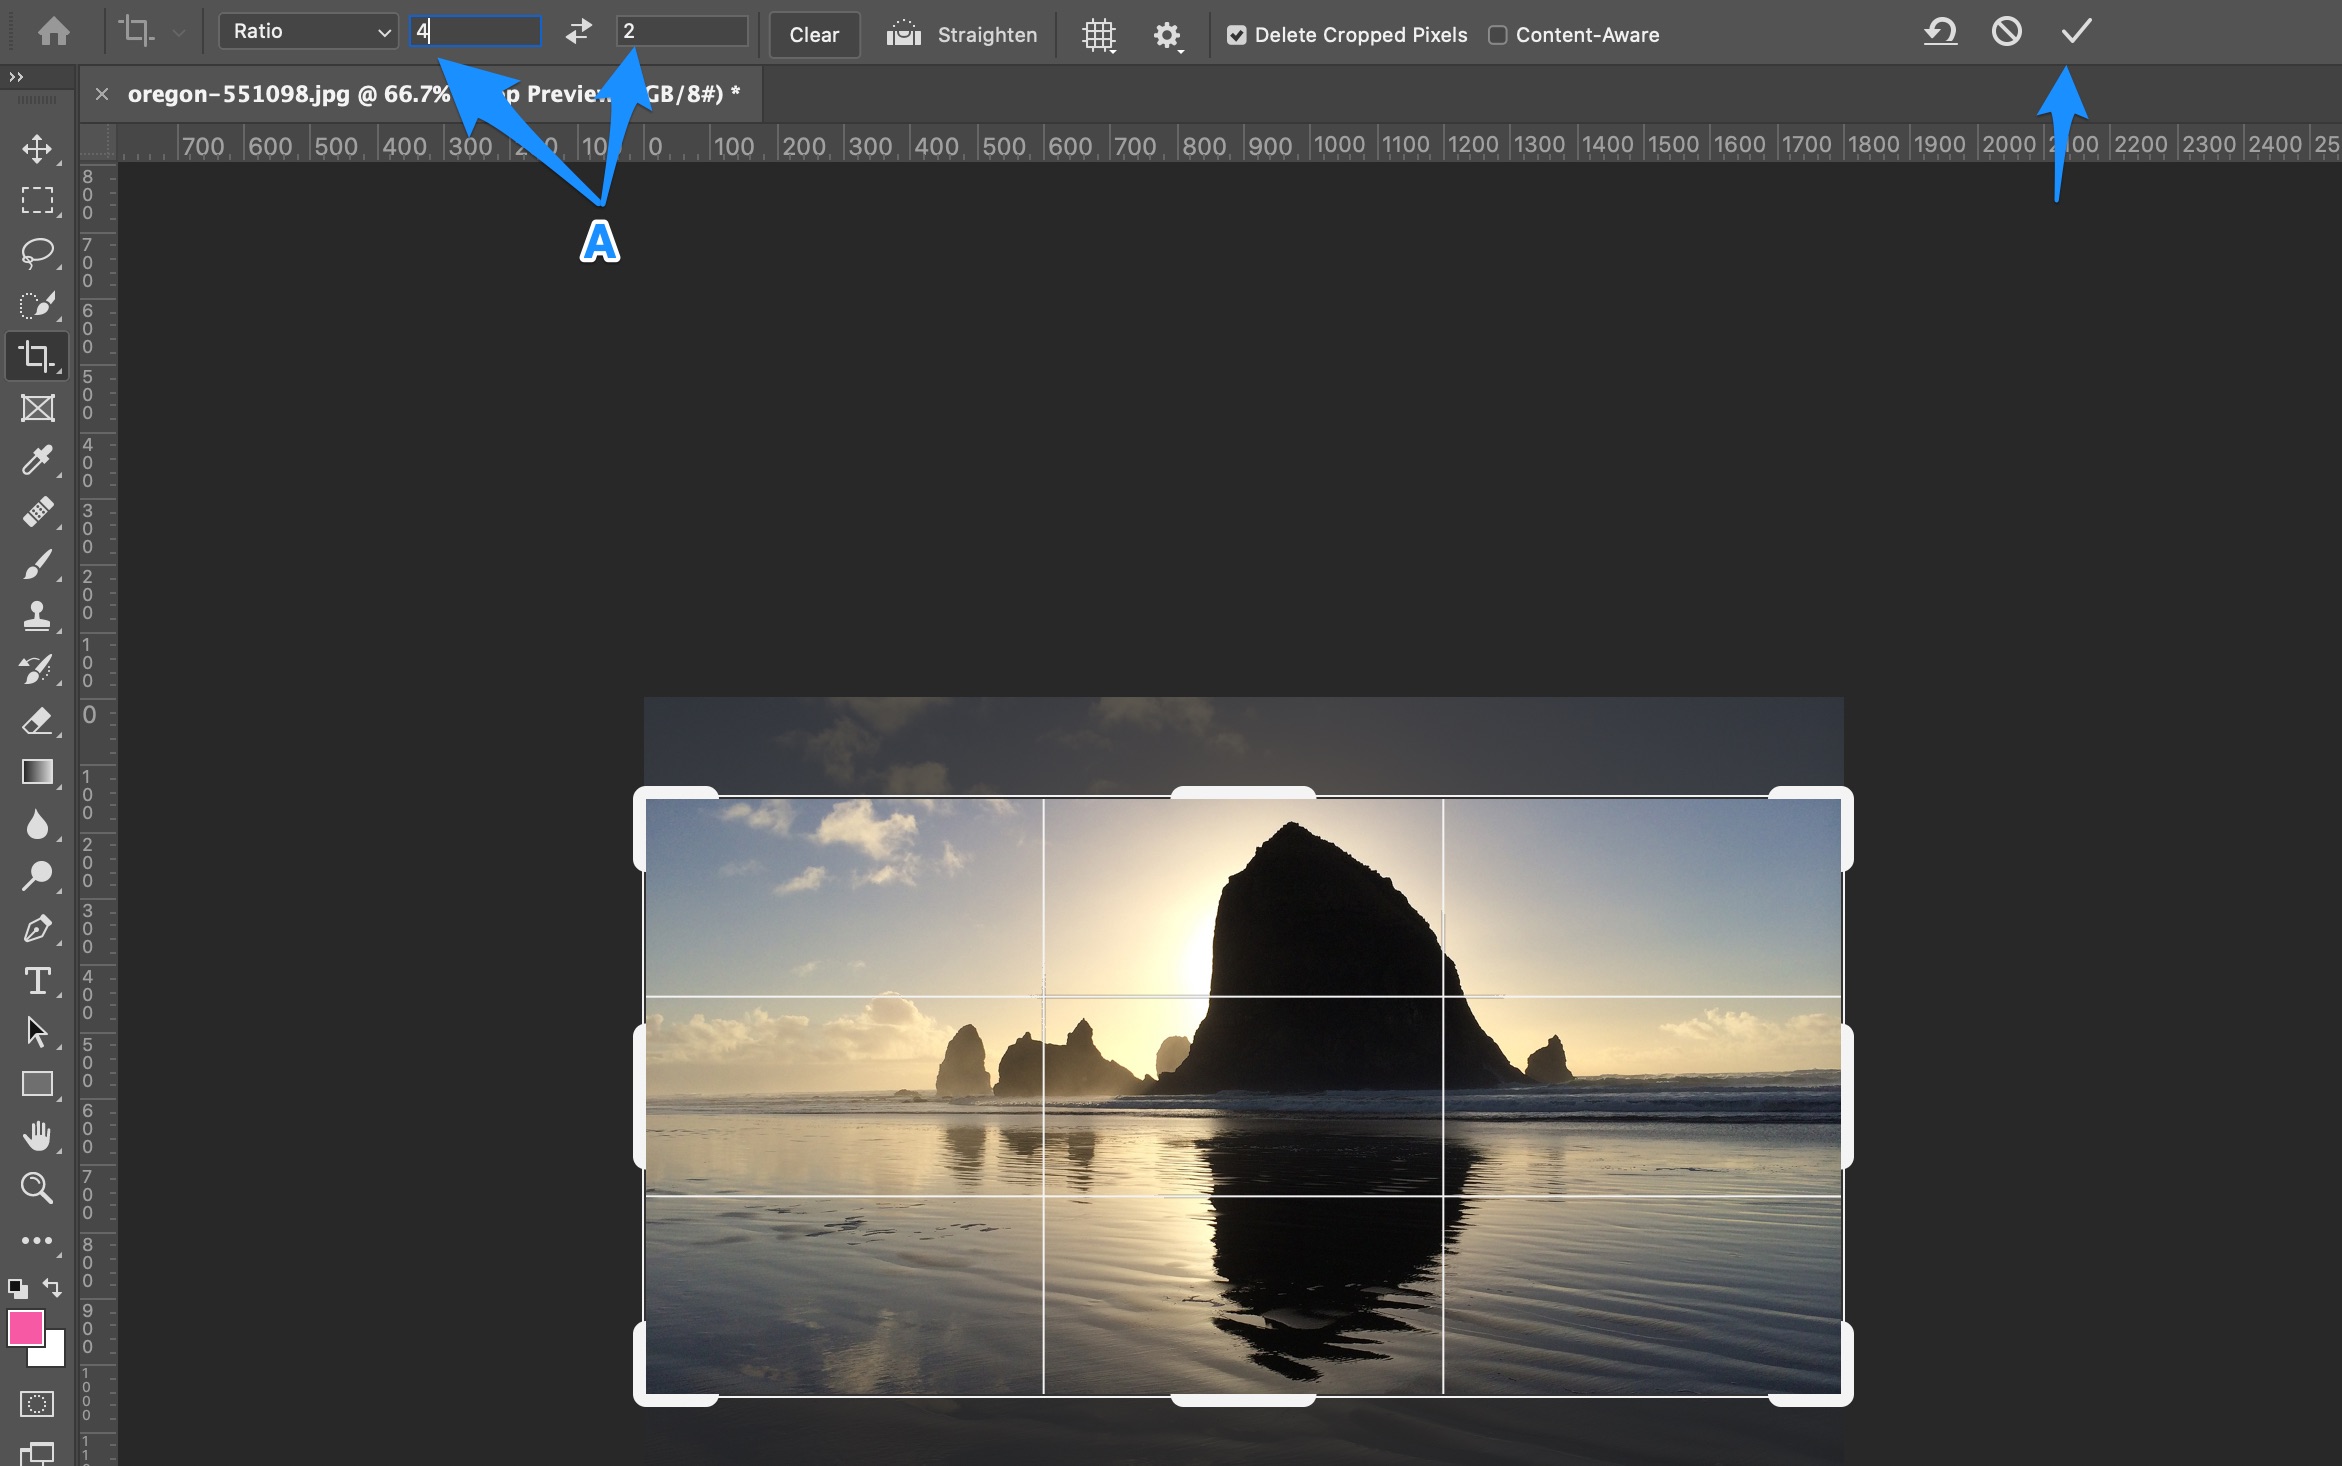
C) Click the Crop button.
D) Enter 3 x 2.
E) Select the best part of the image and click the checkmark.
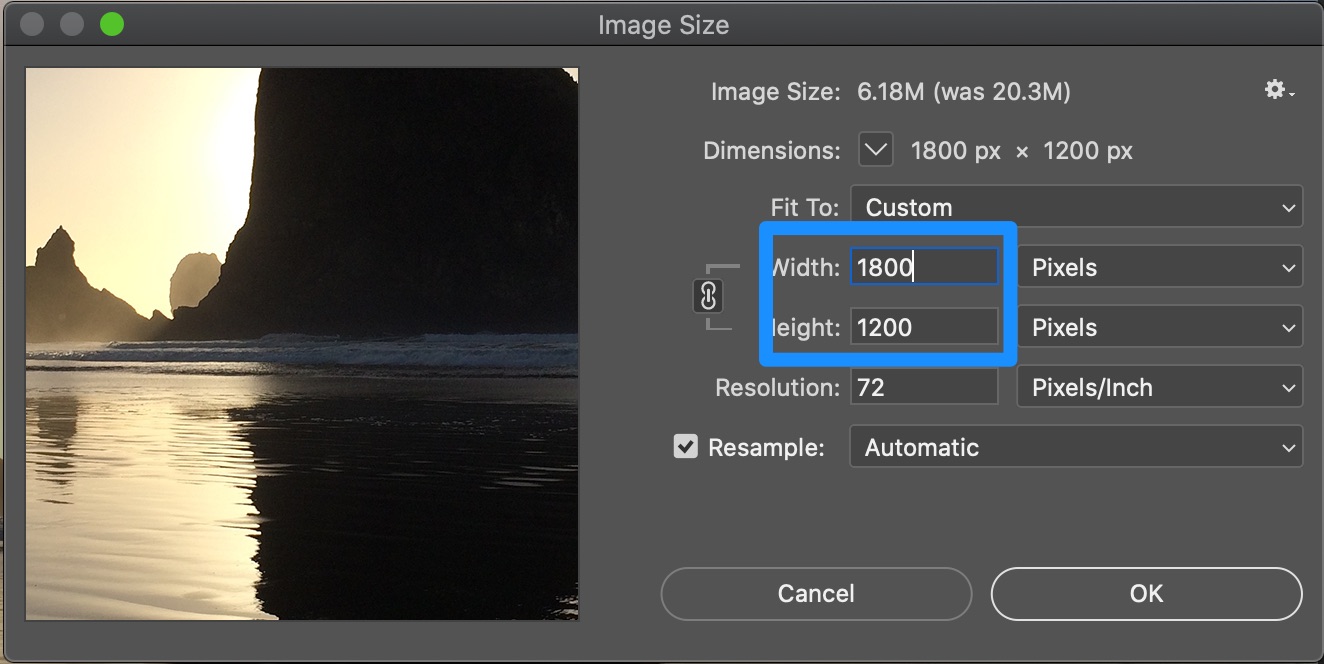
F) Go to Image > Image Size… in the menu and change the Width to 1800. The height should auto-change to 1200 (if it does not, do it manually), and click OK.
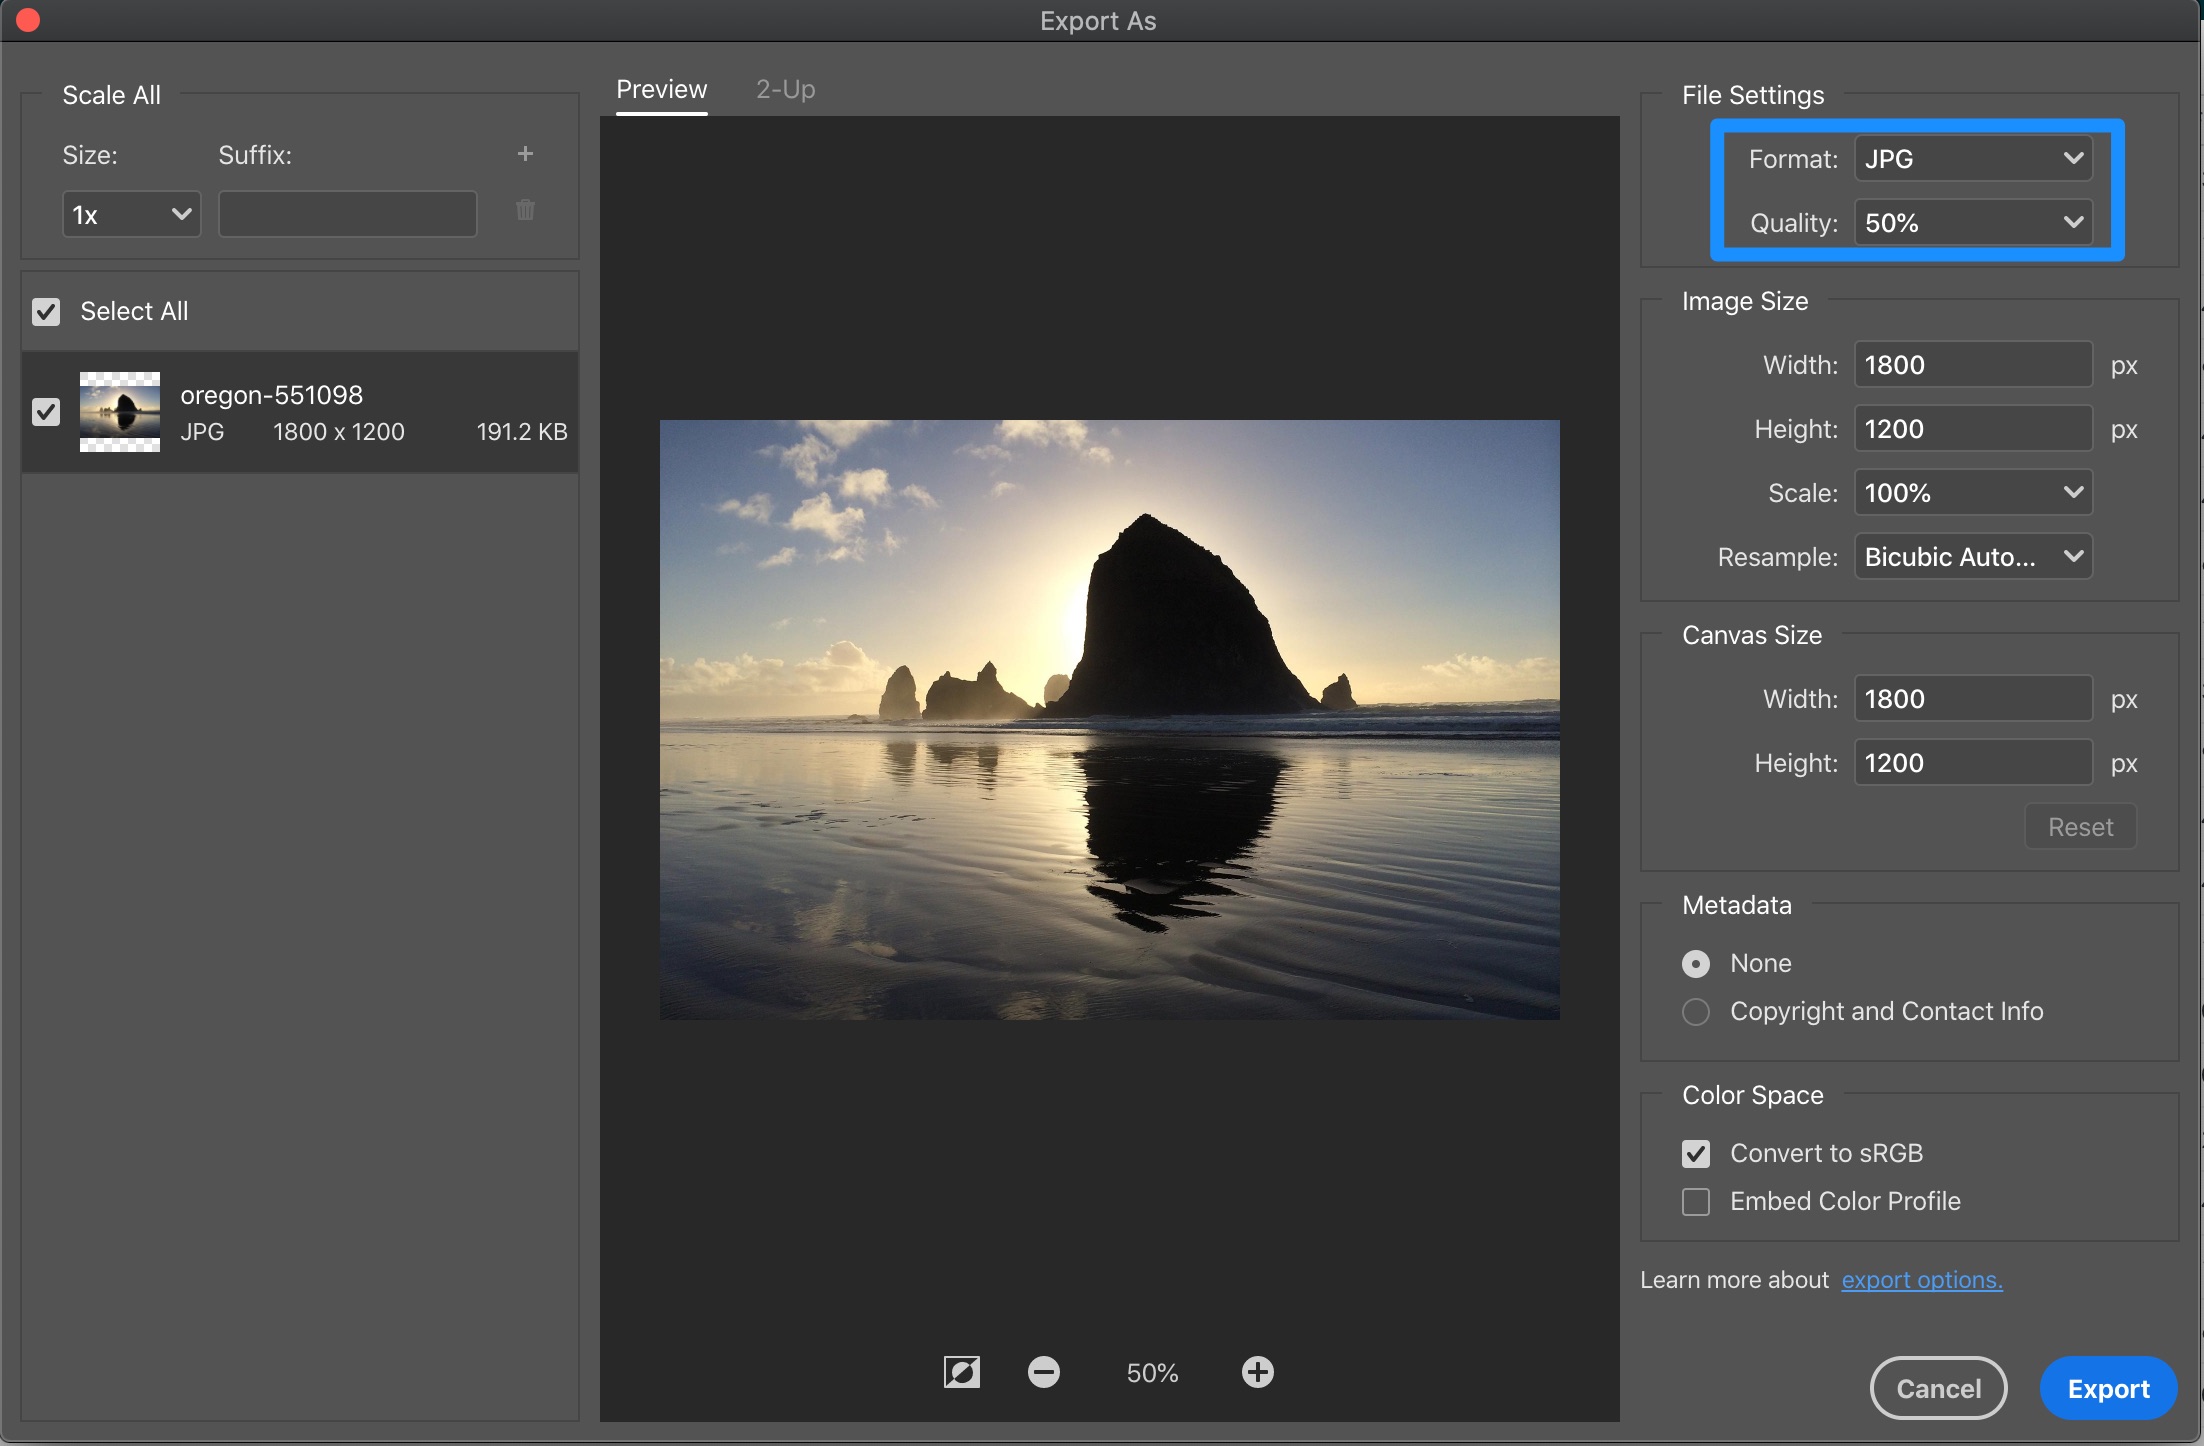
G) Go to File > Export > Export As… in the menu.
H) Make sure the format is JPG, change the quality to “Good” and click “Export”.
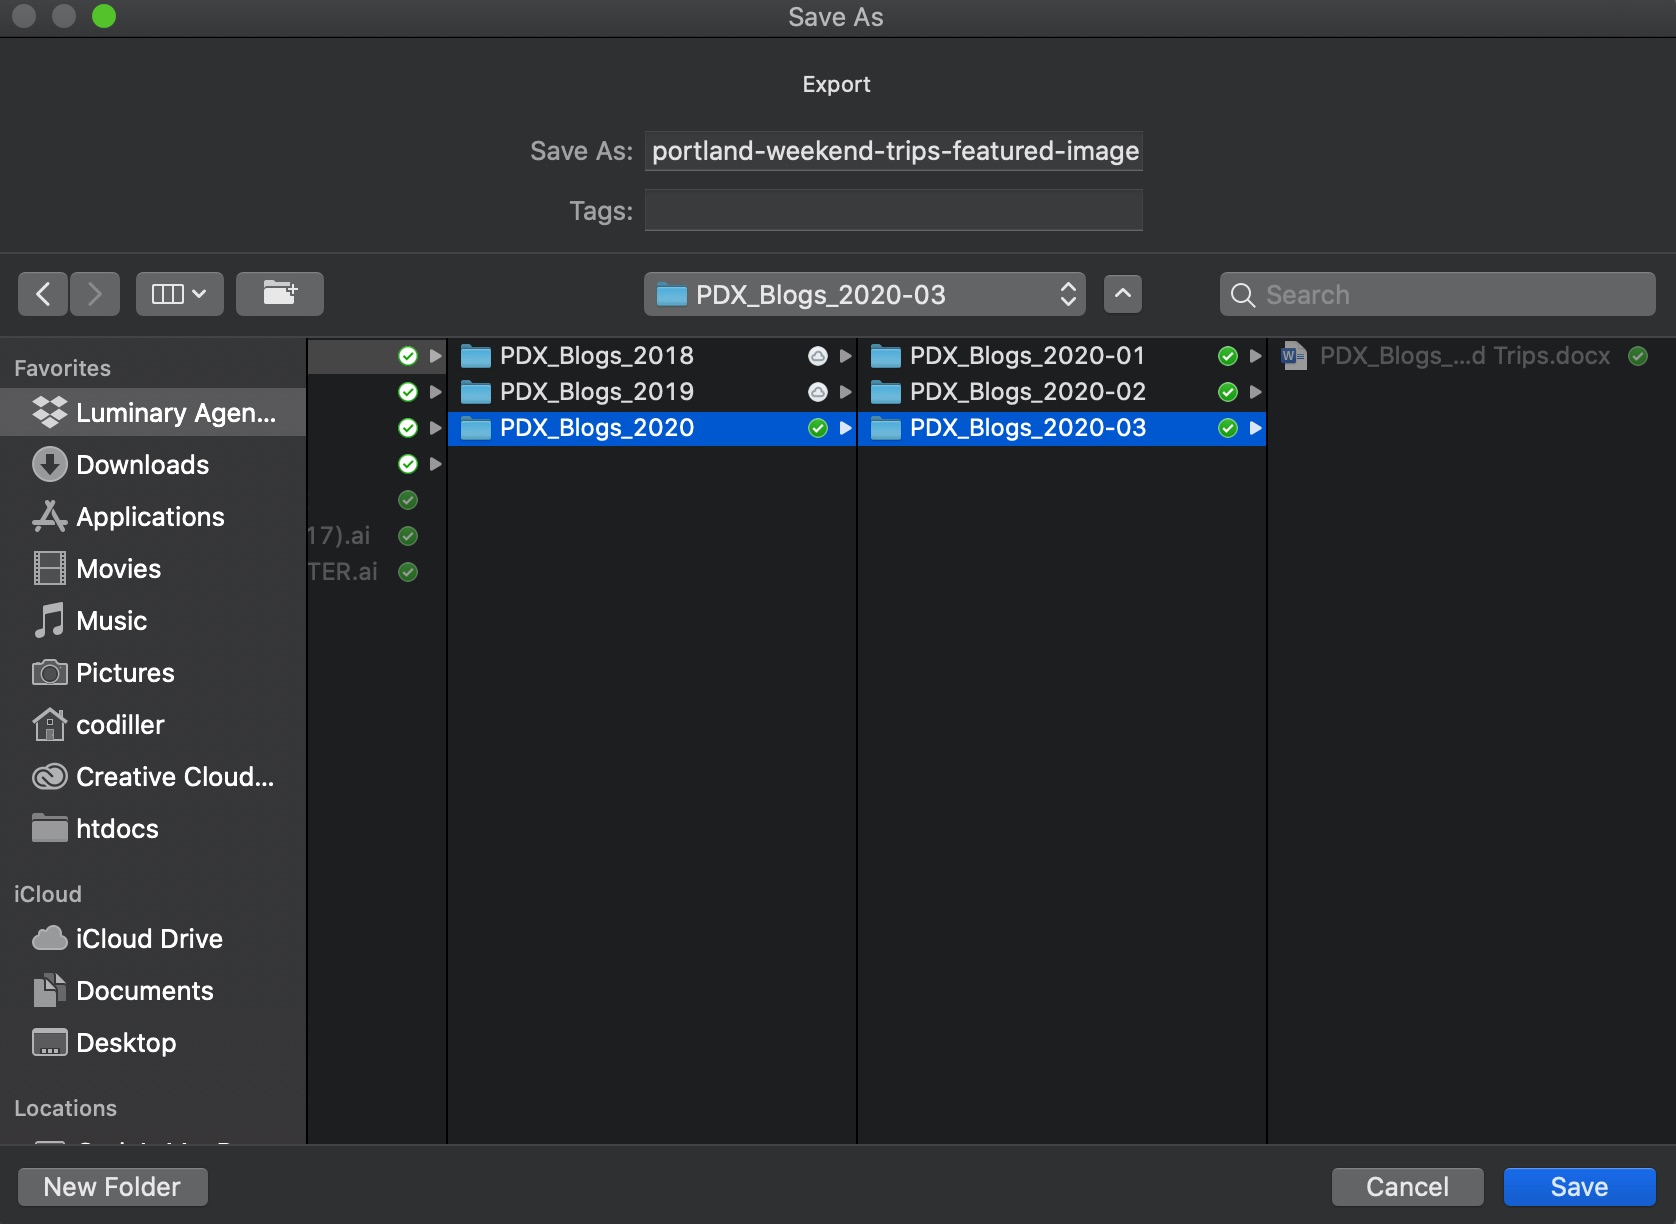
I) Navigate to the current blog’s folder and name the file using the Keyword from the doc in all lowercase with hyphens for spaces and NO PUNCTUATION, adding ‘-featured-image” at the end, and click Save.
For example: if the keyword is “Portland Weekend Trips”, the filename would be portland-weekend-trips-featured-image.jpg
Create the Email Image
A) Back in Photoshop (or your photo editor of choice), change the crop dimensions to 4 x 2, and click the checkmark.
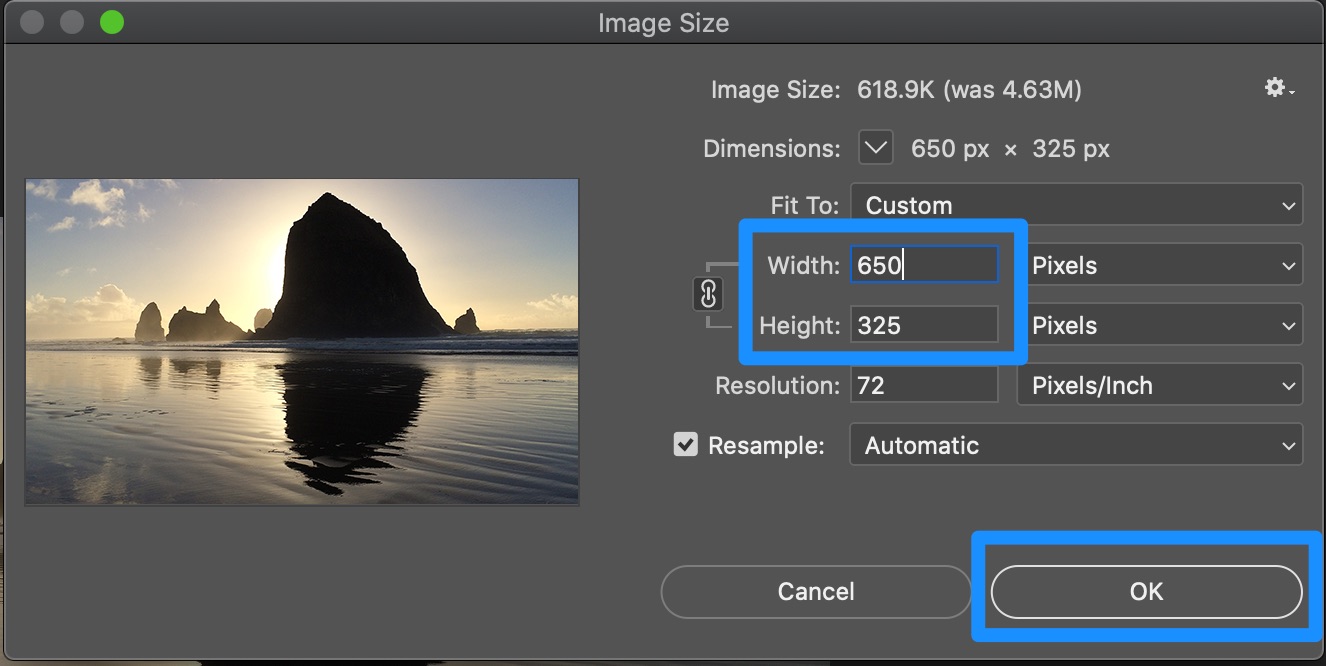
B) Go to Image > Image Size… in the menu and change the width to 650. (The height should auto-change to 325.) Click “OK”.
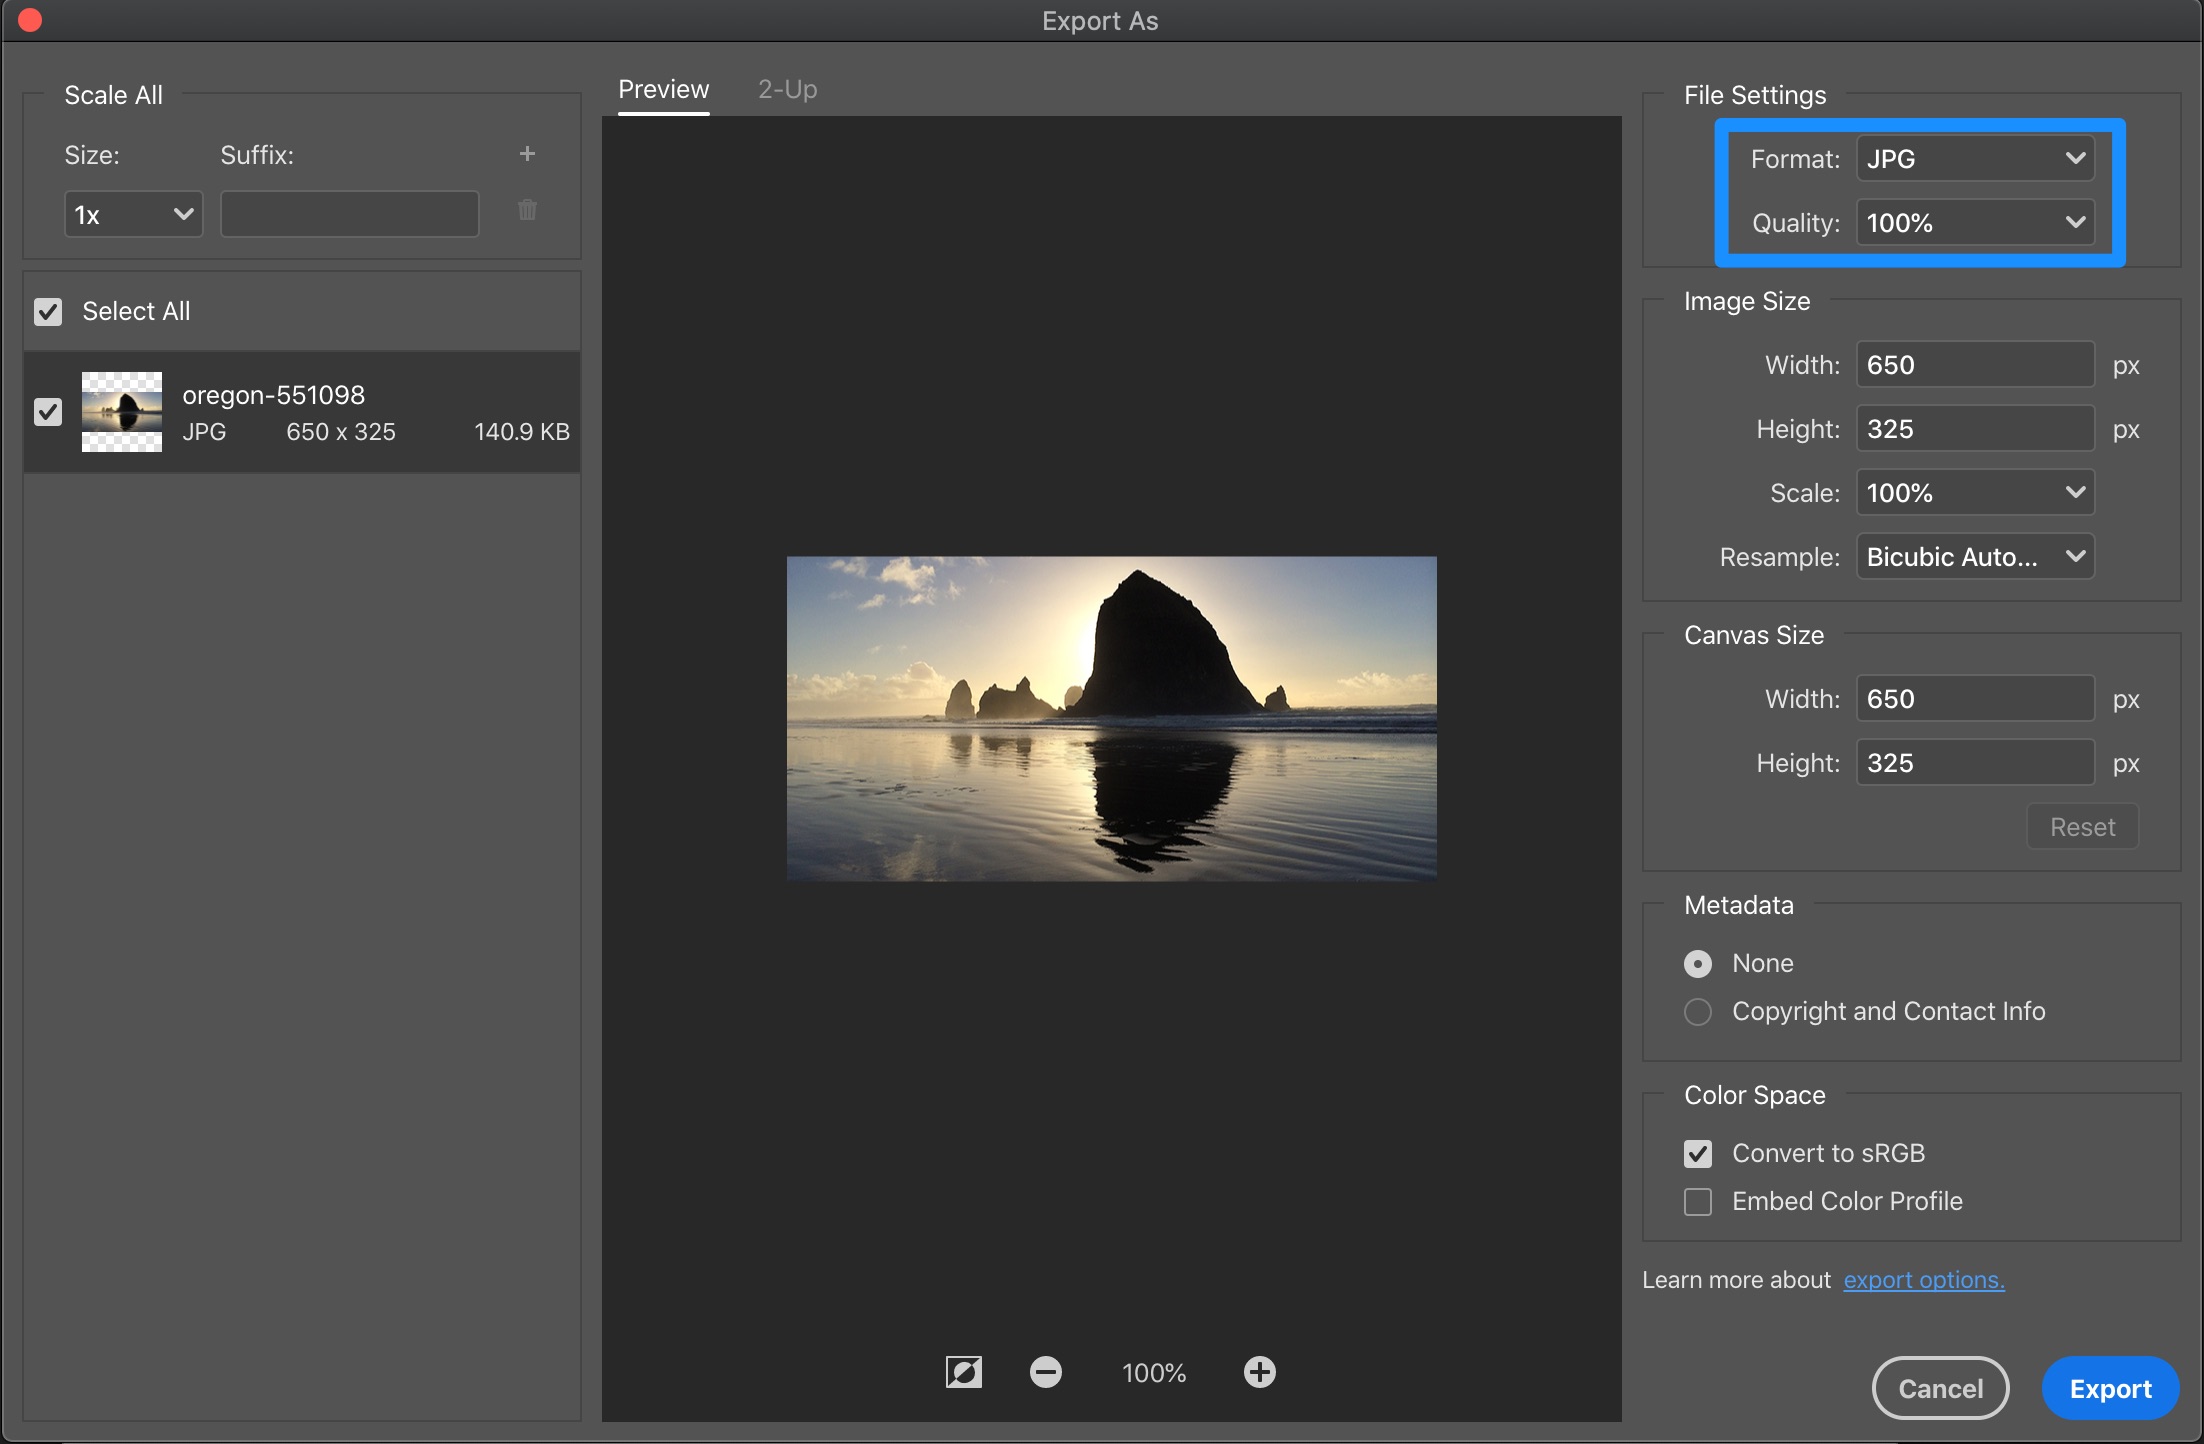
C) Go to File > Export > Export As… in the menu.
D) Make sure the format is JPG, change the quality to 100% and click “Export”.
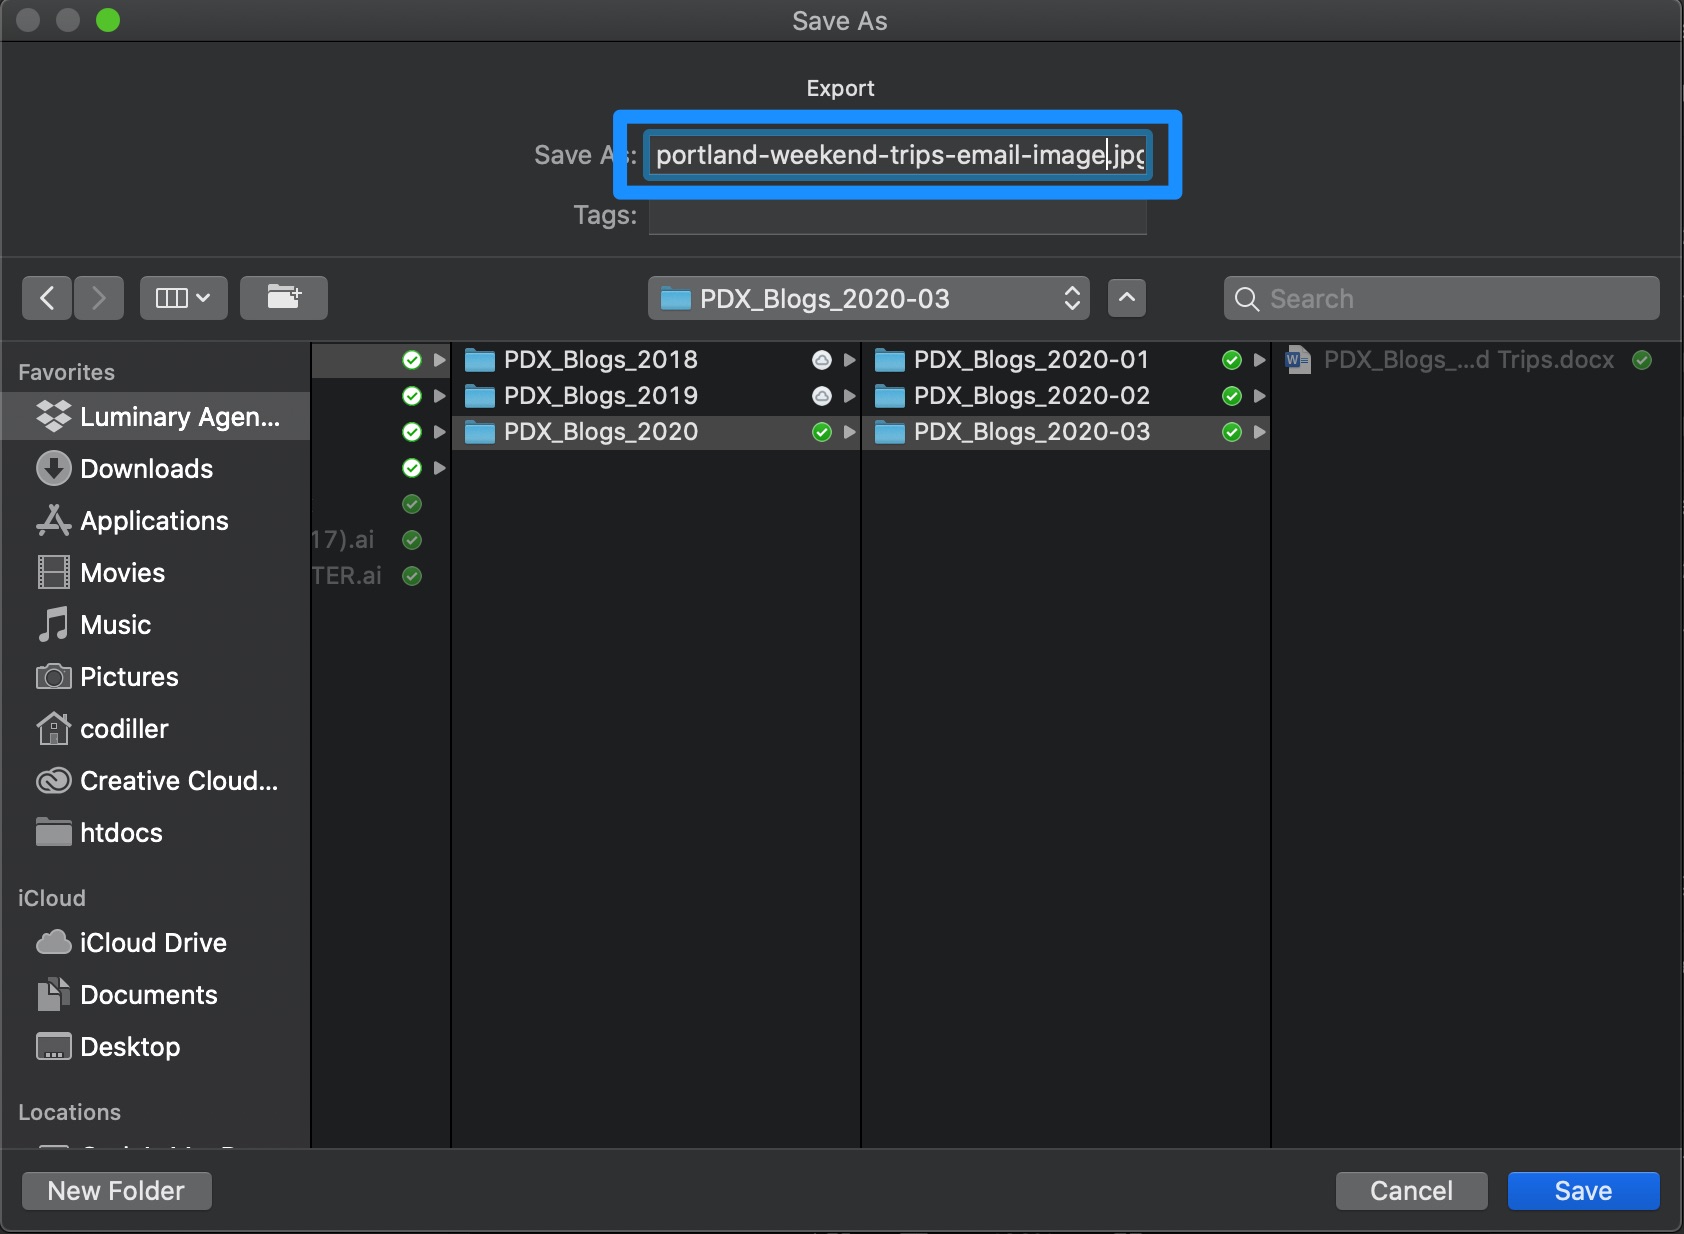
E) Navigate to the current blog’s folder and name the file using the Keyword from the doc in all lowercase with hyphens for spaces and NO PUNCTUATION, adding ‘-email-image” at the end, and click Save.
For example: if the keyword is “Portland Weekend Trips”, the filename would be portland-weekend-trips-email-image.jpg
Upload the Email Image
A) Follow the same procedures you use to upload branded graphics, just replace “social” with “email”.
NOTE: In step 4 substep A, you will right-click on the FILE you uploaded and NOT on the folder. When you copy the file path in substep C, it should be the complete image URL and should end in .jpg. Then, paste it into the doc for this blog post.
Upload Branded Social Media Graphics
Back to TopCreate and Post the Blog
A) Use the video procedure at this link to create and post the blog using the WMCC plugin
B) BEFORE YOU PUBLISH, make sure you correctly attribute any in-copy images using the procedure at this link
Back to TopUpdate Airtable
A) In Airtable, find the topic record for the blog post
B) Update the following fields:
- Article Title – make sure it’s the blog’s actual title
- Post/Mail Date – make sure this reflects the blog’s actual post date
- Stage – Change the stage to “Used”
- Blog Category – make sure this reflects the blog’s actual category/categories
- Live Link – add the link to the blog from the market’s demo site