[CONDITIONAL] Create Personal Logo
If the client does NOT have a personal logo, follow these steps to create one for them:
A) Open the Illustrator template file located here
B) Replace the text with the client’s Account Name and initials from Airtable
C) With the text selected, go to Type > Create Outlines
D) Change the color to match the client’s Company Print Color 01
E) With the outlined text selected, navigate to the market’s CC Library and click Add > Graphic
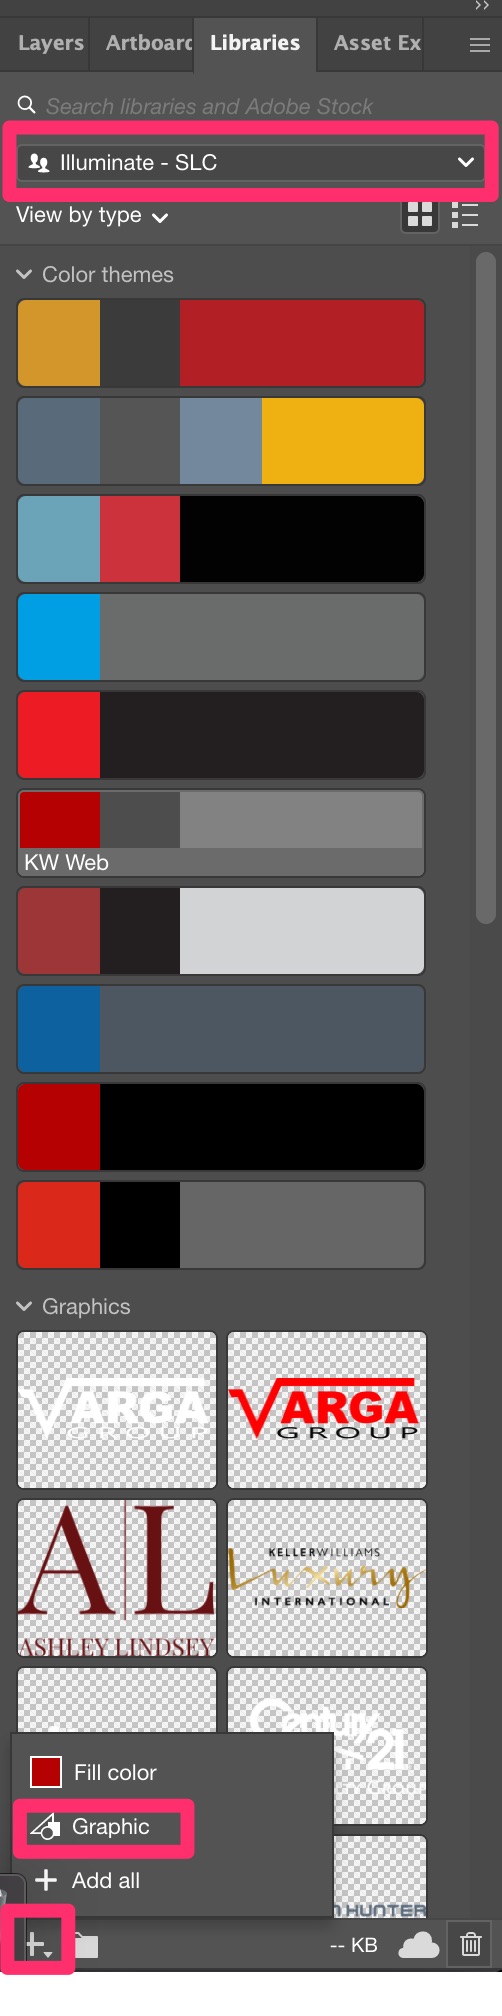
F) Change the color of the text to white and repeat step E
G) Right-click on the newly-imported graphic, click Add to Group, and click the appropriate group
H) Double-click on the graphics’ names and rename them to match the Account Name in Airtable (adding “White” to the white versions)
I) Rearrange the graphics in alphabetical order
Back to TopAdd Company and Personal Logos to CC Library
For any company or personal logos provided by the customer and not yet in the CC Library, please add a colored and white version of each.
Company logos will be in one of two places:
- If this is a new company we’ve never worked with before, the logos should be in the client’s Public Folder.
- If this is a company we’ve worked with before, the logos should be in the Assets > Brands folder on Google Drive.
A) Open the logo in Adobe Illustrator (or Photoshop)
B) Navigate to the market’s CC Library
C) Select the entire logo and click Add > Add Graphic
D) Recolor the logo in all white and repeat step C
E) Right-click on the newly-imported graphic, go to Add to Group and click the appropriate group
F) Double-click on the graphics’ names and rename them to match the Company Brand or Personal Brand names in Airtable (adding “White” to the white versions)
G) Rearrange the graphics in alphabetical order
Back to TopCreate Color Palette and Add to CC Library
If the client has a personal brand, create a color palette for their personal brand. Also, create a color palette for their company brand if it is not already present in the CC library.
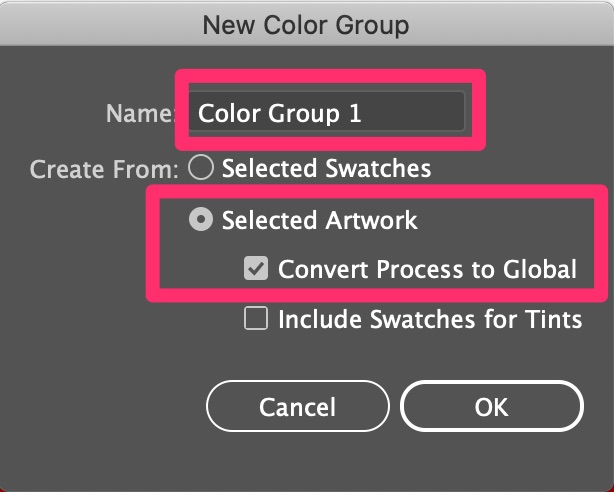
A) Find the colors used in the client’s personal logo (or company logo as stated above) and save the swatches to a group. To do this, follow these instructions:
- Select the entire logo
- In the Swatches panel, click “New Swatch Group”
- In the dialog box that appears, enter the {Company Brand} or {Personal Brand} and make sure the settings are as shown
B) Rearrange the colors to create the brand color order.
- Print 1 / Web 3 is the client’s main color. This is usually a bright, standout color like red, yellow, green, etc.
- Print 2 / Web 1 is the client’s secondary color and should always be the darkest color in their palette. Dark gray, dark blue, black, etc.
- Print 3 / Web 2 is the client’s tertiary color. This is often a muted color like a mid-grey or a color we only use as an accent.
If there are more than three colors remaining, add them to the end of the swatch group. If there are less than three colors, create a third color that’s complementary to the first two.
NOTE: Never use white as a brand color!
C) Rename the color swatches to correspond with the order above.
For example: Print 1, Web CTA; Print 2, Web 1; Print 3, Web 2;
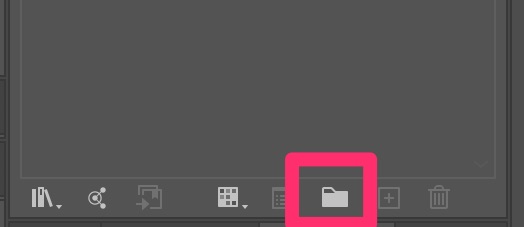
C) With the group selected, import that group into the market’s CC Library by clicking on this button in the swatches panel
![]()
D) Right-click on the newly-imported graphic, go to Add to Group, and click the appropriate group
E) Rearrange the graphics in alphabetical order
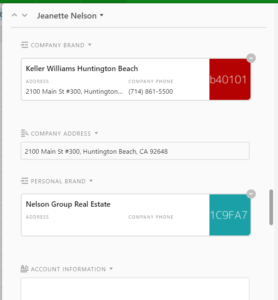
Back to TopCreate the Brand in Airtable and Add Color Boxes
If the client has a personal brand, create the brand in Airtable. Also, create the company company brand in Airtable if it is not already present.
A) Go to the Brands Airtable view by clicking this link
B) Scroll down to the end of the list. Click the little plus button on the left.
C) Insert the name of the brand.
D) Under “Category” choose between personal or company.
E) Got to https://dummyimage.com/.
F) Input the necessary details on the boxes.
- Size: 600×600
- Background Color: Hex code of the color you want to insert
- Text: Hex code of the color you want to insert.
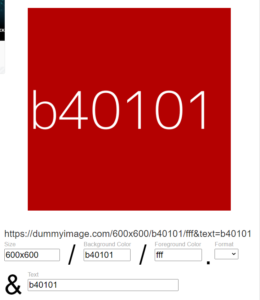
G) Right-click on the image then “Save”.
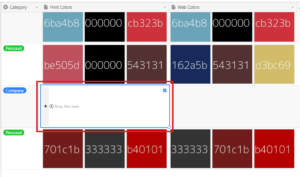
H) Go back to Airtable, then upload the images accordingly. The order should be Print 1, 2, 3 and Web 1, 2, CTA.
Link Client's Brands in Their Airtable Record
A) Go to the airtable view at this link
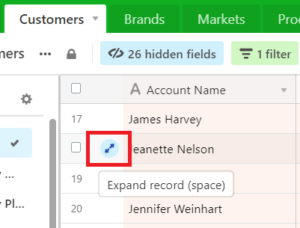
B) Under “Active Customers”, search for the client’s “Account Name”.
C) Beside the client’s record, click “Expand Record” or you can simply hit “space”.
D) A box will pop out and scroll down until you see “Company Brand”. Click “Link to a record from Brands” and search for the client’s Company Brand.
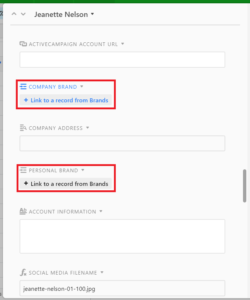
E) Do the same for the client’s “Personal Brand”.
The result should something like this.
Export Single Logo PNGs
For all company and personal logos (either created or provided), please do the following:
A) Once you’ve added the logo(s) to the CC Library, right click on the logo in the CC Library and click “Edit”
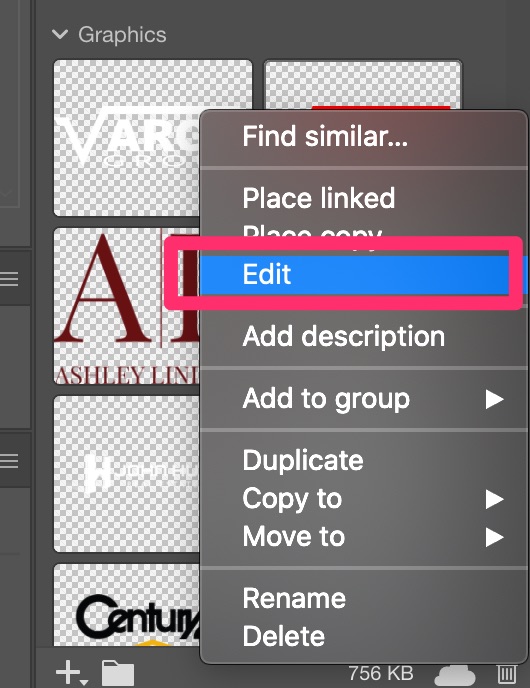
B) Go to File > Export > Save for Screens…
C) Click the folder icon next to “Export To” and choose the client’s “Brand” folder
D) Under Scale, choose “Width” and type 800px
E) Under Format, choose PNG
G) Click “Export Artboard”
H) When the folder opens, rename the file with the client’s Account Name from Airtable, whether it’s a personal or company logo, adding the suffix “-logo”, all lowercase with hyphens for spaces
For example, for Rich Varga’s company logo, the filename would be rich-varga-company-logo.png
When you’re finished, you should have four files created, a color and white version of the personal and company logos

Create Dual Logo
A) Open the dual logo template file located here
B) Replace the logos in the template with the client’s logos
- The client’s logo should be 150px high
- The company logo should be 75px high OR 300px wide (width beats height)
- The spacing between the logos and the middle line should be 32px
C) Resize the artboards to the edges of the logos
D) Export the artboards into the client’s Brand folder.
- Add the prefix that includes the client’s name with a hyphen between each word
- Add a hyphen at the end of the prefix as well
This will produce two exported files named “client-name-dual-logo.png” and “client-name-dual-logo-white.png”
Example: if the client’s name is Cody Martens, the prefix would be cody-martens-
E) Save the Illustrator file to the client’s Brand folder using the naming convention: [Client Initials]_Brand_Logo_Dual.ai
Back to TopExample: if the client’s name is Cody Martens, the .ai filename would be: CM_Brand_Logo_Dual.ai
Create 2x3 Photo
A) Open the photo in your photo editing software of choice
B) Crop the photo to be a 2×3 ratio making sure the client’s face stays within the middle third
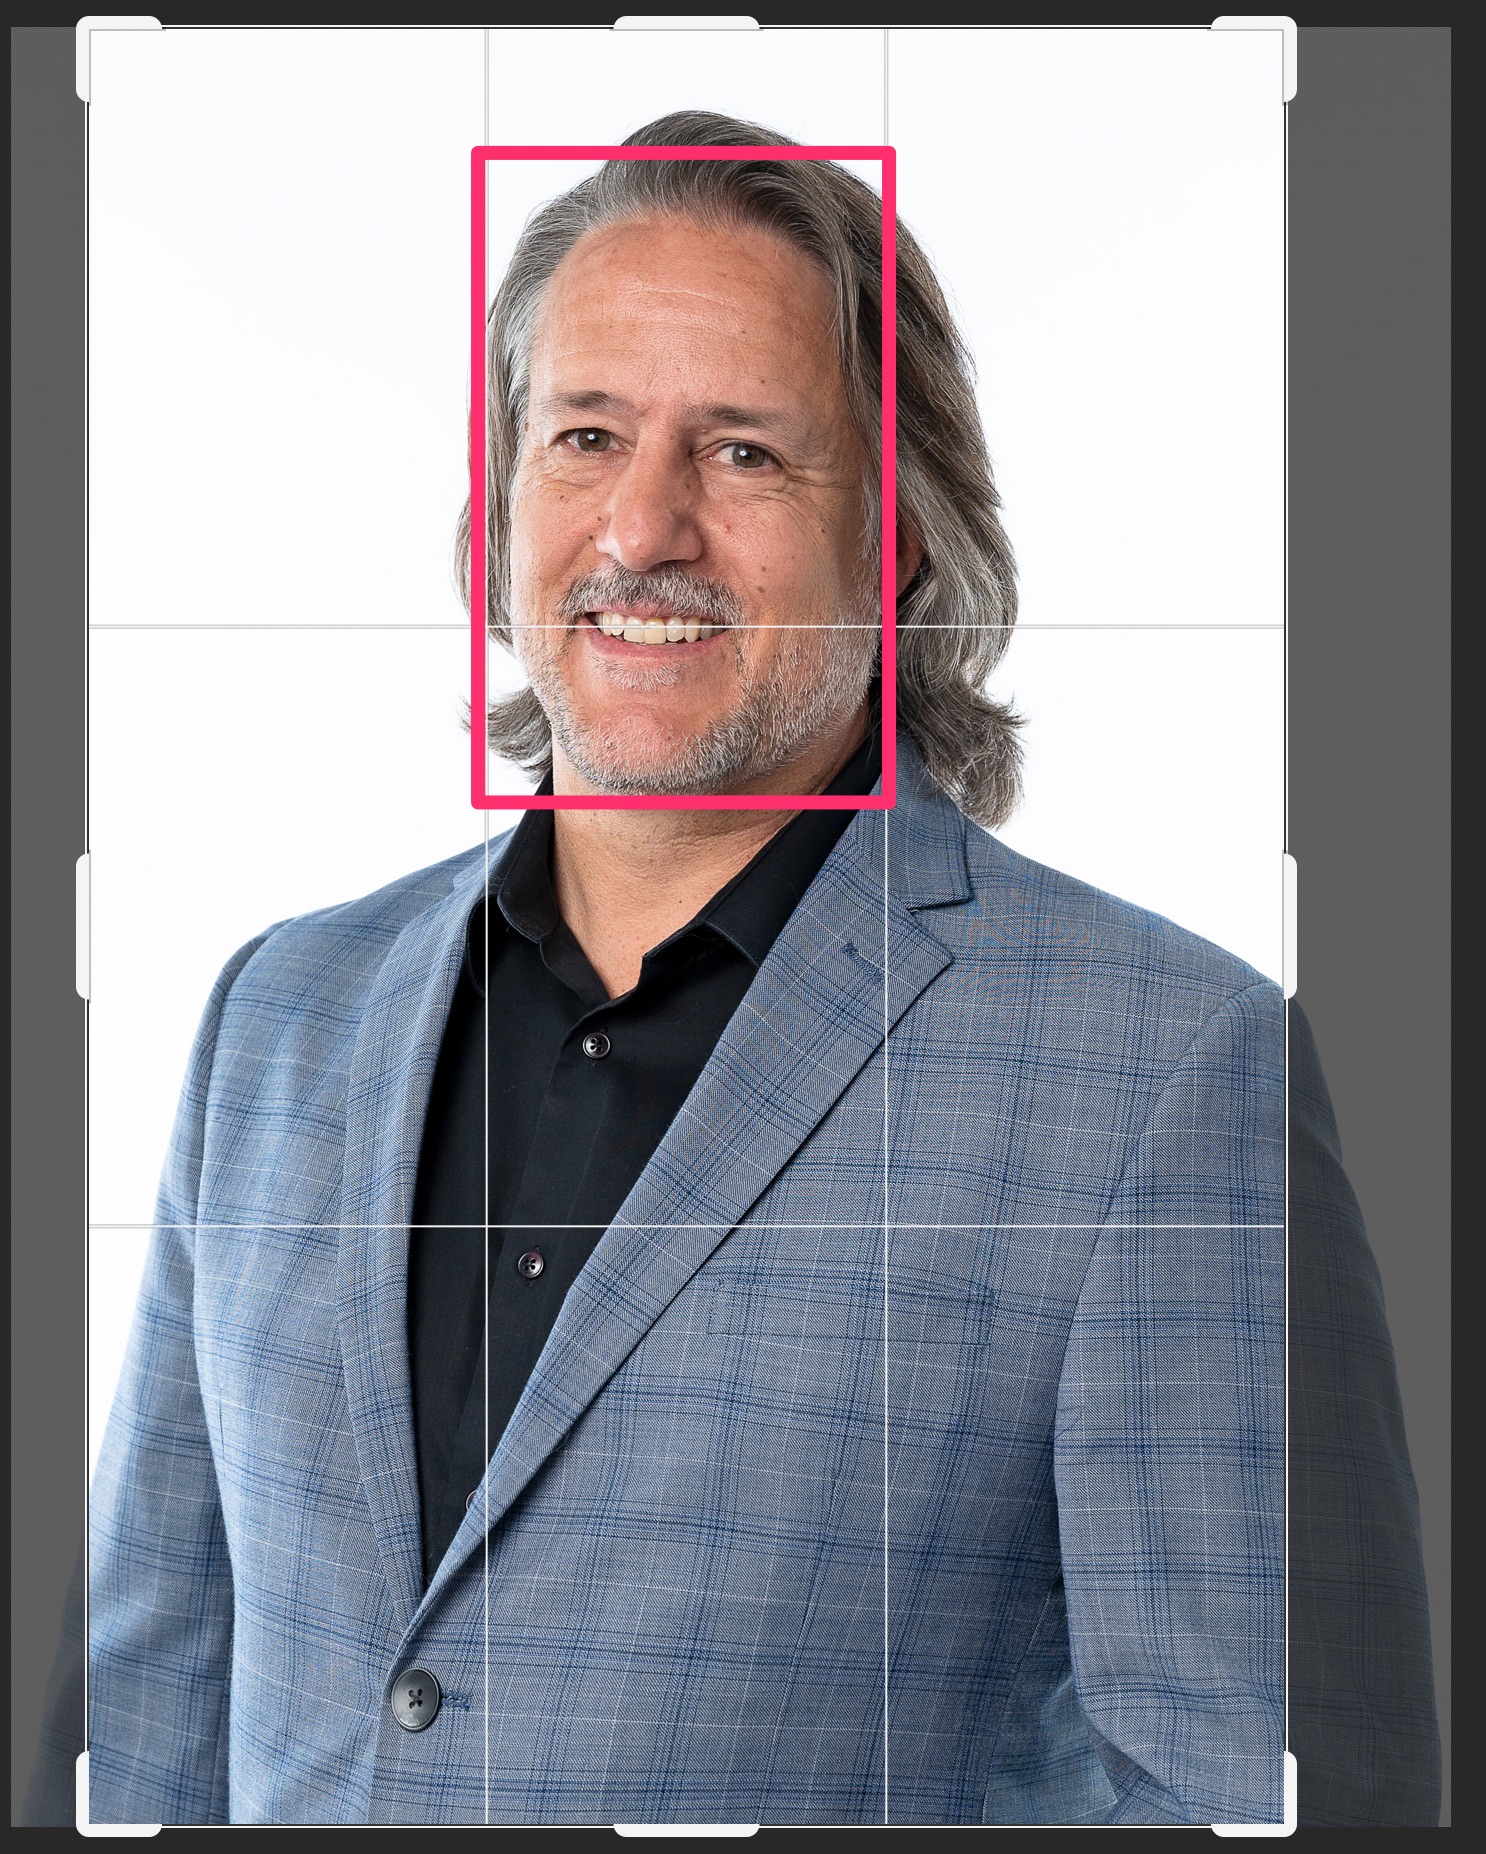
C) Change the image size to be 800px by 1200px

D) Save the file as a jpeg at 100% using the client’s contact name (find this in Airtable) with the suffix “-photo-2×3”. Save it in the client’s “Agent Photos” folder.
Back to TopFor example, “rich-varga-utah-realtor-photo-2×3.jpg”
Create 1x1 Photo
A) Open the photo in your photo editing software of choice
B) Crop the photo to be a 1×1 ratio (square) making sure the eyes are centered on the top third line
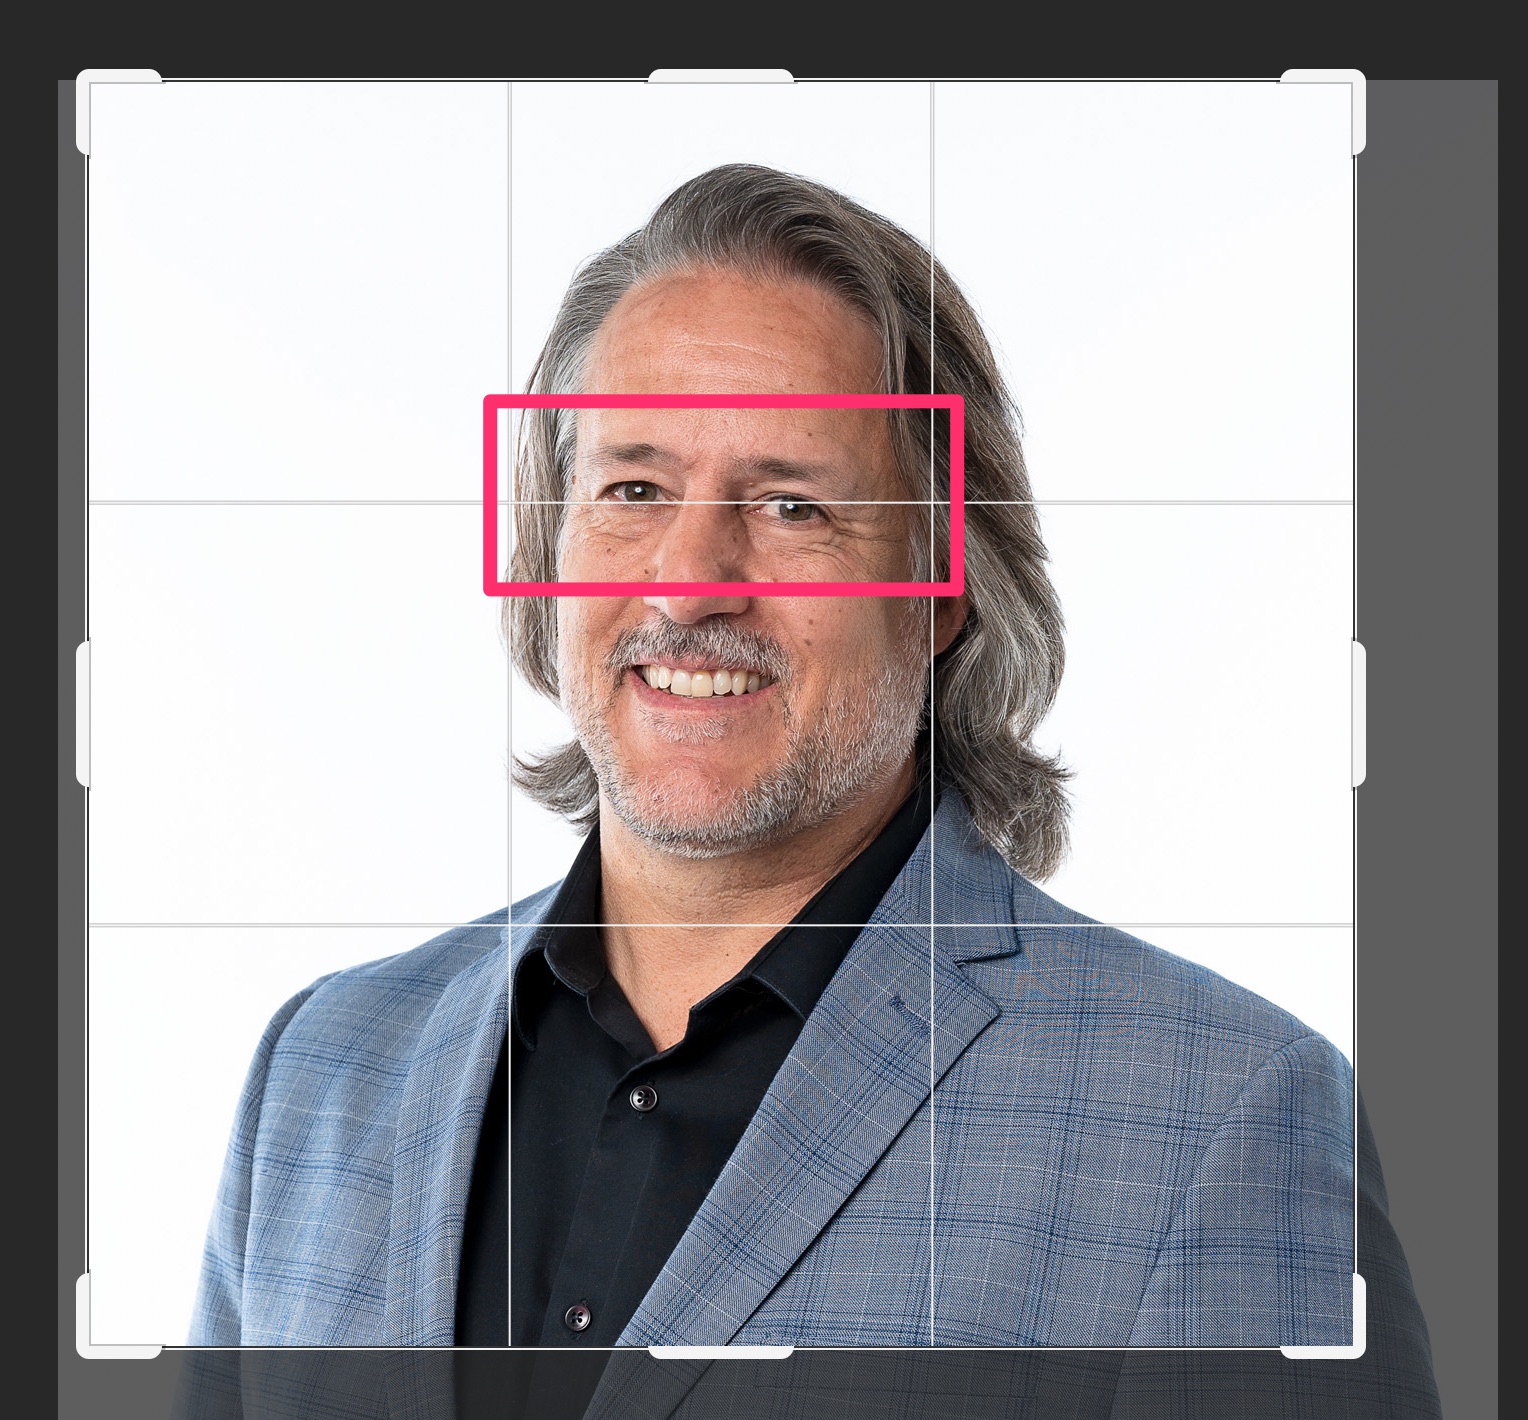
C) Change the image size to be 800px by 800px
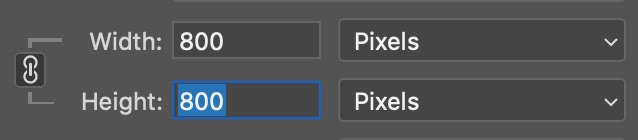
D) Save the file as a jpeg at 100% using the client’s contact name (find this in Airtable) with the suffix “-photo-square”. Save it in the client’s “Agent Photos” folder.
Back to TopFor example, “rich-varga-photo-square.jpg”
Choose and Format Default Image
Each website has a default image that is used for every page. The photo should easily identify the customer as a real estate professional and/or should have some kind of local element to it. Some options are (IN ORDER OF PREFERENCE):
- A cityscape of the customer’s area
- A well-known landmark from the customer’s area
- A gorgeous landscape from the customer’s area
- A generic home or real estate related photo
To find this image, look in the following places:
- Past default images are at this Google Drive link
- Other previously downloaded images are in the _Photos folder of the Assets directory located at this Google Drive link. Check out the Places folder or the Houses folder
- Free sites like pixabay.com or pexels.com
Once you’ve found the image you want to use, follow these steps:
A) If you downloaded the image from the Internet, save the original image into the _Photos folder of the Assets directory. Please choose the most appropriate sub-folder possible so we can keep our images organized
B) Crop and re-size the original image using Photoshop or your photo editor of choice so that the image is 1800 pixels wide and 1200 pixels tall (a 3×2 ratio).
NOTE: Make sure the image size is under 500k. You may need to reduce the quality percentage of the JPEG to achieve this.
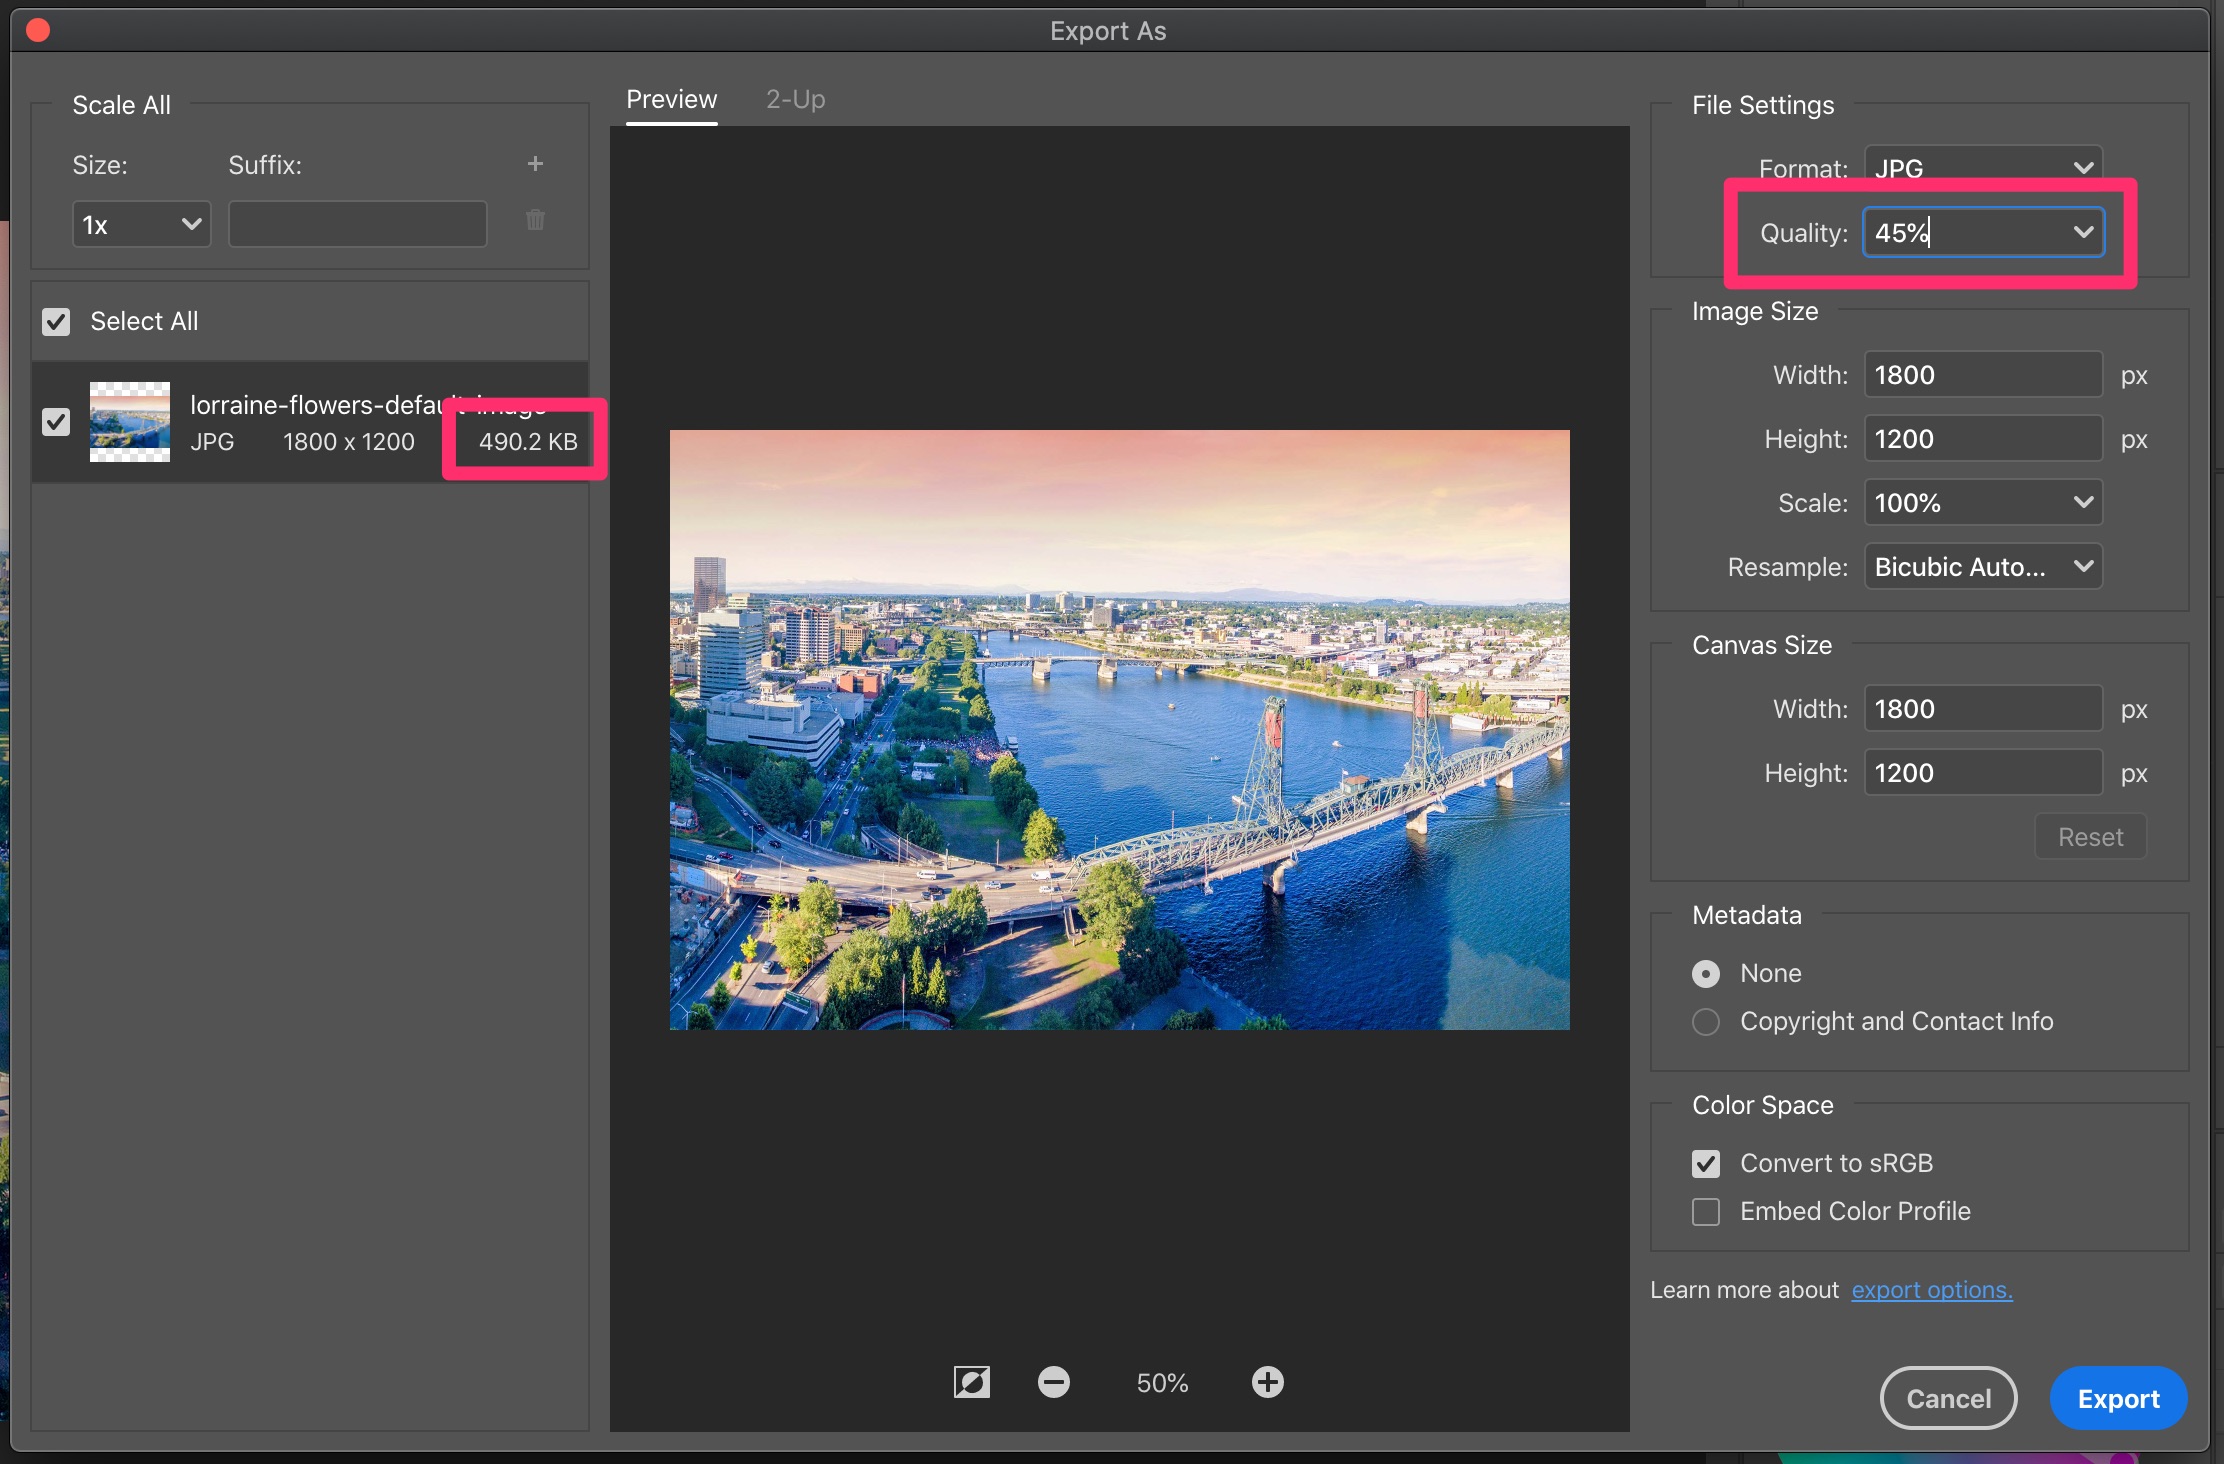
C) Save the cropped image into the customer’s “Websites” folder, naming the file with the customer’s Account Name from Airtable and adding the suffix “-default-image”, all lowercase with hyphens for spaces
Back to TopFor example: cody-martens-default-image.jpg
Create Circle Photo for Email
A) Open up the Email Circle Photo template located here
B) Click on the Direct Select tool and select the current image in the file (see gif below)
C) Click on the filename in the top menu bar and click “Relink” (see gif below)
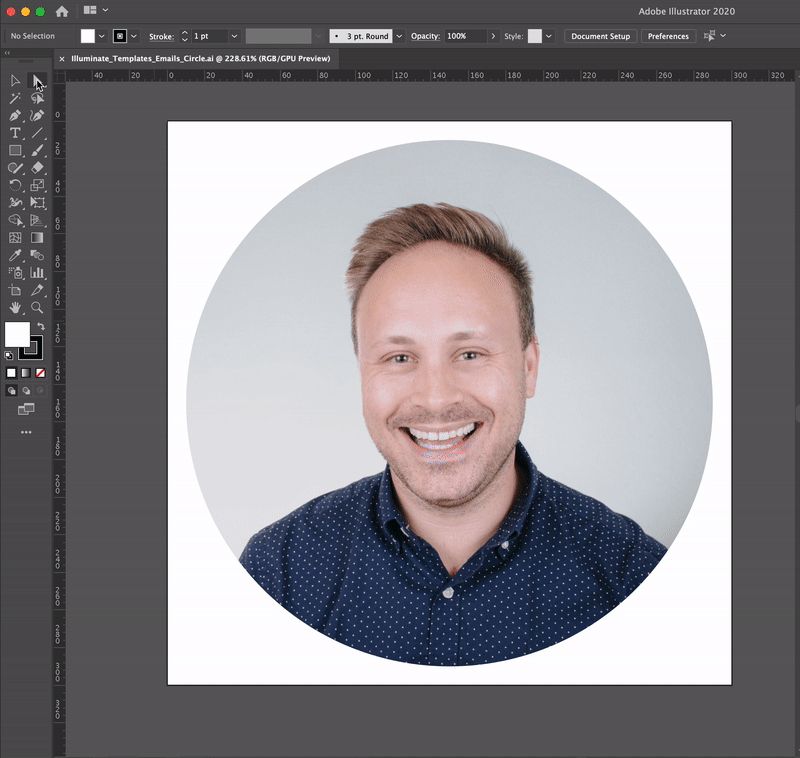
D) Select the client’s square photo you just created from the “Agent Photos” folder
E) Go to File > Export > Export for Screens…
F) Add the customer’s contact name (found in Airtable) into the prefix field, all lowercase with hyphens instead of spaces. NOTE: Make sure you add a hyphen at the end of the prefix phrase as well.
For example, the full prefix for Cody Martens would be “cody-martens-“
G) Select the customer’s “Emails” folder for the Export to: destination
H) Make sure the Scale is 1x and the Format is PNG
I) Click “Export Artboard”

Write Home Feature Title
Every website has a home feature area (the top section of the homepage). You will need to write a unique title for each new client. The title can reflect one of the following categories:
- Experience – depending on how long the client has been a Realtor, you could write something like “Over 20 Years of Salt Lake City Real Estate Experience”
- Local – you could write something like “Helping People Buy and Sell in Portland, Oregon”
- Unique – if the client has a unique past (like they were an Olympian or something), you could write something like “Portland Real Estate with Gold Medal Service” (Note: this is less common)
- Niche – if the client has a specific niche, you could write something like “Portland’s High-End Condo Expert” (Note: this is less common)
You can also check if there is anything written on the client’s current website (if they have an old website that ours will replace). To do this, see if they have a live website at their current Live Website URL (found in their Airtable record).
You can also Google the client and see if there are other titles or headings they use in social media or on other websites. (HINT: try googling their name plus the words “real estate” or “realtor”.)
To write and save the home feature title, follow these steps:
A) Open the task in ProcessKit
B) Write the message
C) Save the block
Back to TopWrite Home Welcome Message
Each client has a welcome message on their homepage. Think of it like a quick introduction or welcome message. We will always ask the client to write this themselves, but sometimes we end up writing it for them.
It can be about any of the following topics:
- Philosophy – why do they practice real estate? What is important to them about this job?
- Bio – it can be a quick or condensed version of their bio
- Instructional – it can give clients an idea of what to expect or what to look for on the website
To write the homepage message, follow these steps:
A) Open the task in ProcessKit
B) Write three things:
- A heading
- The homepage message
- A link title and the link itself
For example, in the image below, we have the heading, message, and then a link to the client’s testimonials. The link title is “Read My Testimonials” and the link goes to: https://katrinasellsgeorgia.com/testimonials/ (NOTE: this example also has a sub-heading, which is optional.)
C) Save the blocks
Back to TopWrite Home Call to Action
Each client has a call to action on their homepage. This is a call-to-action that gets someone to sign up to receive their email newsletter. You can find different variations of the messaging on live client sites, but the gist of it is this:
- Heading: Get Insider Secrets
- Message: Twice a month, we share our favorite things about the [Market] area. Be it our favorite brunch spots, best hikes, or best family activities, we love divulging our top finds. Sign up today.
- Button Text: Sign Up Now
To write and save the home feature title, follow these steps:
A) Open the task in ProcessKit
B) Write the above items
C) Save the block
Back to Top