[CONDITIONAL] Upload Graphics
In ProcessKit, check the “Format” field on the project’s Details screen.
IF THE FORMAT IS “GRAPHIC – BRANDED,” COMPLETE THIS PROCEDURE FIRST:
Upload Branded Social Media Graphics
Back to TopLogin to Hub
A) Login to the Hub using your login credentials.
B) Navigate to Extensions > Custom Post Type or click here
Back to Top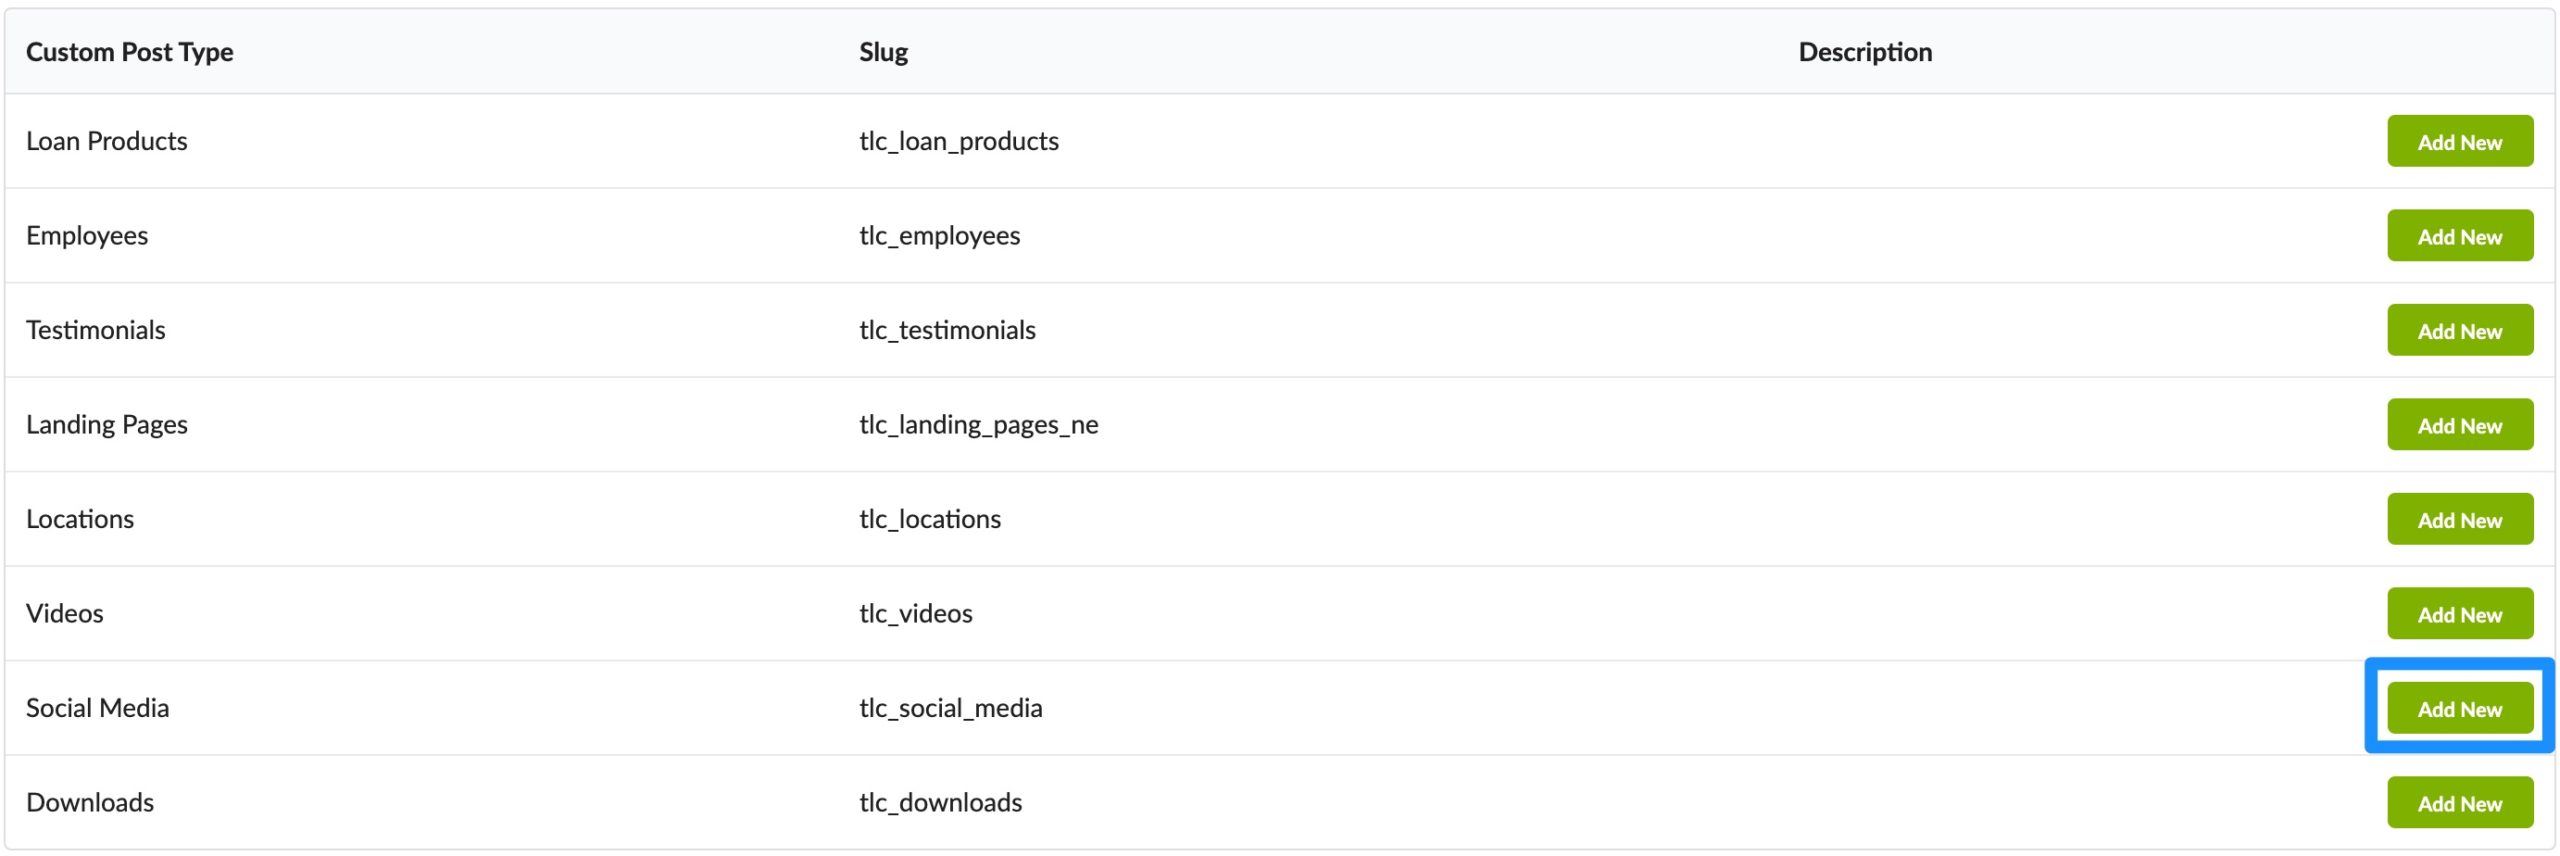
Enter the Title and Content
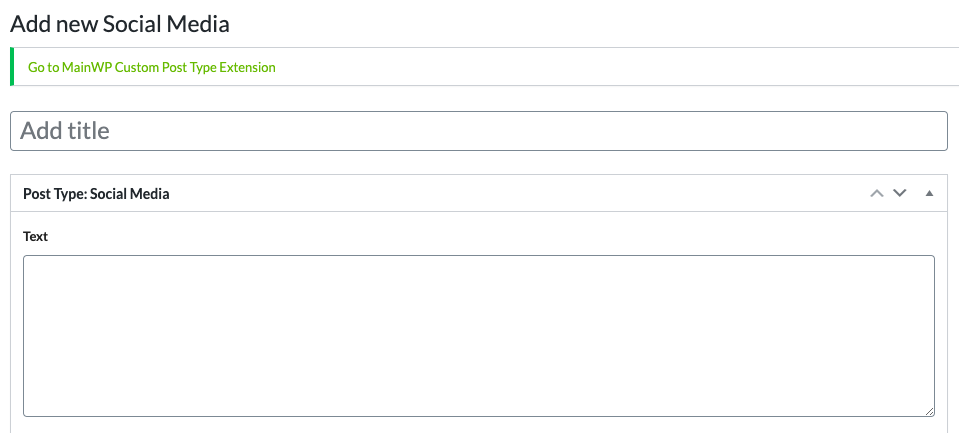
A) The title of the entry should be the project name from ProcessKit.
B) The content will be the “Social Media Status” located in the Schedule Content in Hub step in ProcessKit.
NOTE: When you paste the status into the editor in the Hub, make sure you paste as text using CTRL + SHIFT + V (CMD + SHIFT + V on Mac). You can also click the clipboard icon with the T on it ![]() and then paste your text.
and then paste your text.
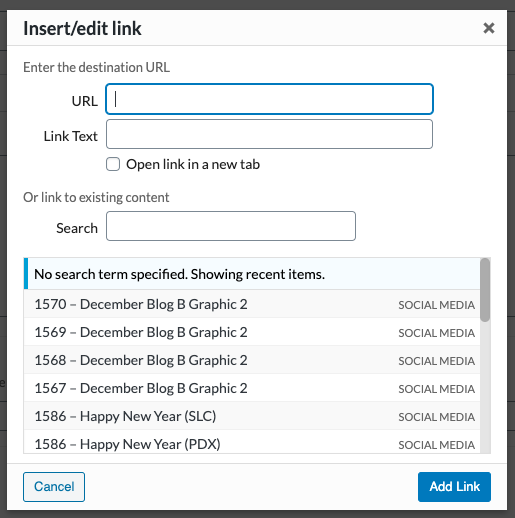
[CONDITIONAL] Add the Post Link

A) If you are uploading a social media graphic with a link that refers to the latest post, simply click “Latest Post” from the dropdown. You don’t have to paste any link for this step.
B) If you are uploading a for a Random Link task or any link from the web, click “Custom Link” then click the “Select Link” button.
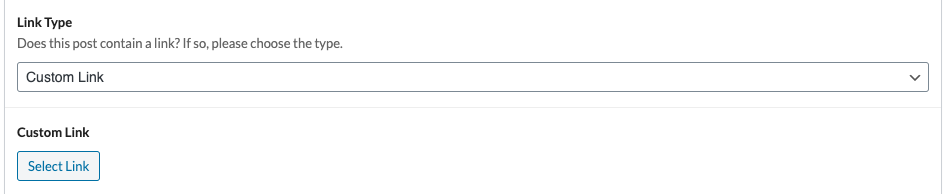
C) Paste the appropriate link in the box that pops up then click the “Add Link” button.
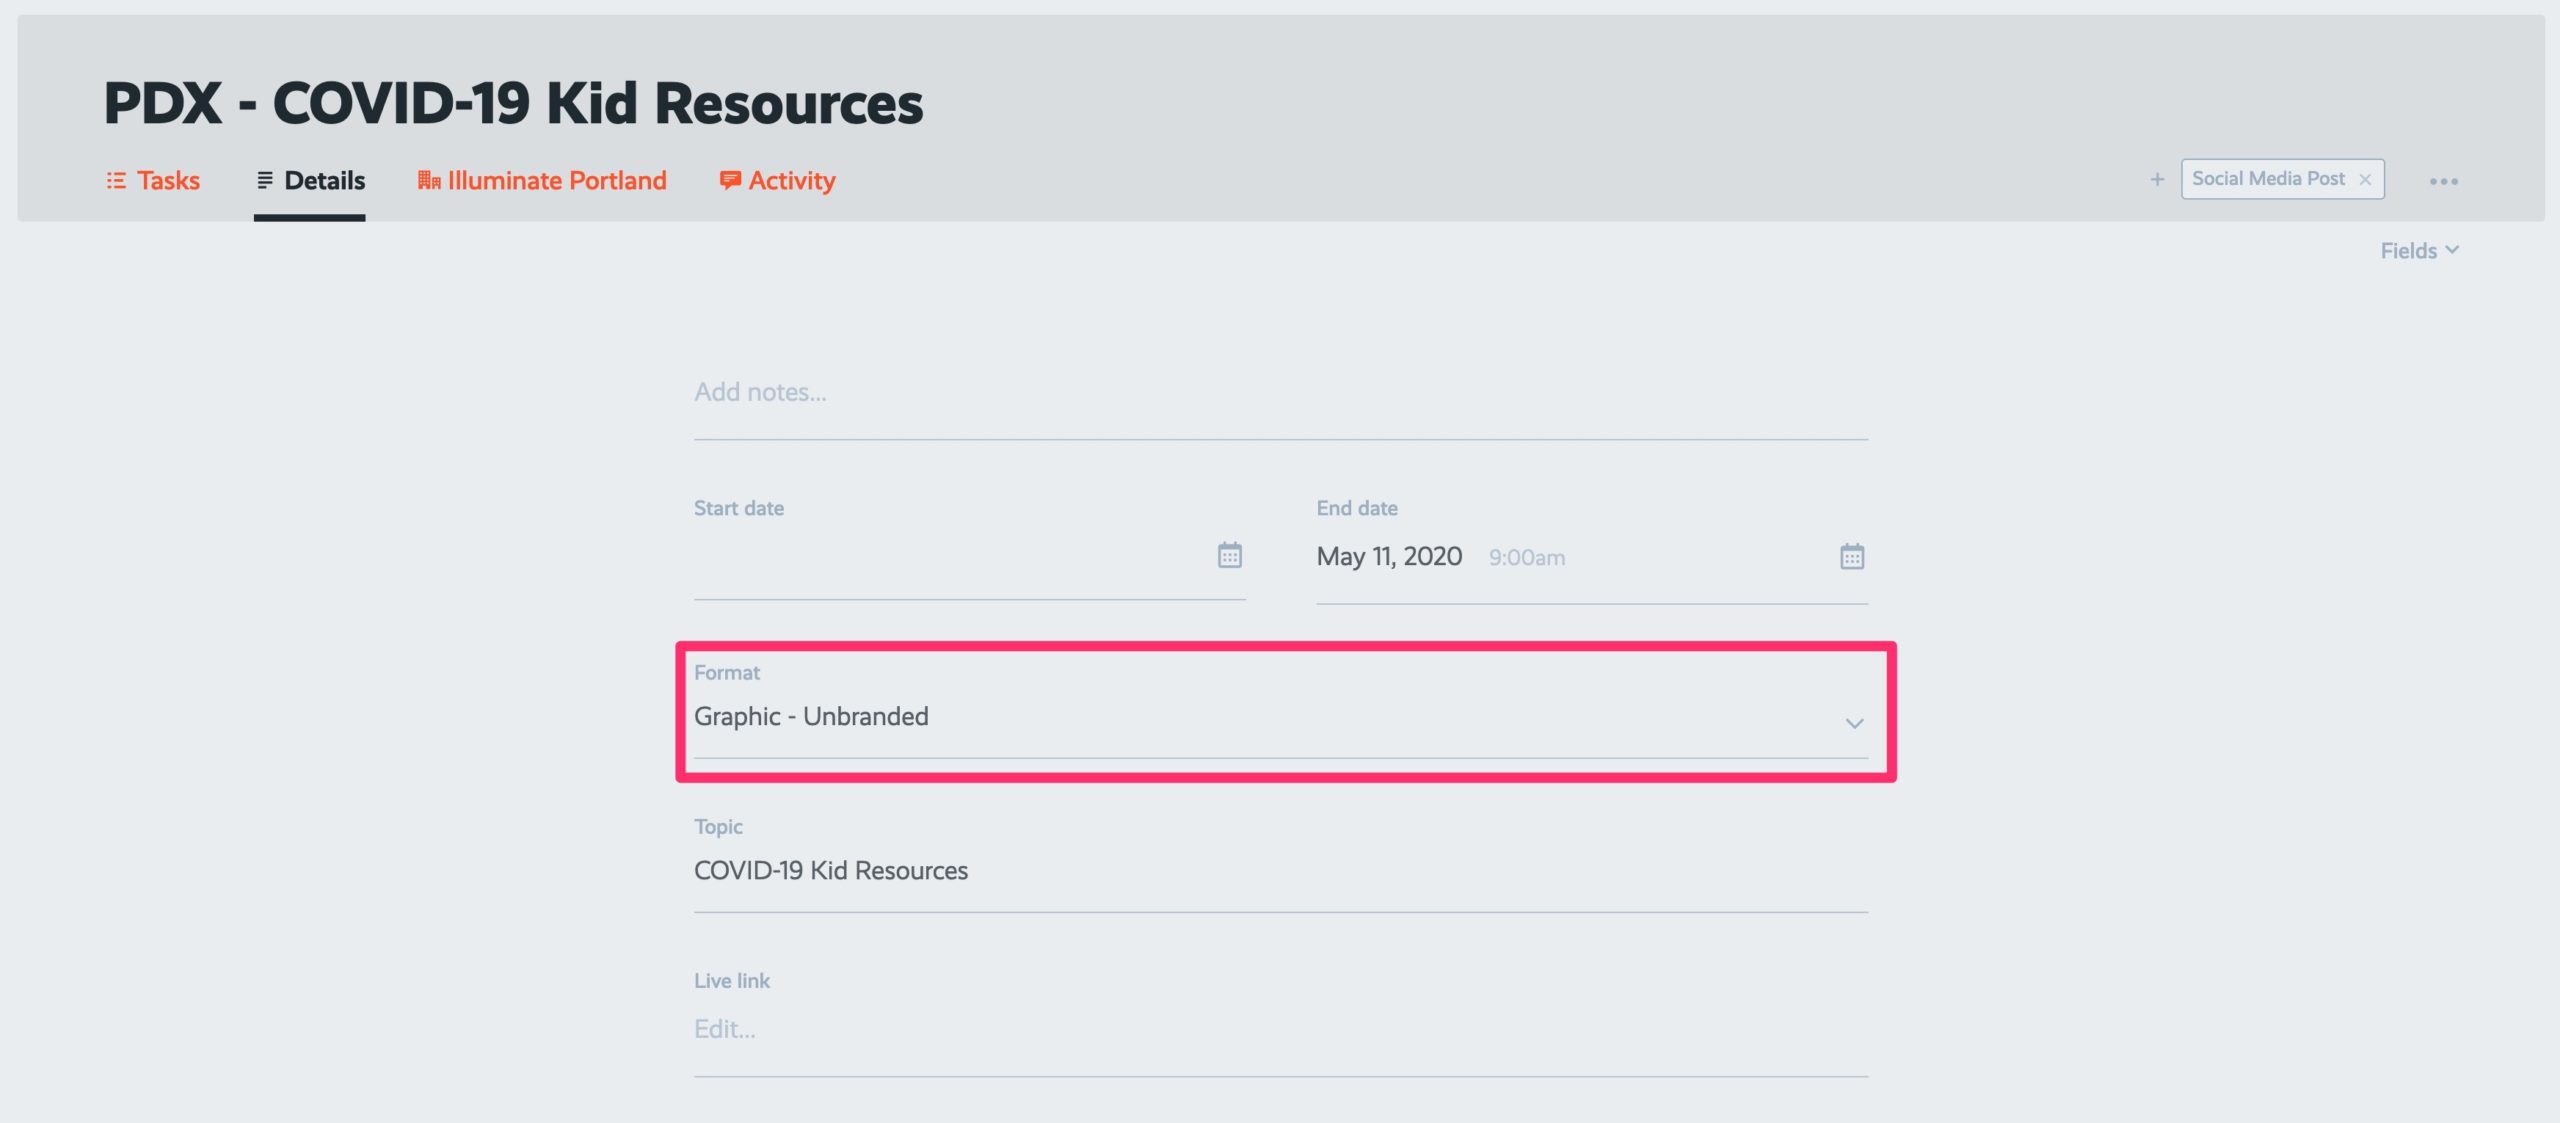
[CONDITIONAL] Enter the Image Directory
If the project’s Format is “Graphic – Branded”, complete this step. Otherwise, skip it.
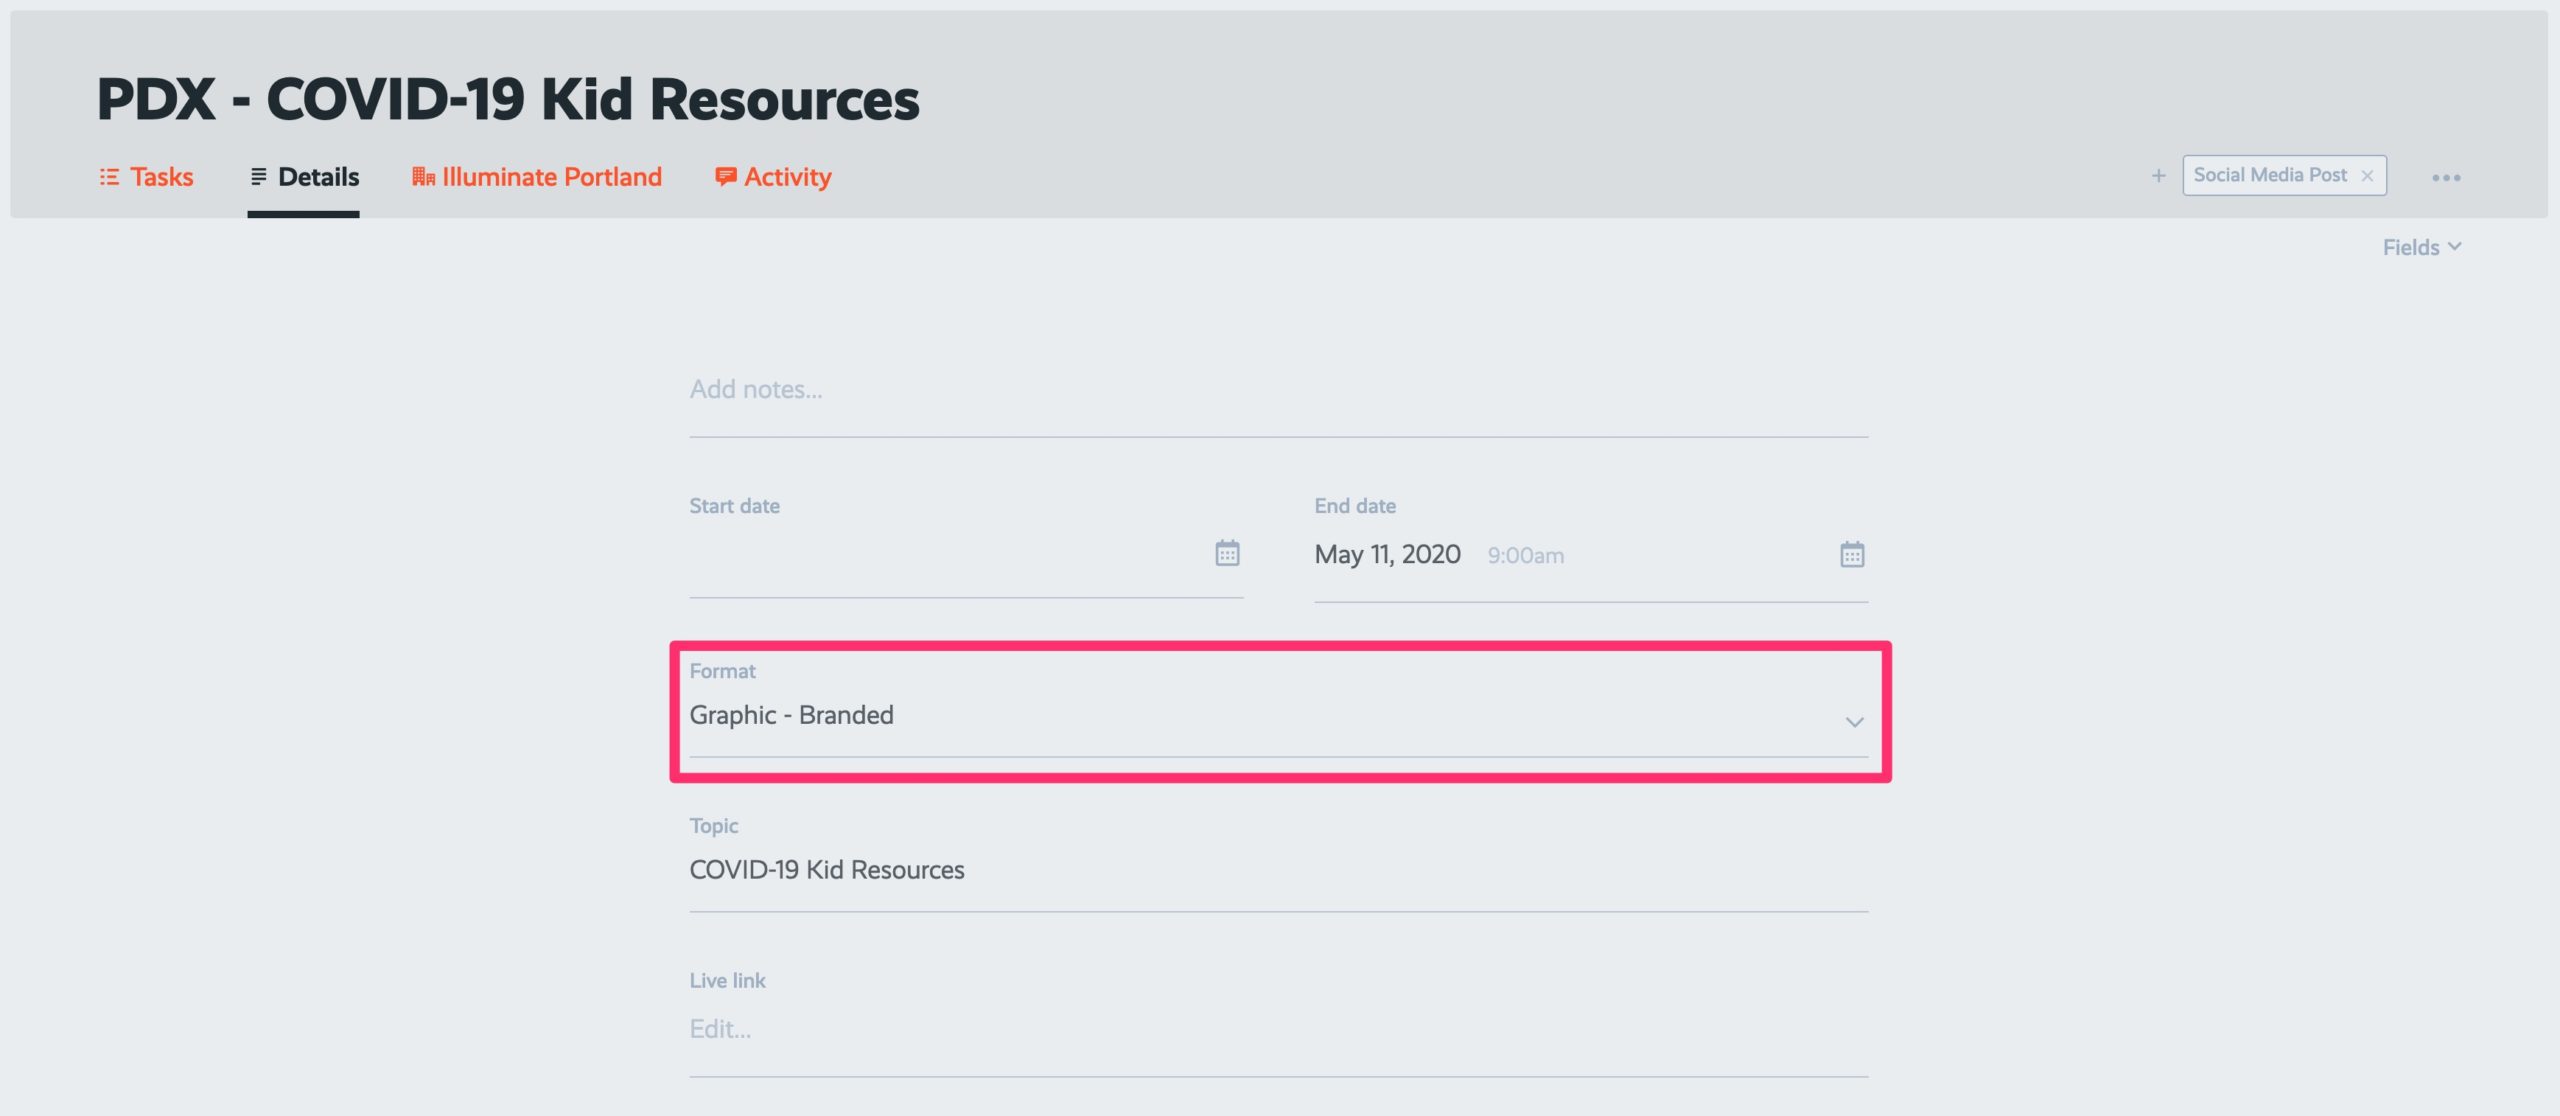
A) Back in the Hub, scroll down to the “Image Type” section and click the dropdown.

B) Click “Image Directory”, paste the Image Title, and paste the link that you copied from Step 4(c) in the Upload Branded Social Media Graphics procedure.
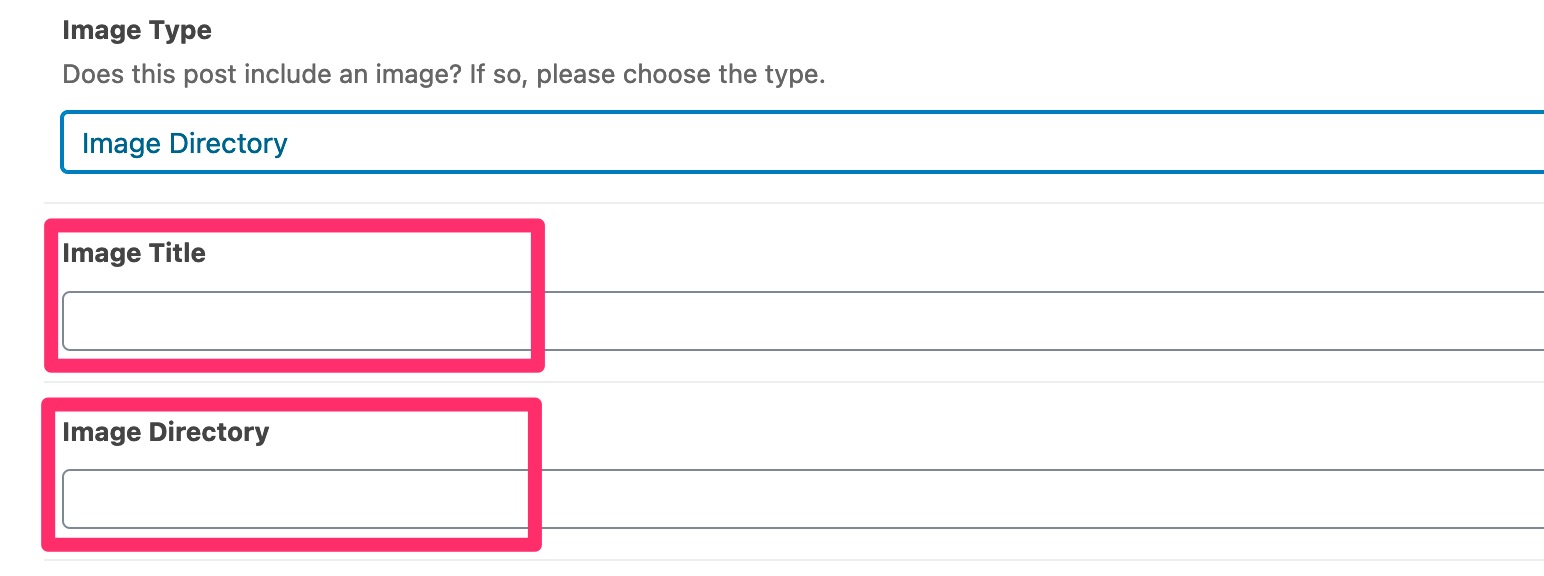
[CONDITIONAL] Attach an Unbranded Graphic
If the project’s Format is “Graphic – Unbranded”, complete this step. Otherwise, skip it.
A) Back in the Hub, scroll down to the “Image Type” section and click the dropdown.
B) Click “Image Upload”, paste the Image Title, and click “Add Image”
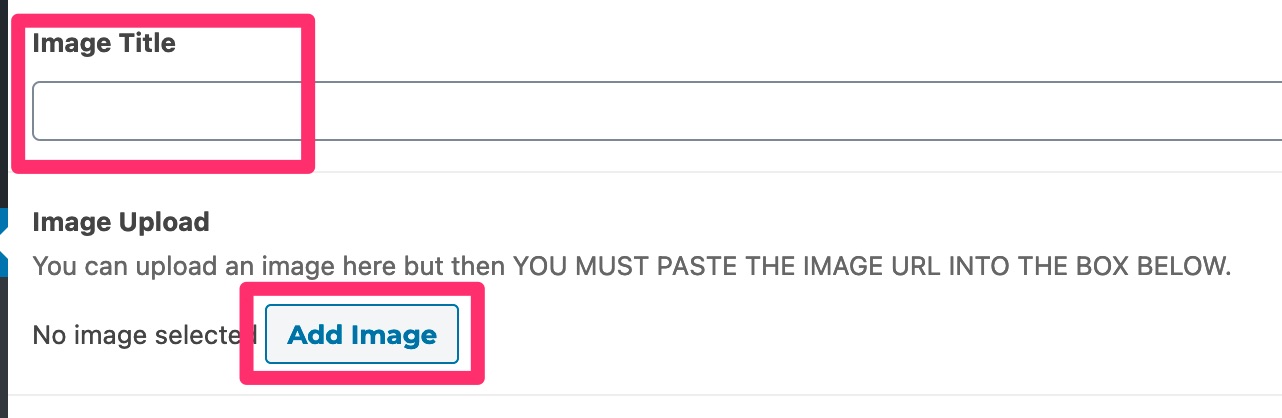
C) Click the “Upload files” tab, click “Select files”, select the unbranded graphic or image and click “Open”
D) Once the image uploads, click “Copy URL to clipboard”, then click “Select”
E) Paste the URL copied in substep D into the “Image URL” box
Back to TopSelect the Groups
A) In the hub, on the right-hand side, click “Groups.”
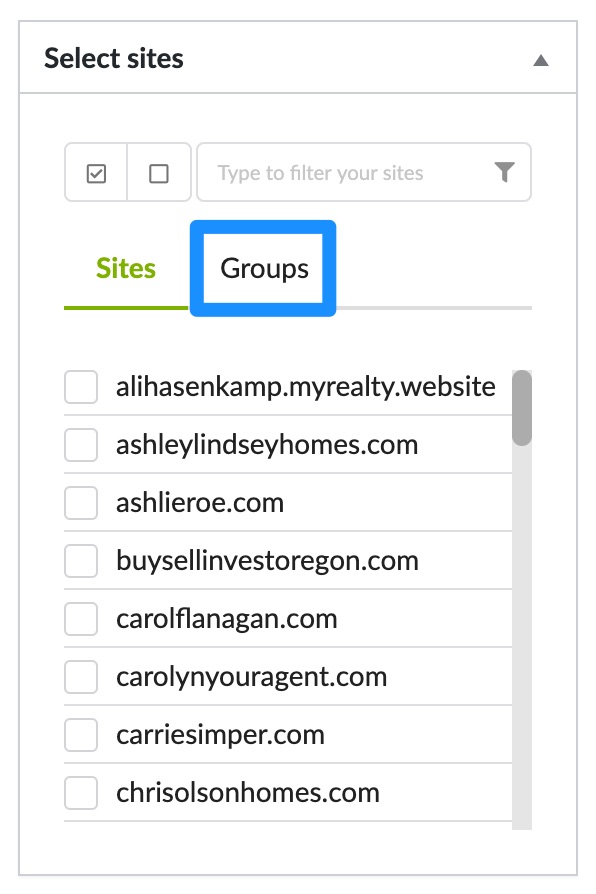
B) Select the “Illuminate Social” group for the Milestone’s market.
Example: the client for this project is “Mortgage” so you’d select the “Illuminate Social – Mortgage” group.

Save as Draft
A) Verify you have correctly entered the following information correctly:
- Title
- Content
- Link to the image directory (if required)
- Select sites “Groups”
B) Click “Save Draft”
Back to TopPublish on Each Website
A) Login to each website where you just posted the draft
B) Go to Social Media > Social Media
C) Hover over the draft and click “Edit”
D) Click “Publish”. This will immediately post the post on social media
Back to Top