Login and Create New Campaign
A) Login to MailerLite at this link, find the customer’s account, and click “Log in”
B) Click the orange “Create campaign” button
C) Fill out the following information and click “Next: CONTENT”
- Subject: see the Blog Post Link in ProcessKit
- Name: {Contact Name}
- Email: {Public Email}
D) Hover over the customer’s email template and click “Select”
E) Edit the appropriate content such as title, image, email message, link, featured listings, etc.
NOTE: for listings, make sure you remove the “FIND OUT MORE” button text and link if there is no link to the property. Only active properties have a link. Under contract and sold properties do not have a link.
F) Click “Done editing”
G) Choose the appropriate list then click “Next”
NOTE: if this is a bi-monthly email newsletter, choose the “Email Newsletter” list. Otherwise, ask the customer which list to select.
NOTE: some customers have one list for each person on the team inside one MailerLite account. If that’s the case, select the list matching the individual contact you are sending for.
H) Send the client a test email by clicking “Send test email”, entering their email address, and clicking “Send”
Back to TopReply to (or Create) the Support Request
A) In Freshdesk, reply to the customer’s existing ticket letting them know you have sent them a test email for review
Note: if the customer does not have an existing ticket, create a new email, setting the status to pending.
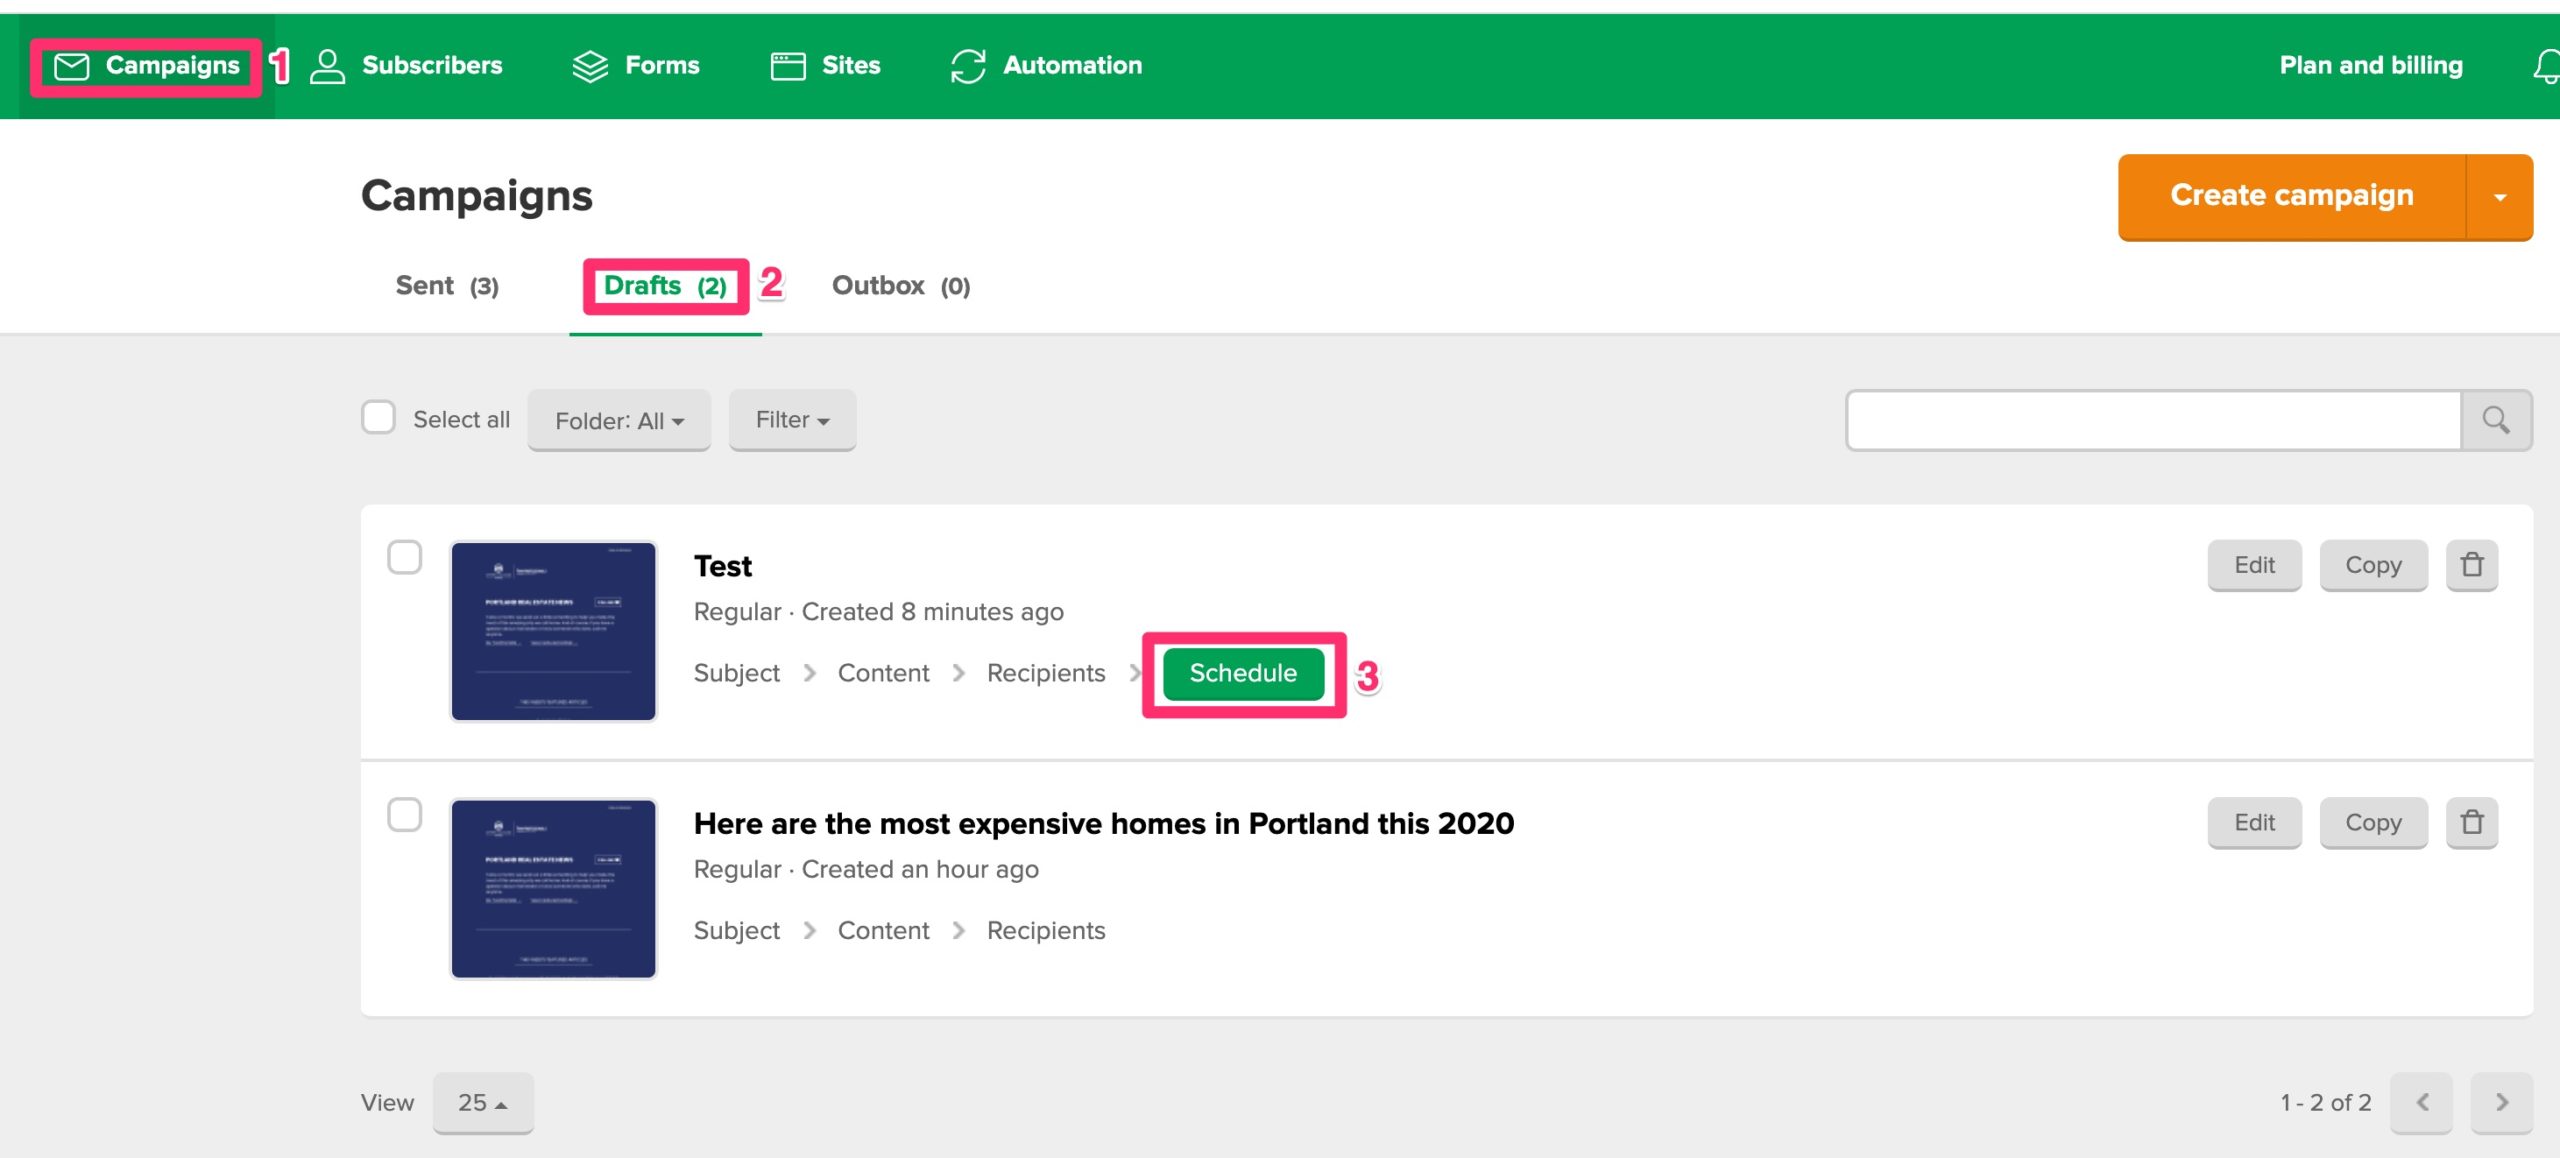
Back to TopSchedule the Email
A) Once you’ve received approval, click “Campaigns” (1), “Drafts” (2), then “Schedule” (3)
B) Select when to send the campaign (1), check the box (2), and click “Send” (3)