Add Site to Cloudflare
A) Login to Cloudflare at https://dash.cloudflare.com/login using the shared credentials in 1Password.
B) Click “+ Add a Site”
C) Enter the client’s “Live Website” link from their Airtable record and click “Add site”
D) Select “Free” under “Select a plan” and click “Confirm plan”
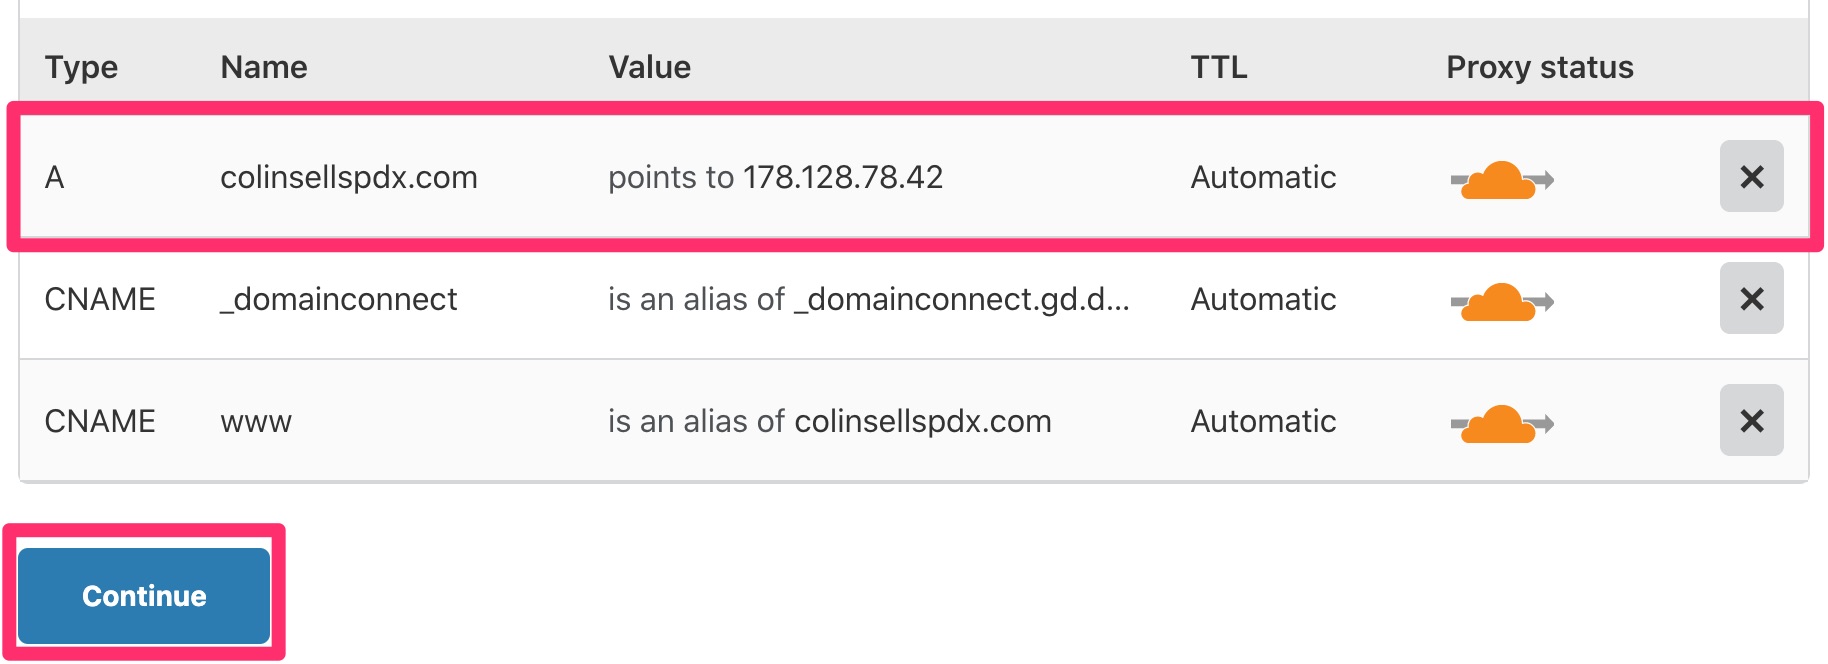
E) Cloudflare will import all of the client’s current DNS settings. Please complete the following then click “Continue”
- If there are any AAAA records, please delete them
- If there is more than one A record, please delete all but one (which one to leave doesn’t matter)
- Please change the “Value” of the remaining A record to 167.71.146.245
F) In the next section, “Change your nameservers” copy the Cloudflare nameservers listed (likely nora.ns.cloudflare.com and piotr.ns.cloudflare.com)
G) Click “Done, check nameservers”
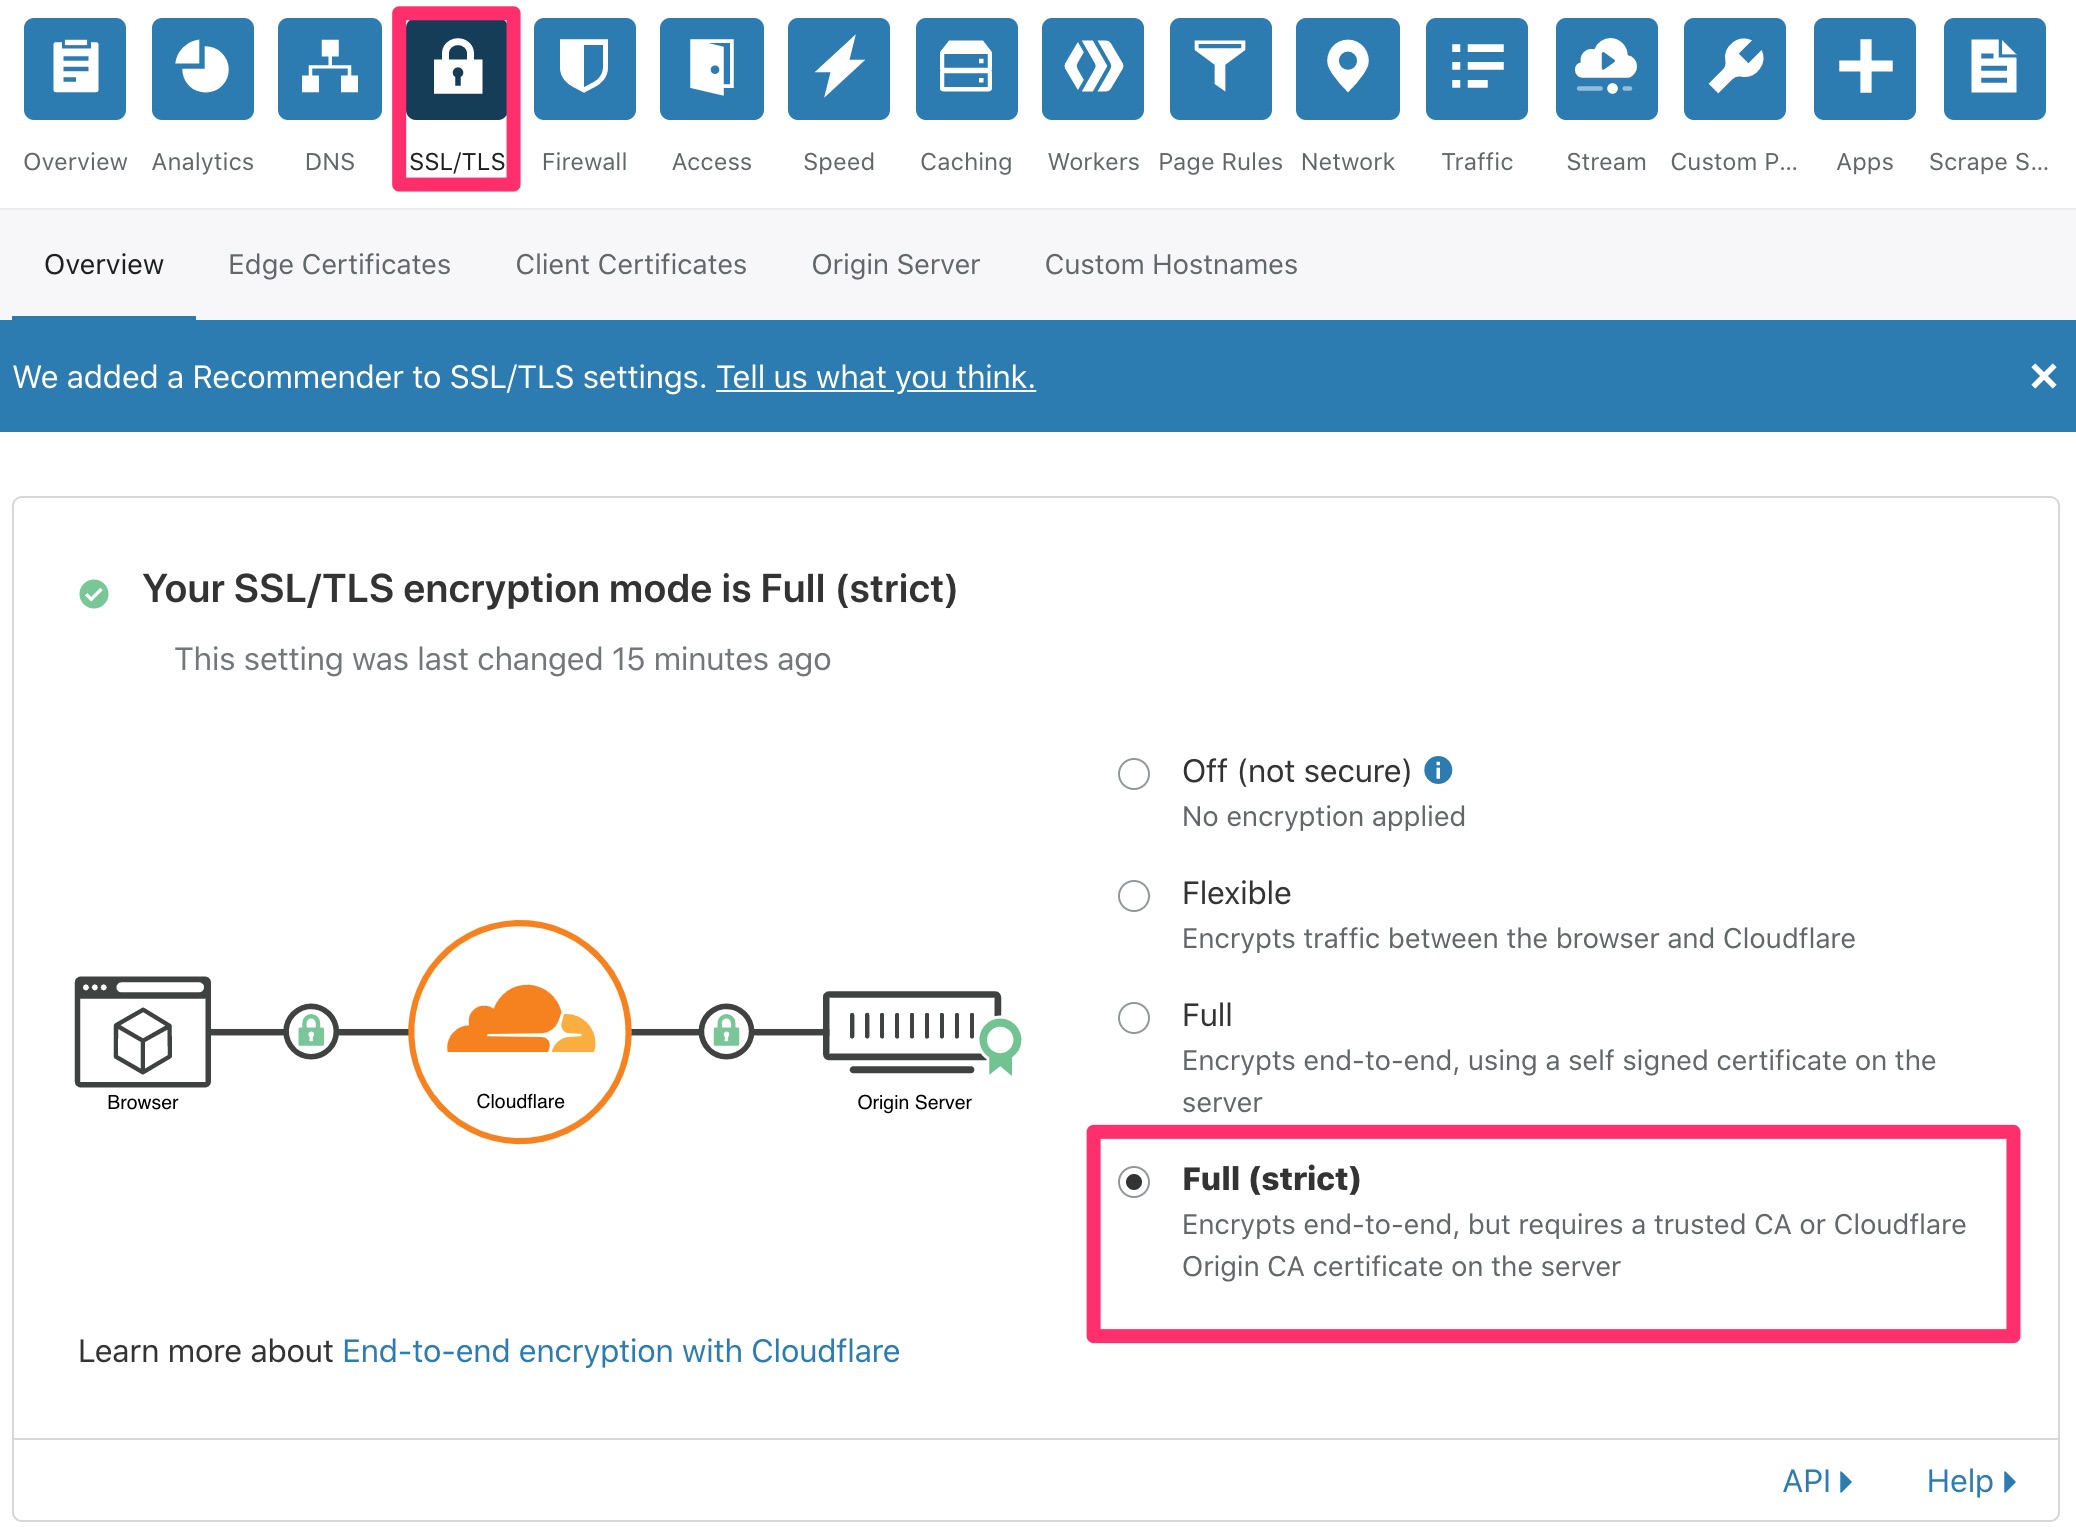
H) Choose “Full (strict)” for the SSL/TLS encryption mode, scroll to the bottom and click “Done”
Back to TopChange Nameservers with Registrar
A) Login to GoDaddy Pro at https://pro.godaddy.com/ using the shared credentials in 1Password
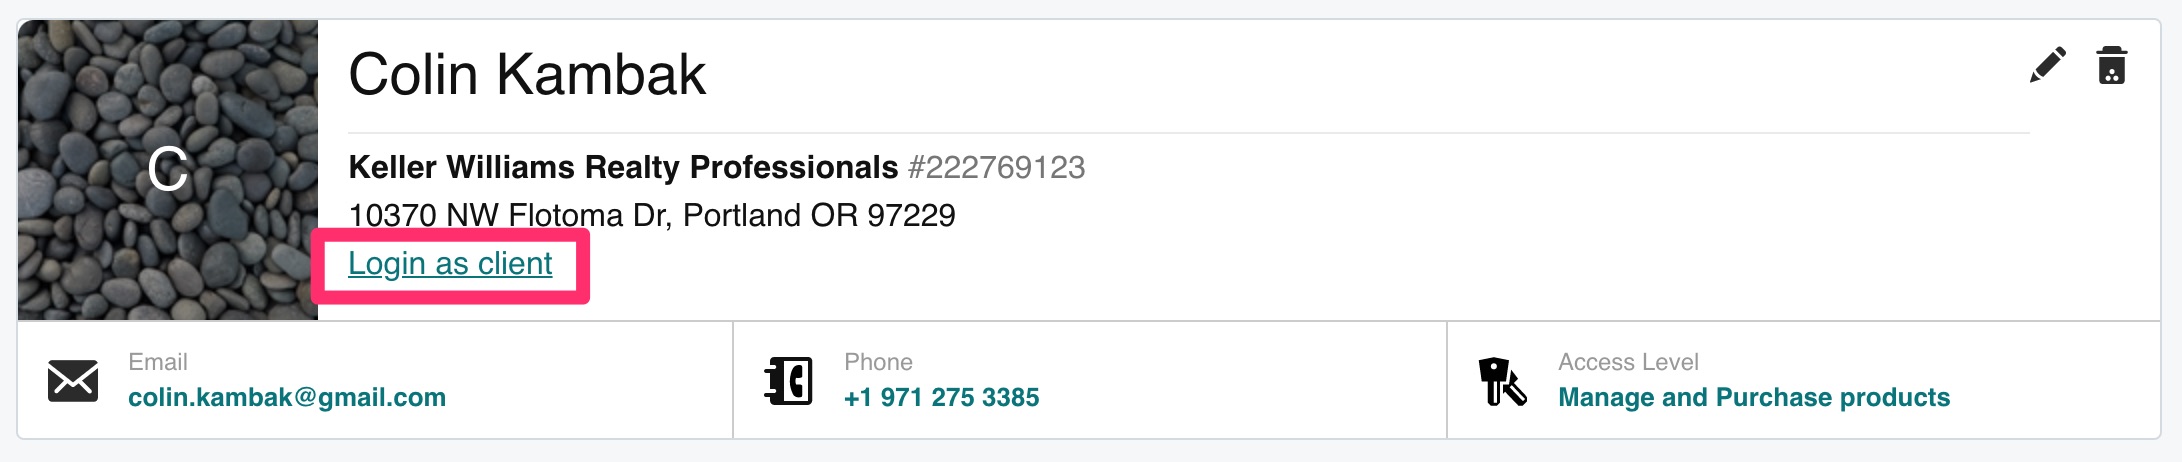
B) When it loads the Clients list, search for the client in the list and click their name
C) Click “Login as client”
D) Under “Domains” click “DNS” next to the client’s Live Website

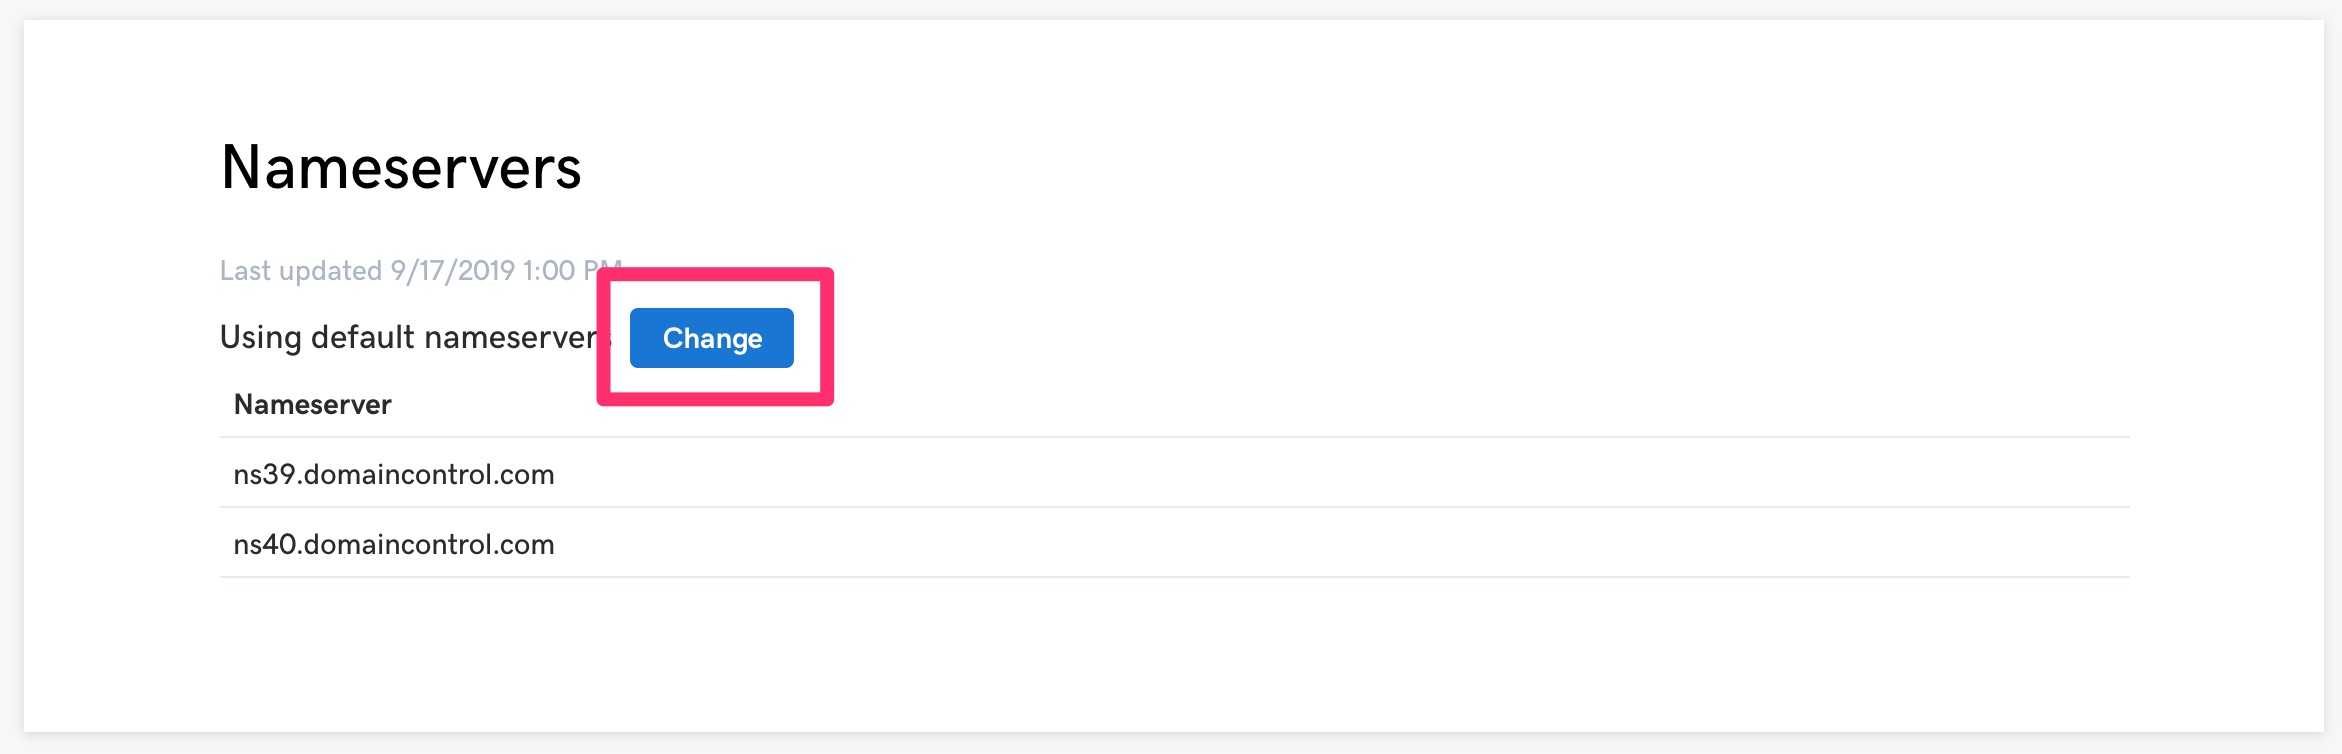
E) Scroll down to the “Nameservers” section and click “Change”
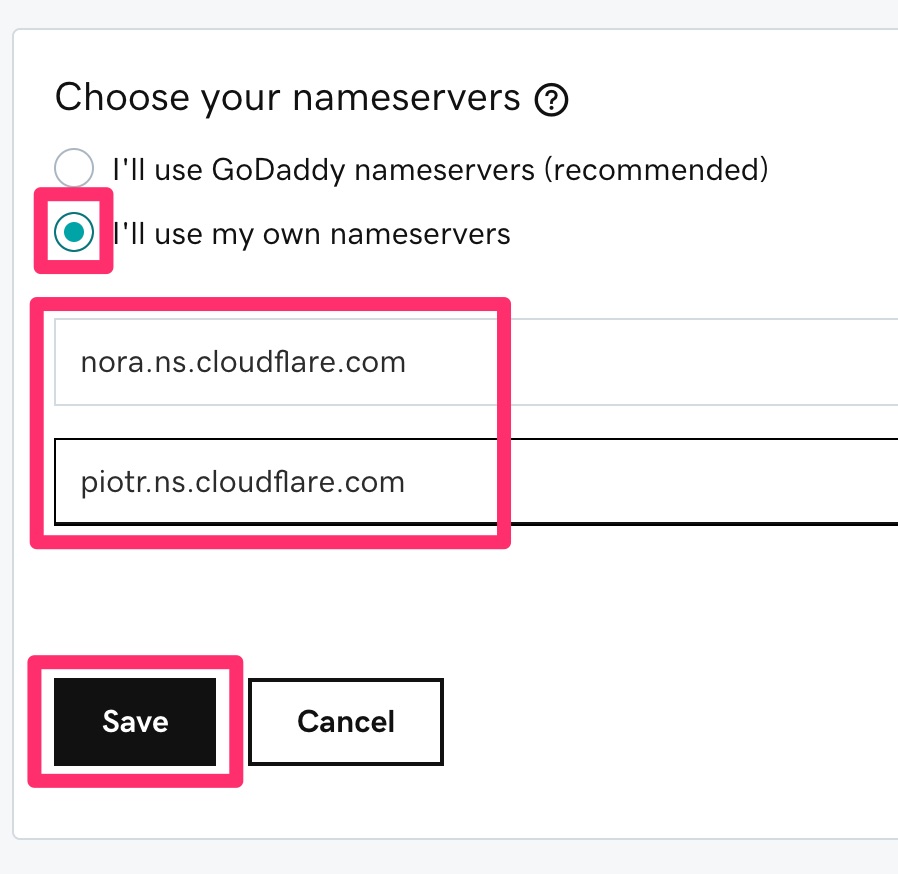
F) Select “I’ll use my own nameservers”, enter the nameservers Cloudflare provided in the previous step, then click “Save”
Edit Cloudflare SSL Settings
A) Click on SSL/TLS
B) Change the encryption mode to “Full (strict)”
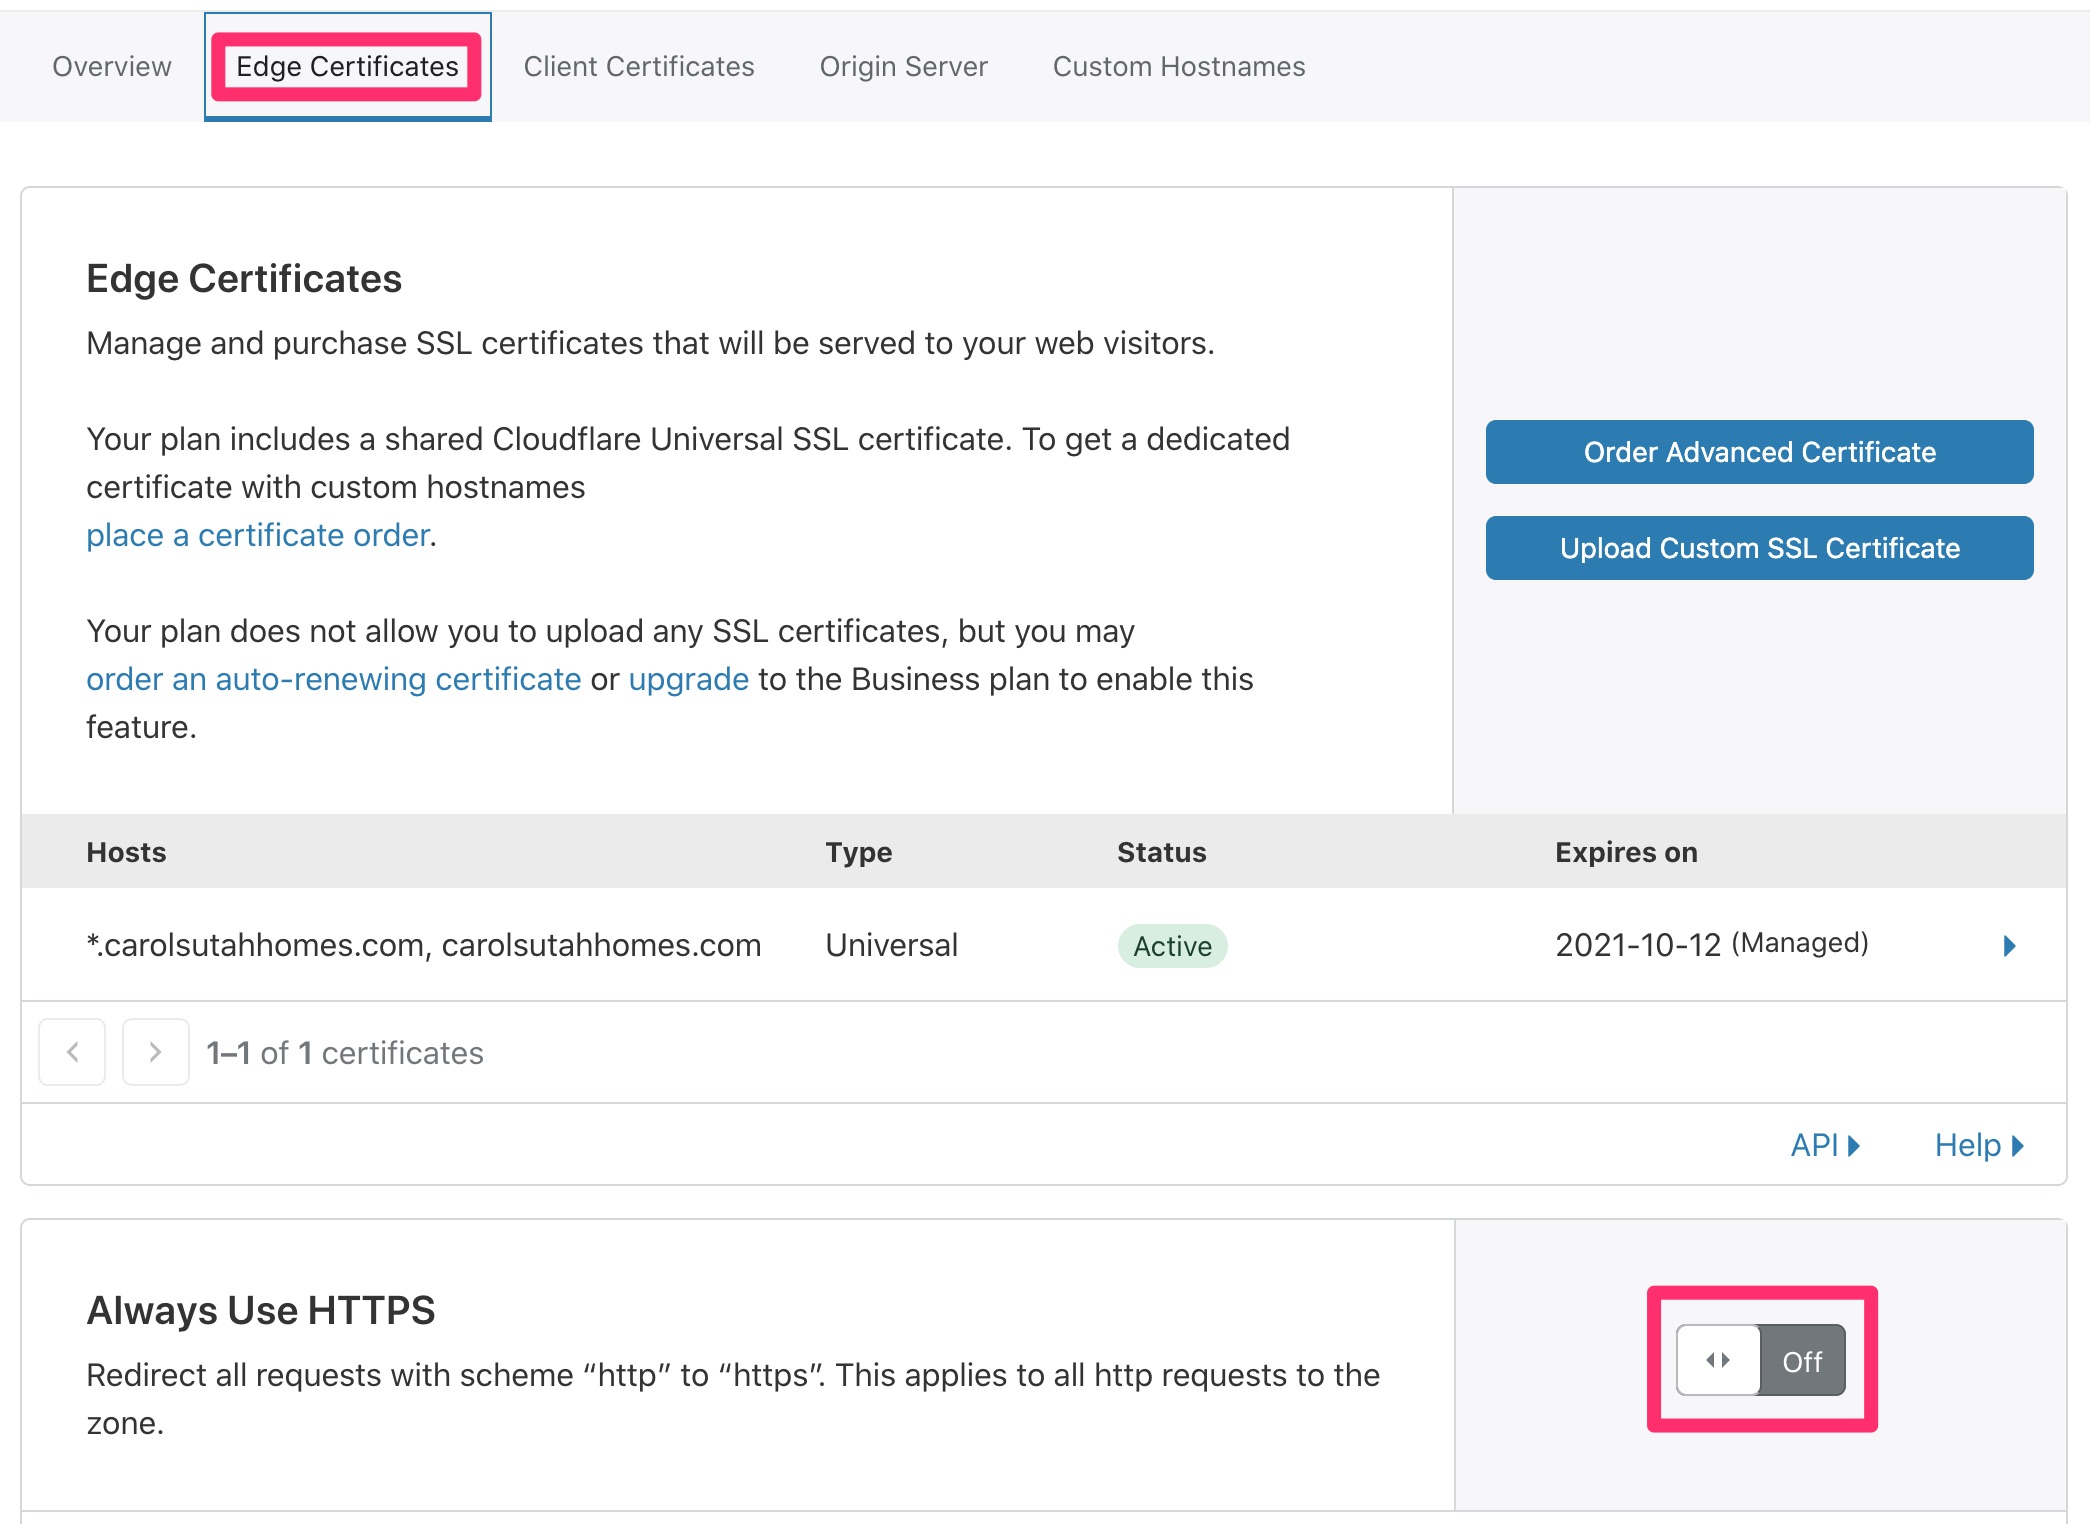
C) Click on “Edge Certificates”
D) Turn OFF “Always Use HTTPS”
Add Cloudflare Page Rule
A) Back in Cloudflare, click on “Page Rules” and click “Create Page Rule”
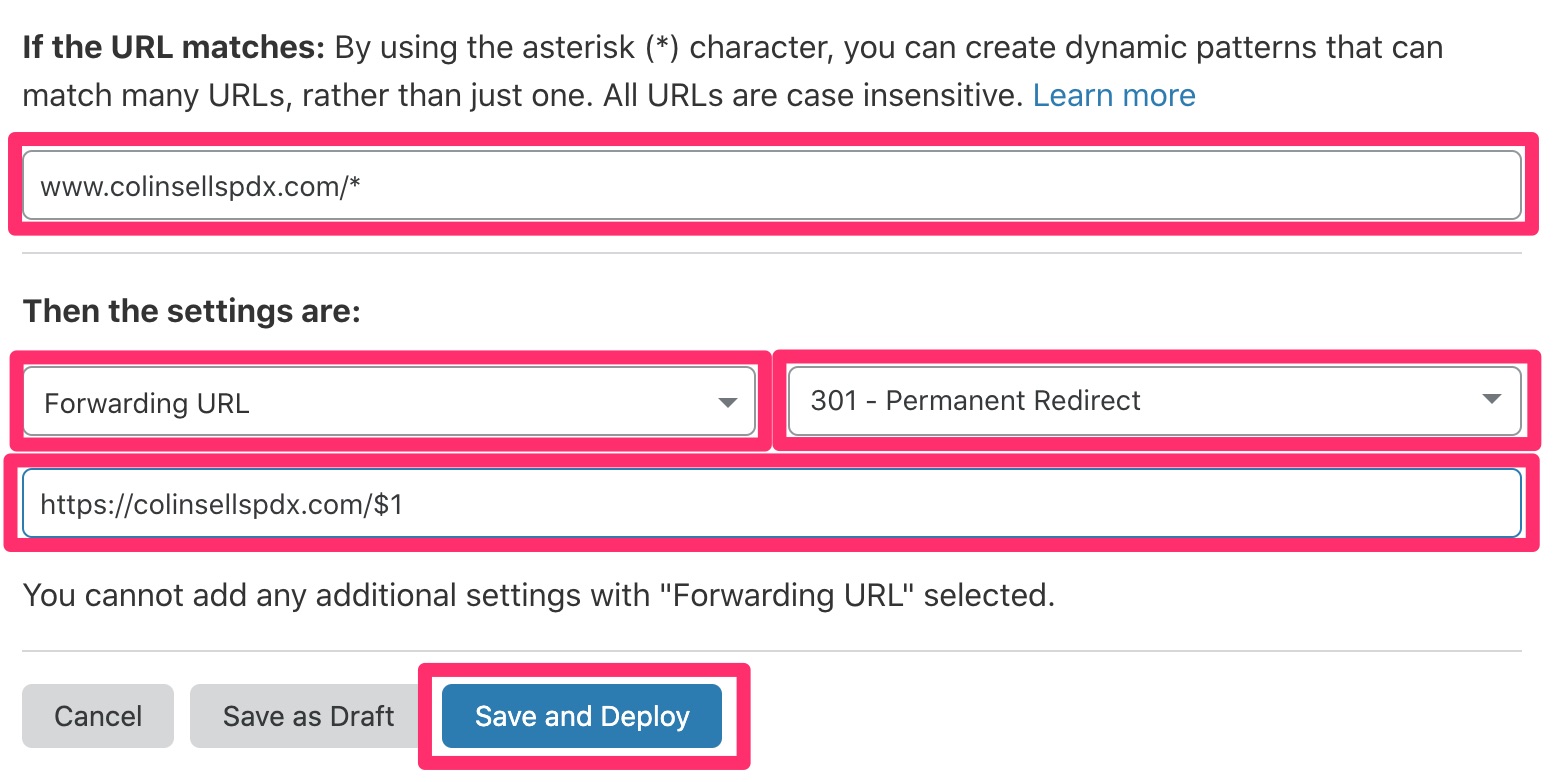
B) Enter the following information then click “Save and Deploy”
- If the URL matches: field, type “www.” + Client’s Live Website + “/*” Example: www.colinsellspdx.com/*
- Then the settings are: choose “forwarding URL”
- Select status code: choose “301 – Permanent Redirect”
- Enter destination URL: “https://” + client’s Live Website + “/$1” Example: https://colinsellspdx.com/$1
Add Domain to SpinupWP
A) Login to SpinupWP at https://spinupwp.app/login using the shared credentials in 1Password
B) On the “myrealty.website” server, click “myrealty.website”
C) Find and replace the client’s Dev Website with their Live Website and click “Save”
Back to TopChange Site URL in WP Network Settings
A) Login to the MyRealty multisite network sites list located here using your own credentials
B) Hover over the client’s Dev Website and click “Edit”

C) Replace the client’s Dev Website with the client’s Live Website and click “Save Changes”
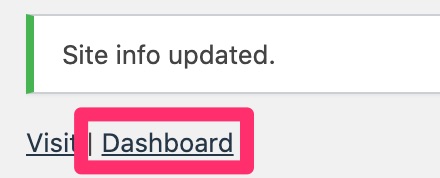
D) When you see the confirmation message displayed, click “Dashboard” and login with your same credentials
Run Better Search Replace
A) In the client’s Live Website admin dashboard, navigate to Tools > Better Search Replace
B) Enter the following information and click “Run Search/Replace”
- Search for: client’s Dev Website with no “https://” Example: colinkambak.myrealty.website
- Replace with: client’s Live Website with no “https://” Example: colinsellspdx.com
- Select tables: select all the tables in the list (You can select one table, then type CTRL + A to select all
- Replace GUIDs?: check this box
- Run as dry run?: uncheck this box
Back to Top
Add New Site to Hub
A) In the client’s Live Website admin dashboard, navigate to Plugins > Plugins
B) Find “Luminary Agent Manager” in the list and click “Deactivate”
C) Find “MainWP Child” in the list and click “Activate”
D) Login to the hub located here using your own credentials
E) Click “Sites” on the left
F) Locate the client’s Dev Website from the list, click on the three “more” dots, and click “Remove Site”

G) At the top of the page, click “New Site”
H) Enter the following information and click “Add Site”
- Site URL: client’s Live Website
- Administrator username: client’s username
- Groups: choose the following groups
- IF the client has the “04 – Social” product attached to their Airtable record, add the appropriate “Illuminate Social” group
- Add the client’s “Market” group
- IF the client has the “02 – Blogs” product attached to their Airtable record, add the appropriate “Illuminate Blogs” group
- Add the “Theme – Illuminate” group
- Check “Apply global Branding options”
Ignore Updates
A) In the Hub, go to the site’s Dashboard (HINT: if you’re coming from the last step, click “Dashboard” in the confirmation message)
B) Click “Edit”
C) Toggle the following ON and click “Save Settings”
- Ignore core updates
- Ignore plugin updates
- Ignore theme updates
Create Advanced Uptime Monitor
A) Go to Extensions > Advanced Uptime Monitor or click here
B) Click “Create New Monitor”
C) Complete the following and click “Create Monitor” (you may have to scroll to see the button)
- Friendly name: client’s Live Website
- URL (or IP): client’s Live Website
- Select alert contacts to notify: check all
Create New Search Console Property
A) Login to the Google Search Console located here using the [email protected] account
B) Click on the website dropdown and click “Add property”
C) Enter the domain name and click “Add”
D) Copy the TXT record
E) Go to the DNS page for this domain in Cloudflare
F) Click “Add record”
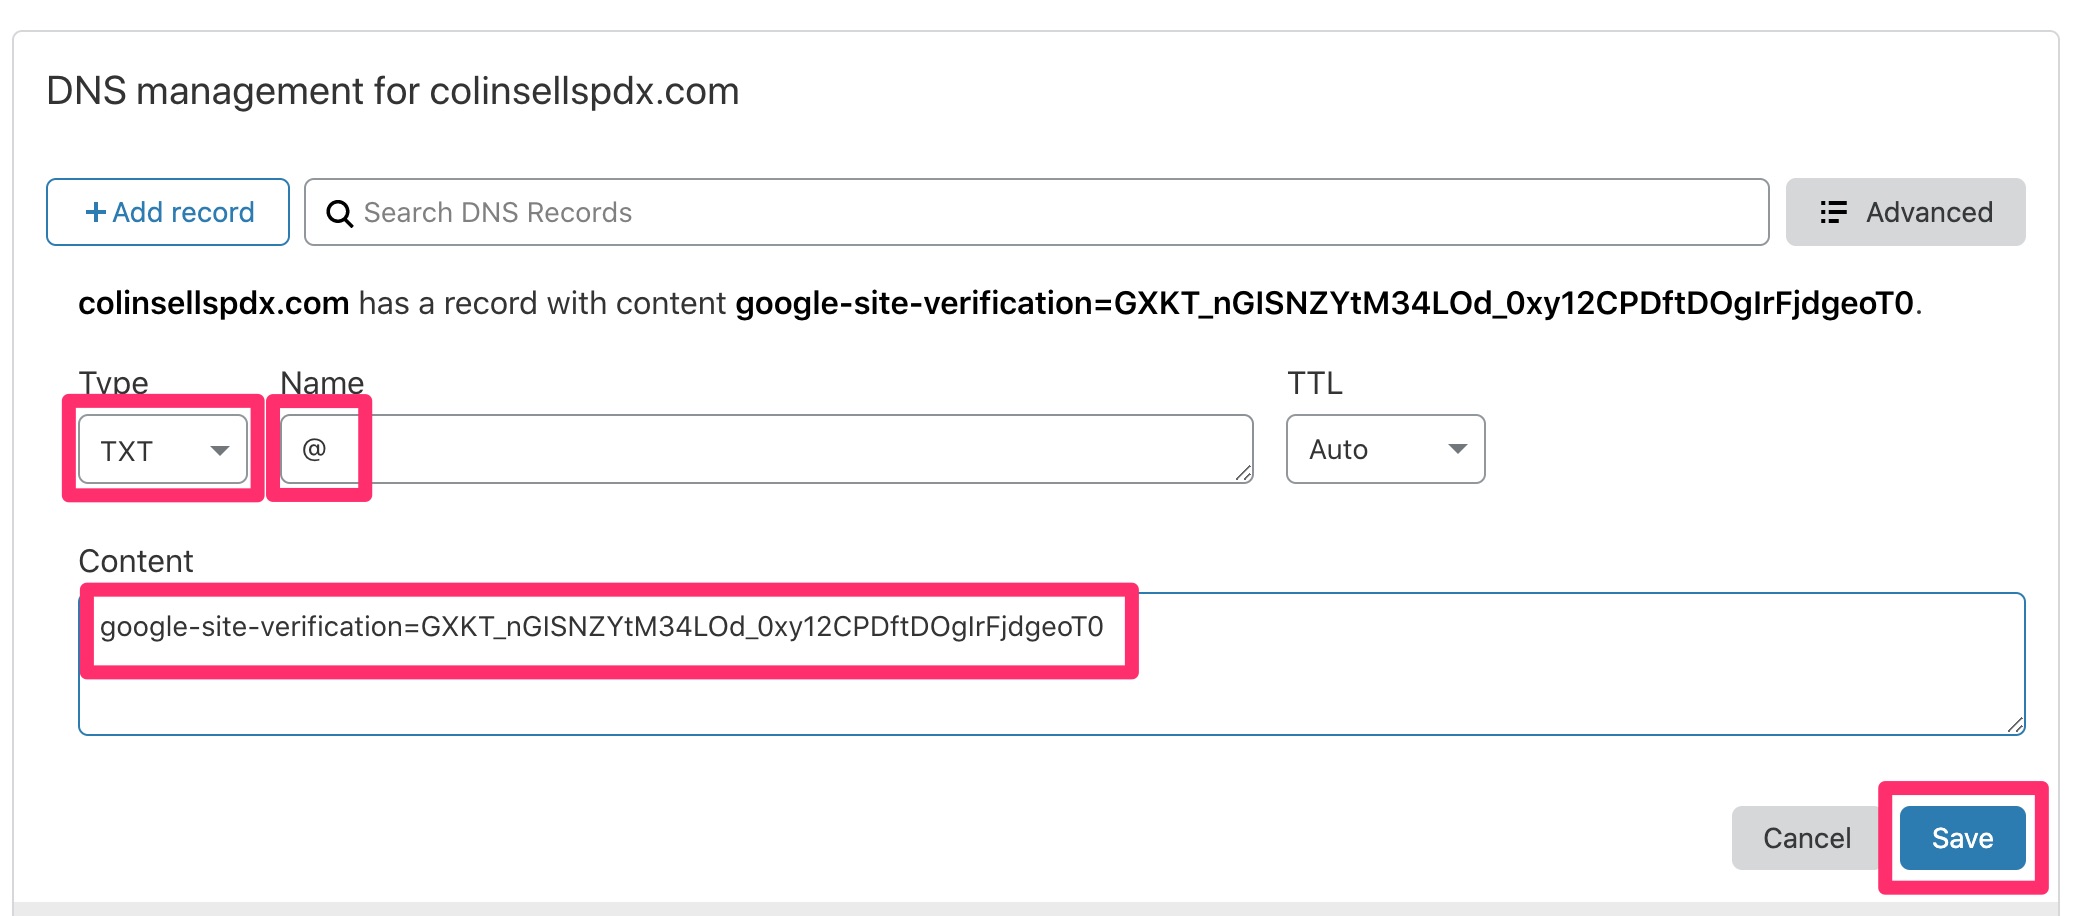
G) Enter the following and click “Save”
- Type: choose “TXT”
- Name: type the @ symbol
- Content: paste the TXT record you copied in substep D above
H) Back in Google Search Console, click “VERIFY”
NOTE: It may take anywhere from 5 minutes to a few hours for the TXT DNS record to be active. If you click verify and receive an “Ownership verification failed” error, click “OK”, wait 5 minutes, then click “VERIFY” again. If it doesn’t work after a few tries, wait a few hours and come back.
I) Once the verification succeeds, click “Go To Property”
Back to TopAdd Sitemap to Google Search Console
A) On the left click “Sitemaps”
B) In the “Add a new sitemap” box, enter the client’s domain name (with https://), adding “/sitemap_index.xml” to the end.
C) Click “Submit”

Add Client User in Google Search Console
A) On the left, click “Settings”
B) Click “Users and permissions”
C) Click “Add User”
D) Add the customer’s Google email address and click “Add”
Back to TopCreate Google Analytics Profile
A) Login to Google Analytics using the [email protected] account by clicking here
B) On the bottom left, click “Admin”
C) Next to “Account” click “Create Account”
D) Enter the following (choosing Next after each step):
- Account Name: use the client’s name
- Choose “Web”
- Website Name: client’s Live Website
- Website URL: client’s Live Website (select https!)
- Industry Category: Real Estate
- Reporting Time Zone: choose the client’s time zone
E) Click Create
F) A pop-up will appear, click the two check boxes and click “I Accept”
G) Copy the Tracking ID. You’ll need it in a subsequent step.
Back to TopGive Client Access to Google Analytics
A) Click the “previous” button

B) Click “Account User Management”
C) Click the blue “+” and then “Add users”
D) Enter the client’s email and check all checkboxes
E) Click “Add”
Back to TopCreate Google Tag Manager Account
A) Login to Google Tag Manager using the [email protected] email by clicking here
B) Click “Create Account”
C) Enter the following:
- Account Name: client’s name
- Container name: client’s Live Website
- Target platform: Web
D) Click “Create”
E) Check the checkbox at the bottom of the slideout, then click “Yes”
Back to TopAdd Google Tag Manager Tracking
A) In the dialog box that appears at the end of the previous step, copy the first box of tracking code
B) Back on the client’s website, go to “Website Options” > “Tracking & Admin” > “Google”, and paste the first box of tracking code into the “Google Tag Manager Code 01” box
C) Copy the second box of tracking code in GTM and paste it into the “Google Tag Manager Code 02” box
D) Click “Update”
Back to TopCustomize Google Tag Manager
A) Back in Google Tag Manager, click “OK” to close the “Install Google Tag Manager” modal window if it’s still up.
B) Click “Add a new tag”
C) Name the tag “Google Analytics” (replacing “Untitled Tag”)
D) Click in the “Tag Configuration” box
E) From the slideout, click “Google Analytics: Universal Analytics”
F) In the “Google Analytics Settings” dropdown, click “New Variable…”
G) In the slideout, name the variable “GA – Tracking ID” (replacing “Untitled Variable”)
H) Click into the “Variable Configuration” to display the fields and in the “Tracking ID” box, paste the Google Analytics Tracking ID from a previous step
I) Click “Save”
J) Click in the “Triggering” box
K) In the slideout, click “All Pages”
L) Click “Save”
M) Click “Submit”
N) In the “Version Name” box, type “Google Analytics”
O) Click “Publish”
Back to TopGive Client Access to GTM
A) Click “Admin”
B) Click “User Management”
C) Click the blue “+” and “Add users”
D) Enter the following:
- Email Addresses: client email address
- Click both checkboxes (Administrator and User)
- Click “Set all” and select all checkboxes
E) Click “Invite”
Back to TopUpdate Google Cloud Console
A) Login to Google Cloud Console using [email protected] by clicking here
B) Click on the project dropdown and select the product/market project
Note: You may need to click on “All” if you don’t see the product/market project in the “Recent” list
C) Click “Restrict Key”
D) Click “Add an Item”, enter the client’s Live Website (no https://) and click “Done”
E) Click “Save”
Back to Top