Open the Postcard Master Template
A) Find the master template PDF for the market and postcard you are sending and open it in Adobe Illustrator.
Example: the ProcessKit project says, “June Postcard B” and the client is “Illuminate Portland”.
You’ll navigate to Google Drive > Product Illuminate > Markets > Market – Portland > PDX_Postcards > PDX_Postcards_2020-06_B
Back to TopOpen the Client Templates
A) In Google Drive, navigate to the “_Client Templates” folder for the market. This can be found in the same folder as above, just up a few levels.
Google Drive > Product Illuminate > Markets > Market – [Market Name] > [Market Initials]_Postcards > _Client Templates
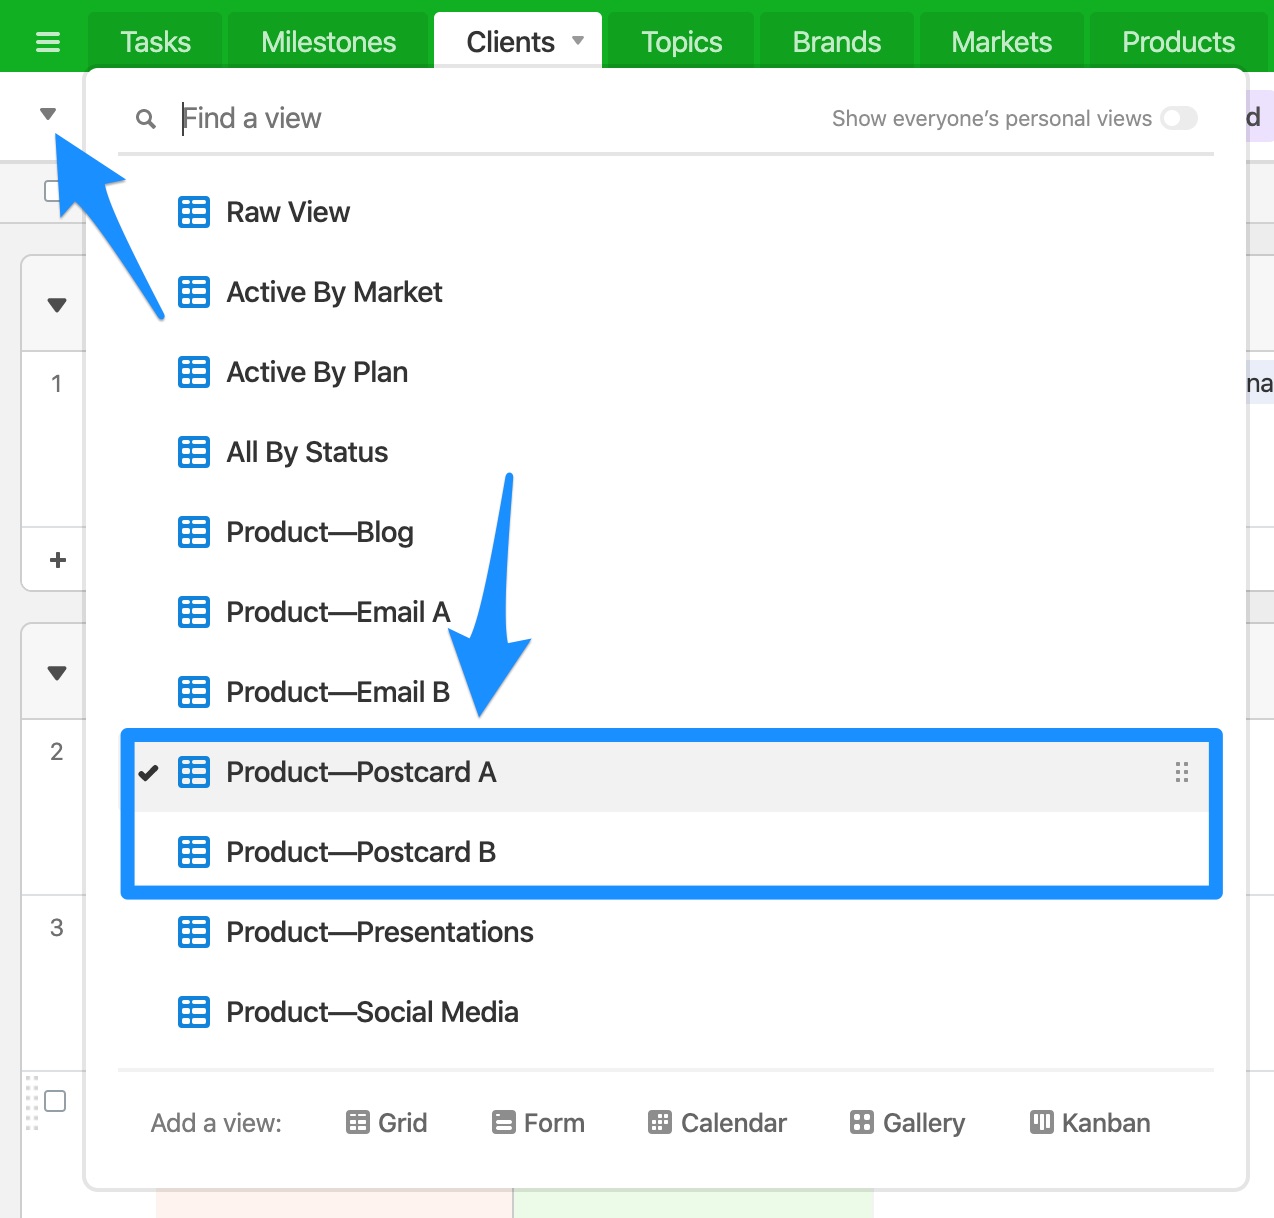
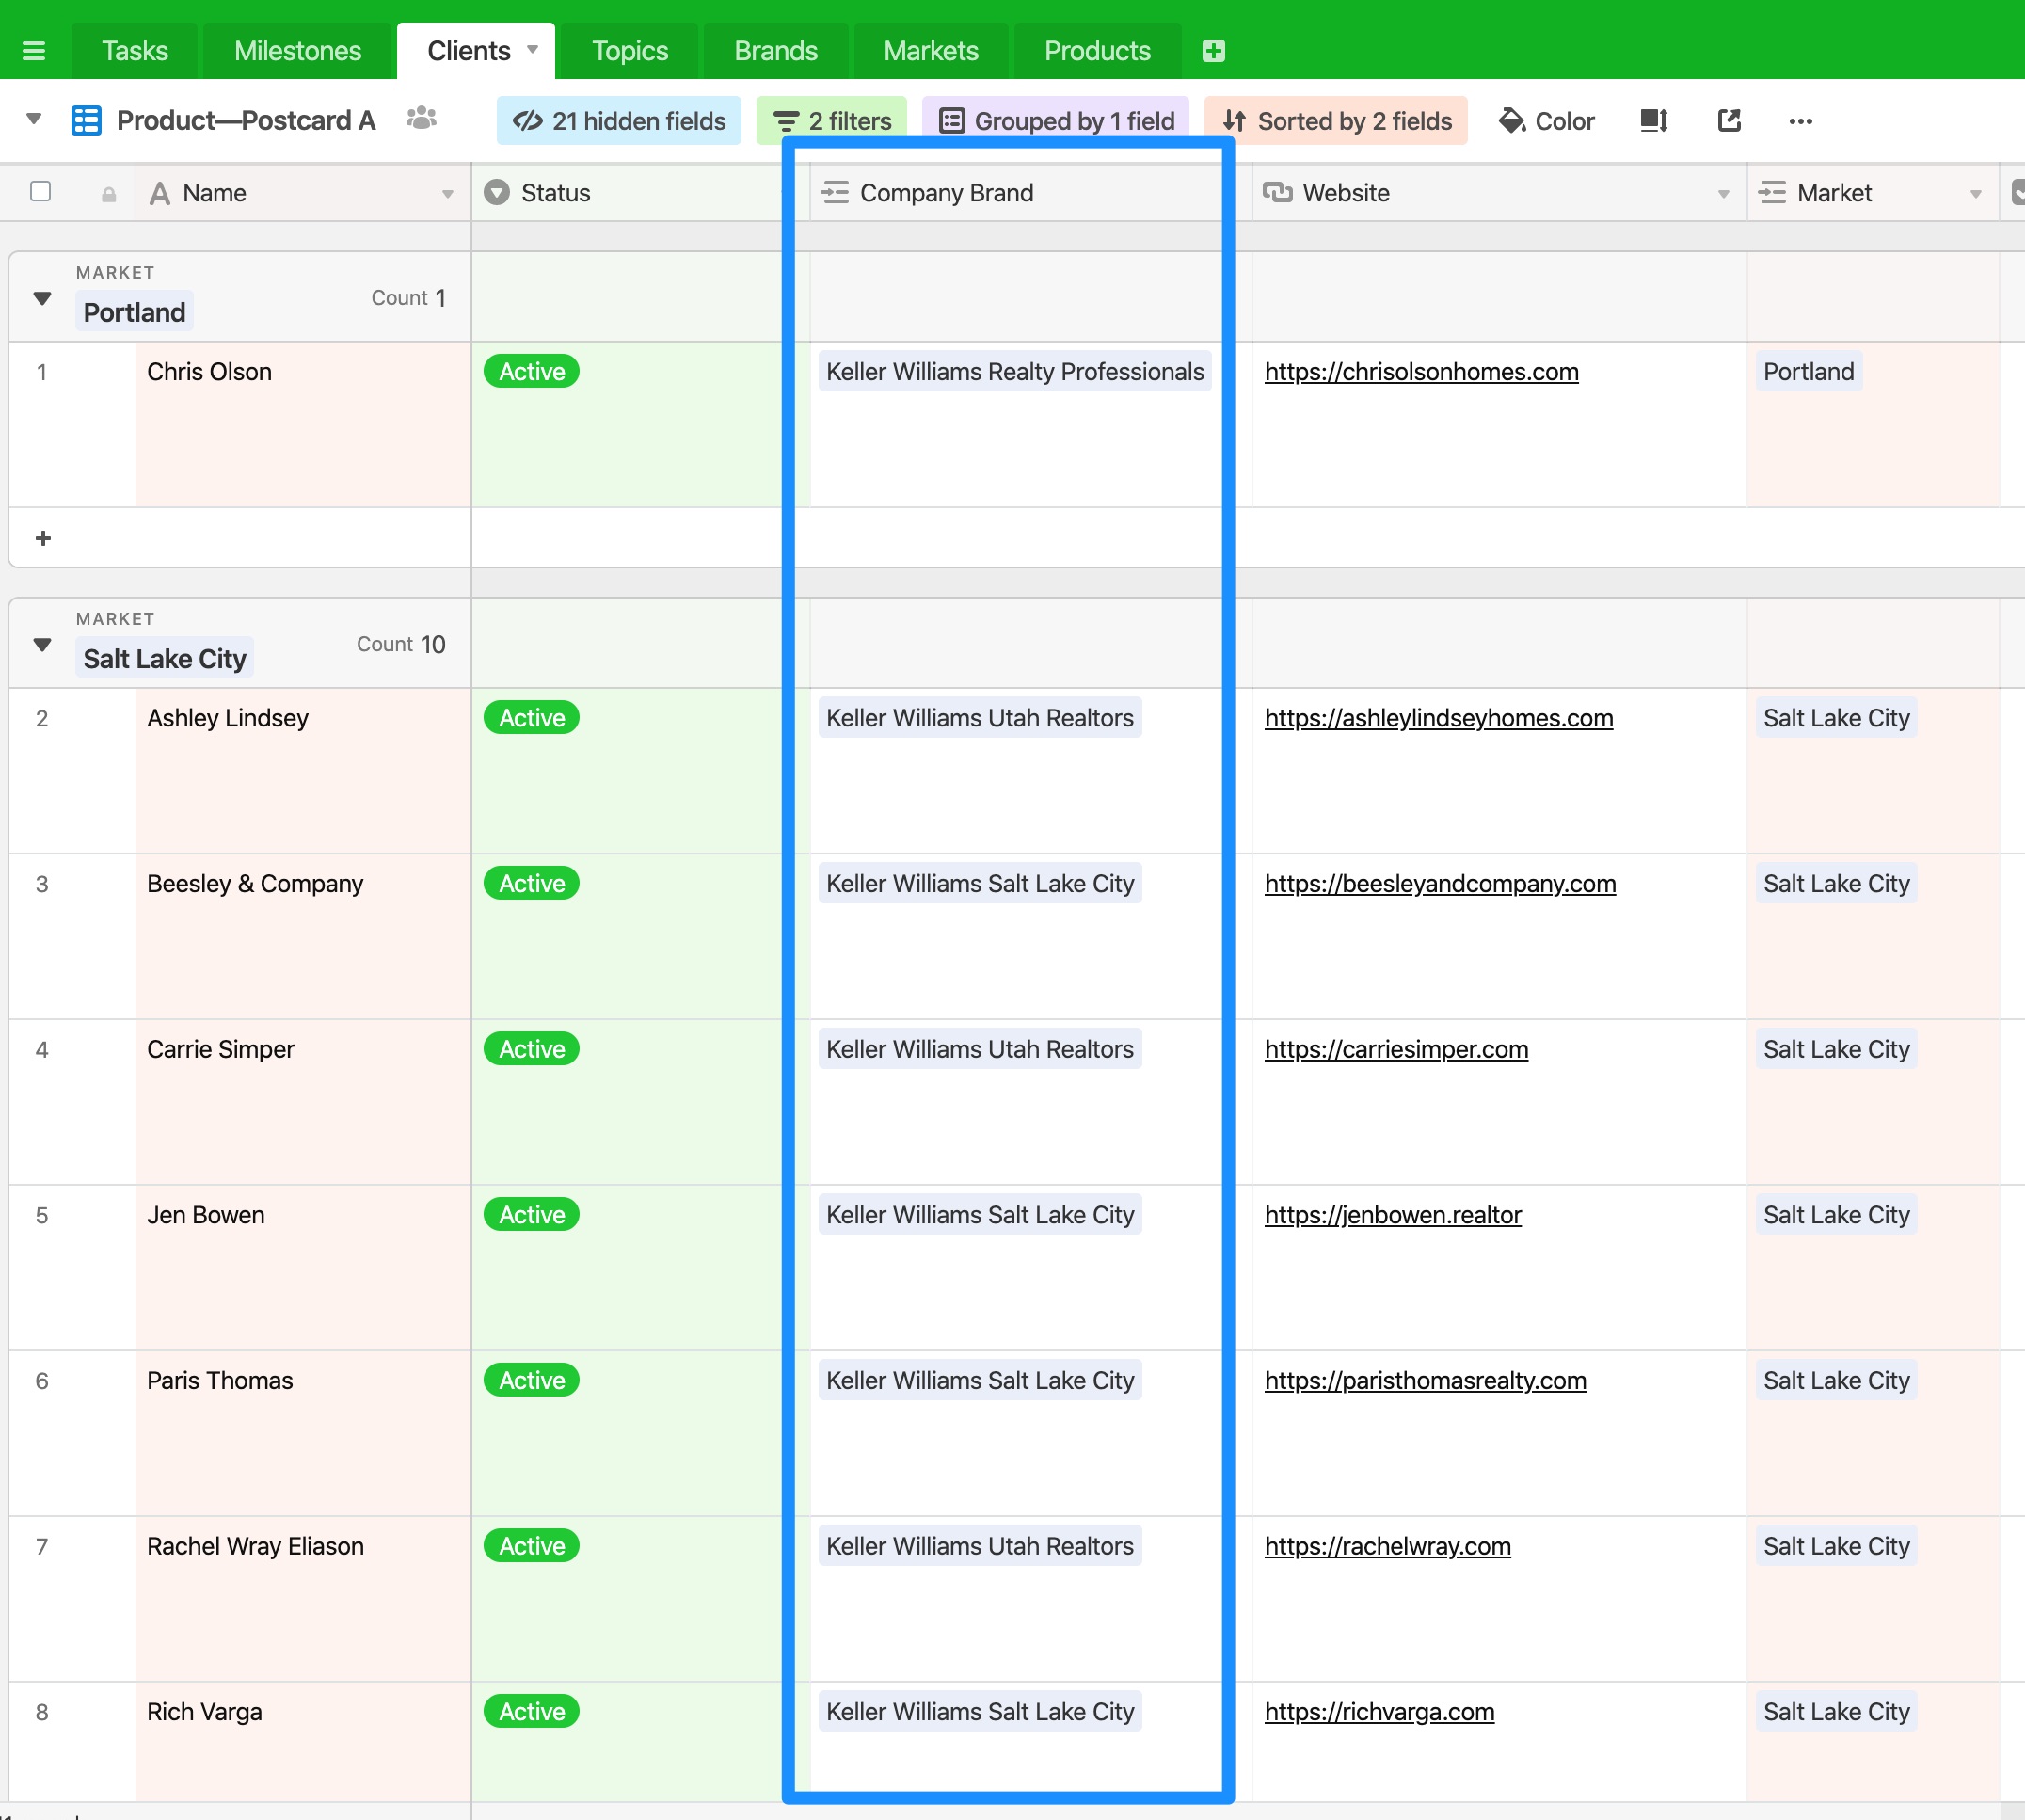
B) In Airtable, navigate to the Clients tab and open the corresponding Postcard view (either Product – Postcard A or Product – Postcard B). This will give you the list of clients whose postcards will need to be mailed.
For Postcard A, you can click this direct link.
For Postcard B, you can click this direct link.
Create the Individual Client Postcards
A) Starting with the first client listed in Airtable, open their template PDF in Adobe Illustrator. NOTE: make sure there aren’t any missing linked assets! If there are, please search for and relink them.
B) Make sure the bottom artboard is active (simply click anywhere on it), then select and copy everything in the client’s template. To do this, press CTRL + A (CMD + A on Mac) OR go to Select > All in the menu.
D) Go to the Postcard Master Template you opened in Step 1 and select the layer named “Client Layer” from the Layers palette.
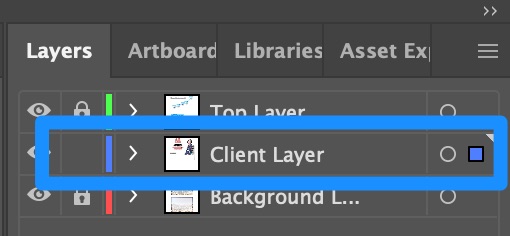
E) Make sure the bottom artboard is active (simply click anywhere on it), then press SHIFT + CMD + V (SHIFT + CTRL + V on a PC) to Paste in Place. You can also navigate to Edit > Paste in Place from the menu.
Back to TopRecolor Artwork
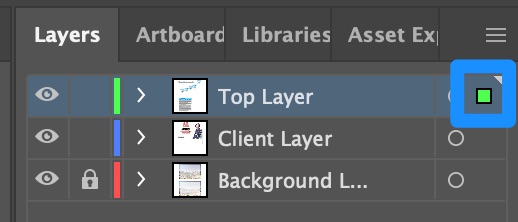
A) Make sure the “Top Layer” is unlocked. Then, select all elements in the top layer named “Top Layer” by clicking directly to the right of the open circle on the Layers palette. A square should appear and all elements in the Top Layer should be selected.
B) In the top shortcuts bar, click “Recolor Artwork.”

C) Select the color palette that matches the client and click “OK.”
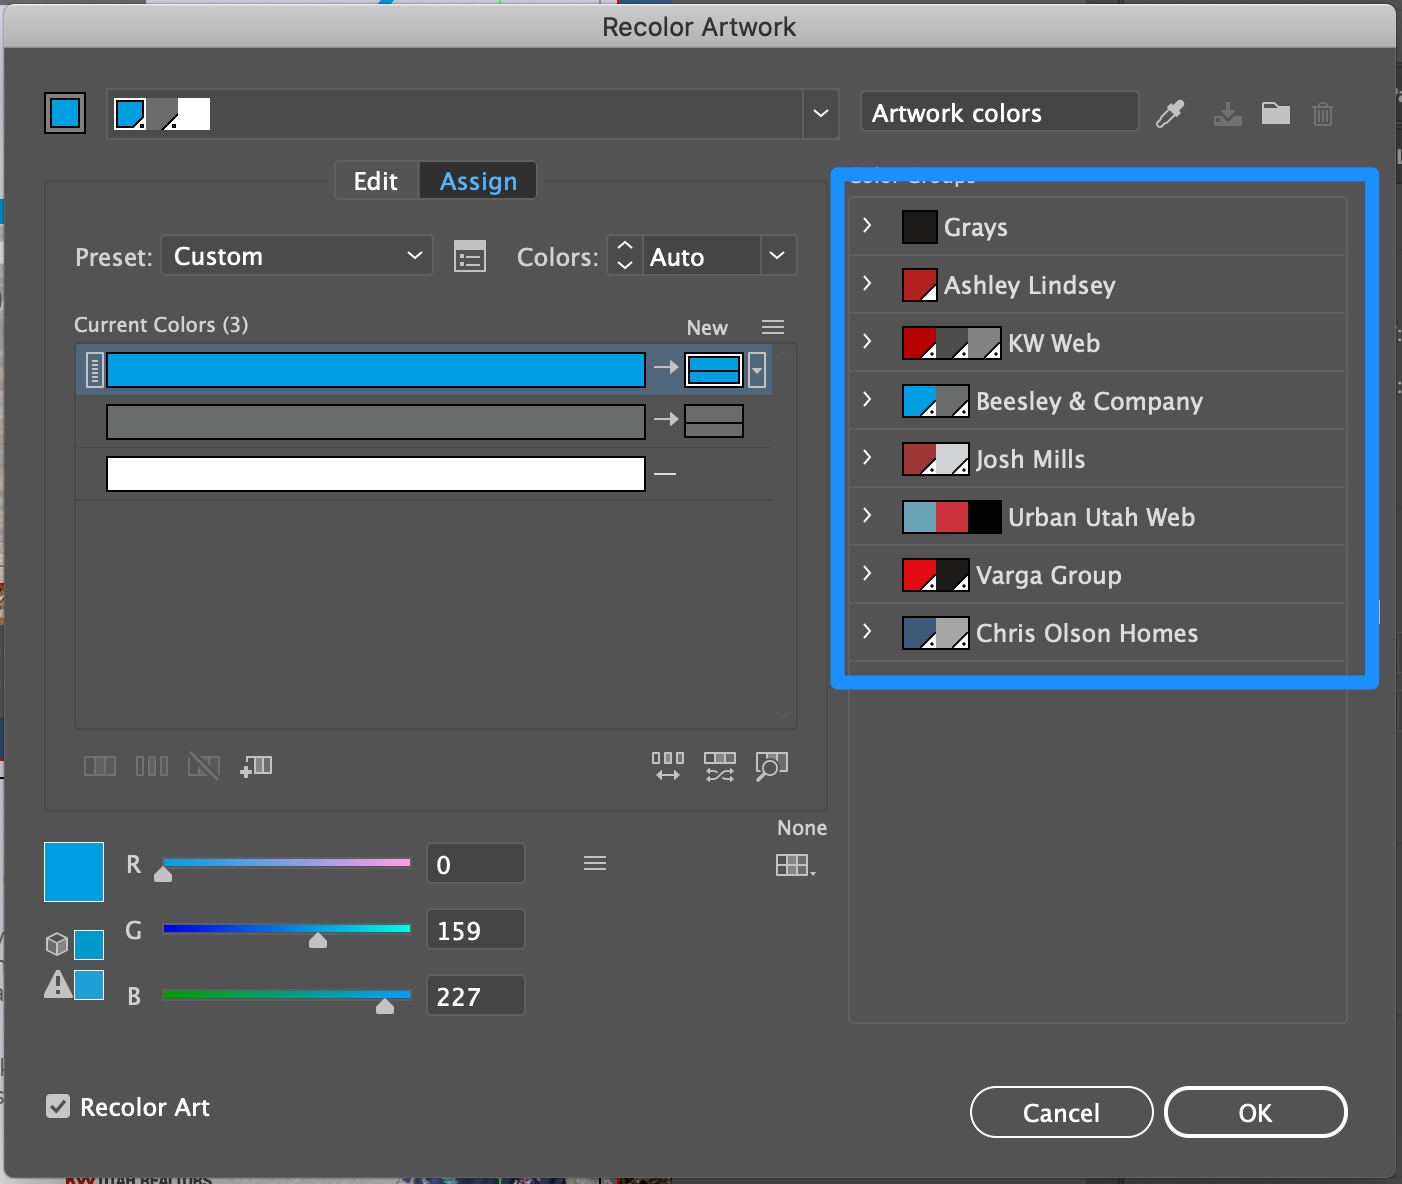
If the client doesn’t have their own color palette, use the color palette for their company brand. You can find their company name under the “Clients” tab in Airtable.
Save As and Create JPEG Images
A) Once you’ve recolored the artwork, save the postcard by pressing SHIFT + CMD + S (SHIFT + CTRL + S on a PC) to Save As…
B) Replace the beginning initials of the postcard with the client’s initials. Click Save.
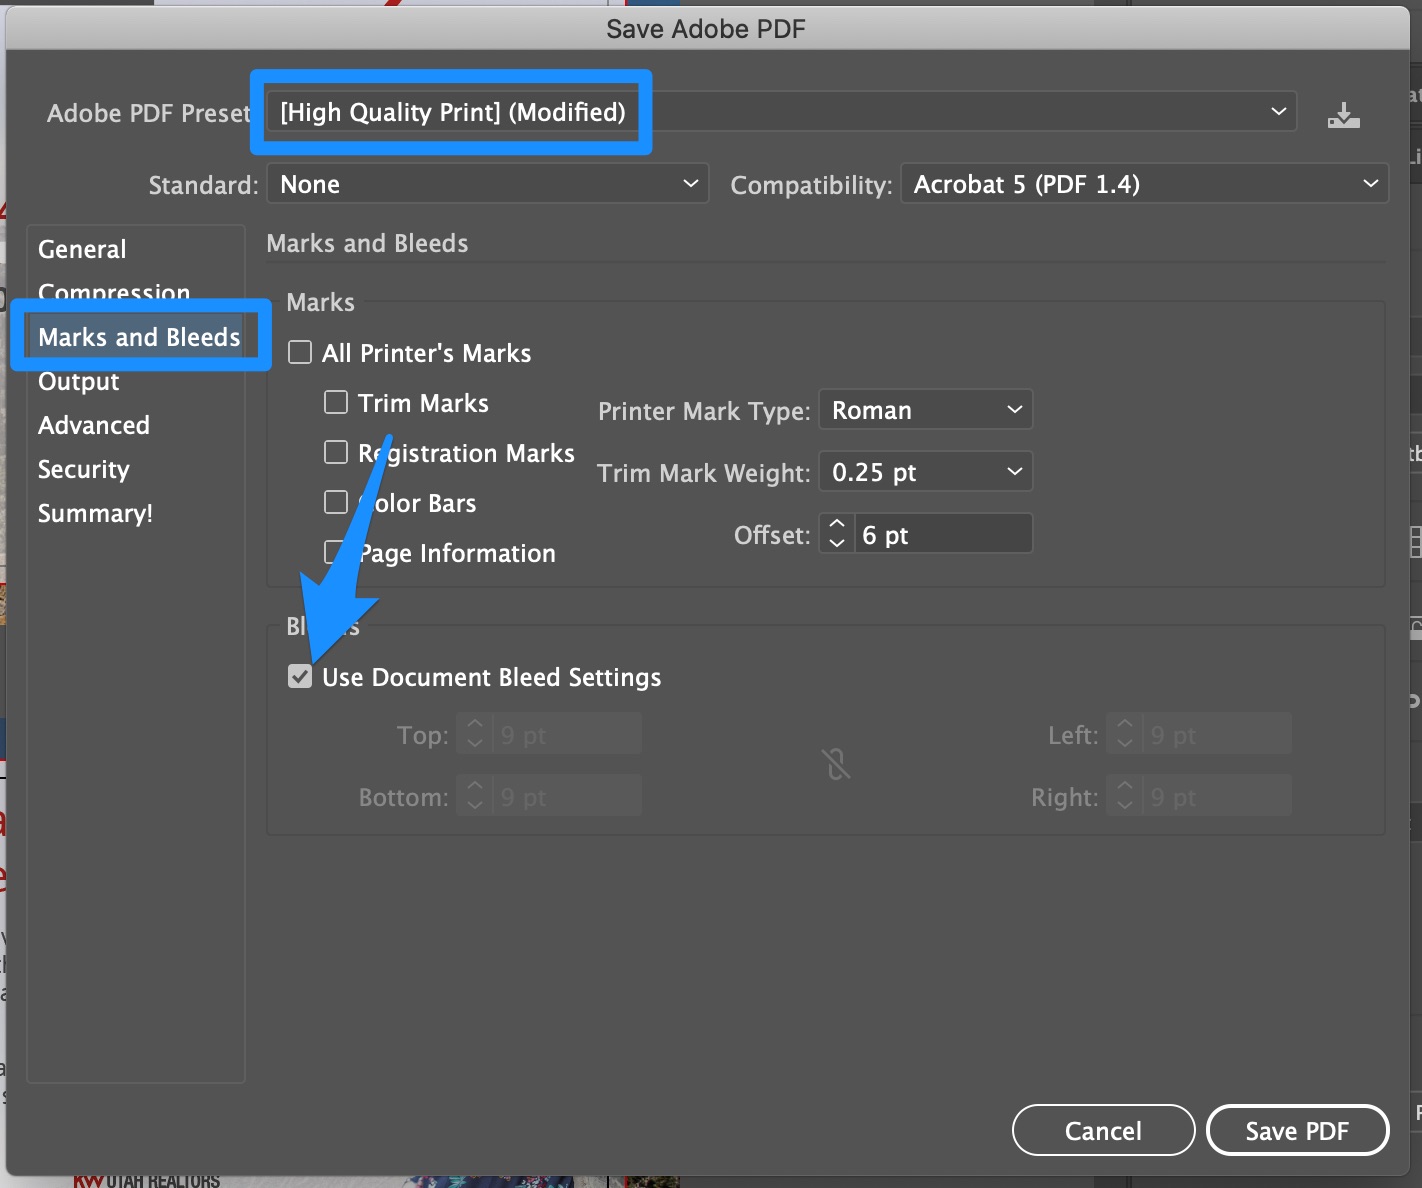
C) In the Save Adobe PDF dialog box, choose “High Quality Print” and then, in the “Marks and Bleeds” section, check the “Use Document Bleed Settings” box. Then, click “Save PDF.”
The PDF will save and automatically open in Adobe Acrobat Pro.
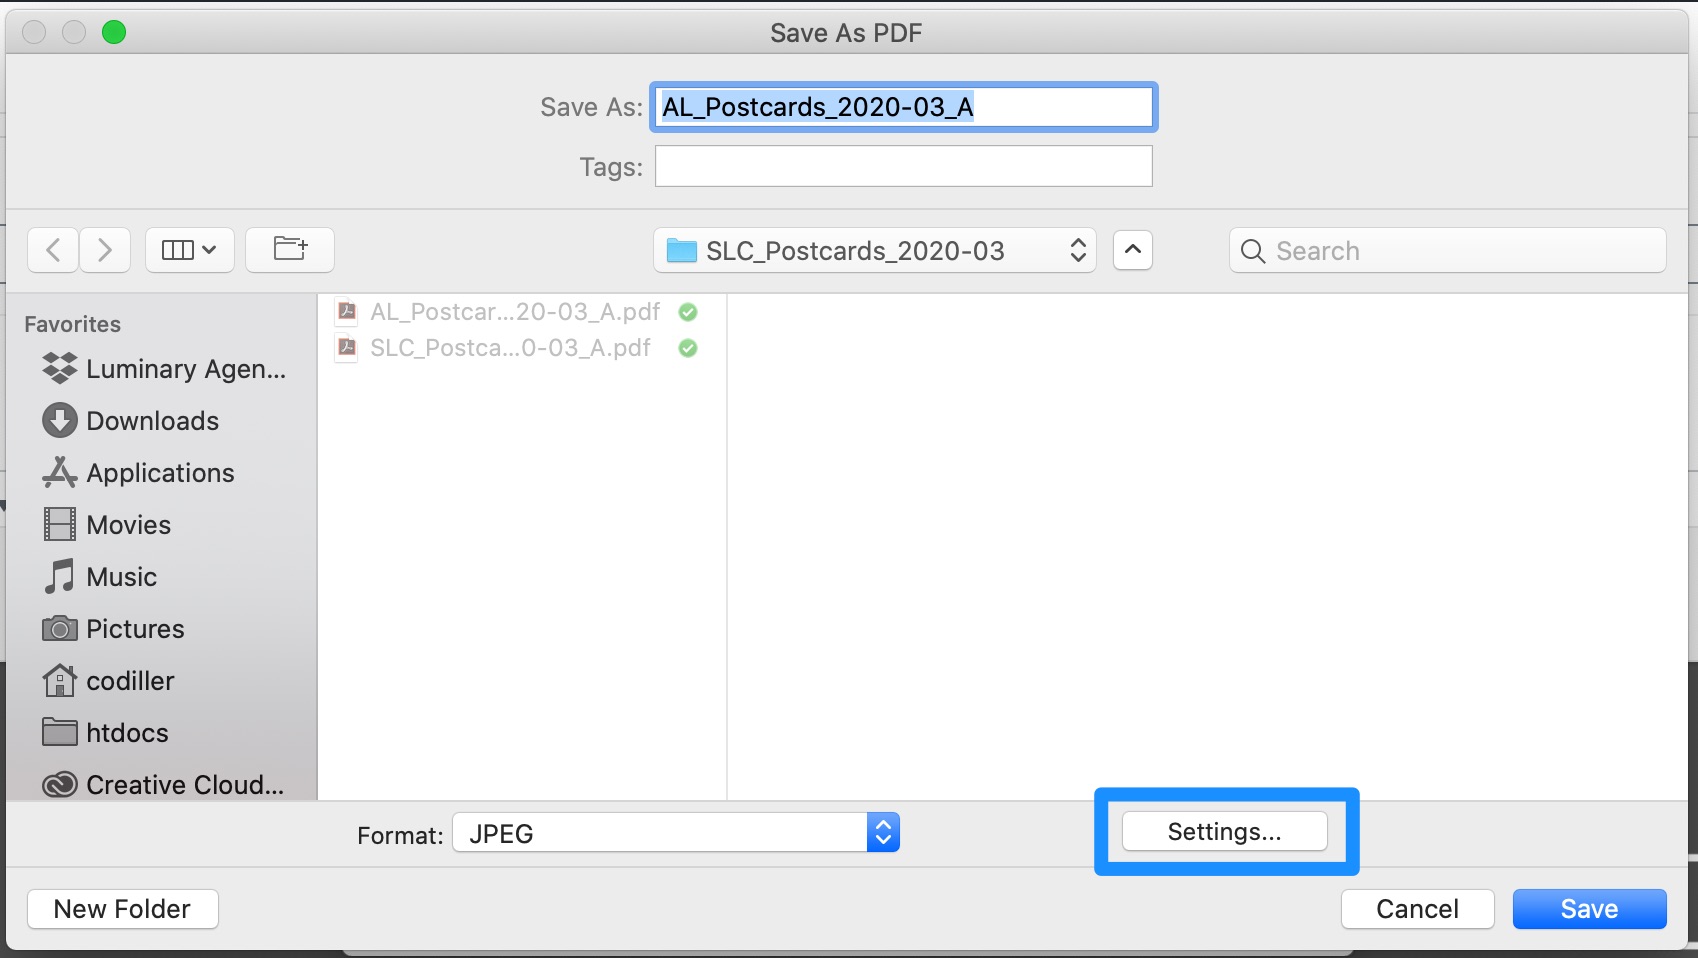
D) In Acrobat Pro, go to File > Export To > Image > JPEG. In the dialog box that appears, click “Settings…”
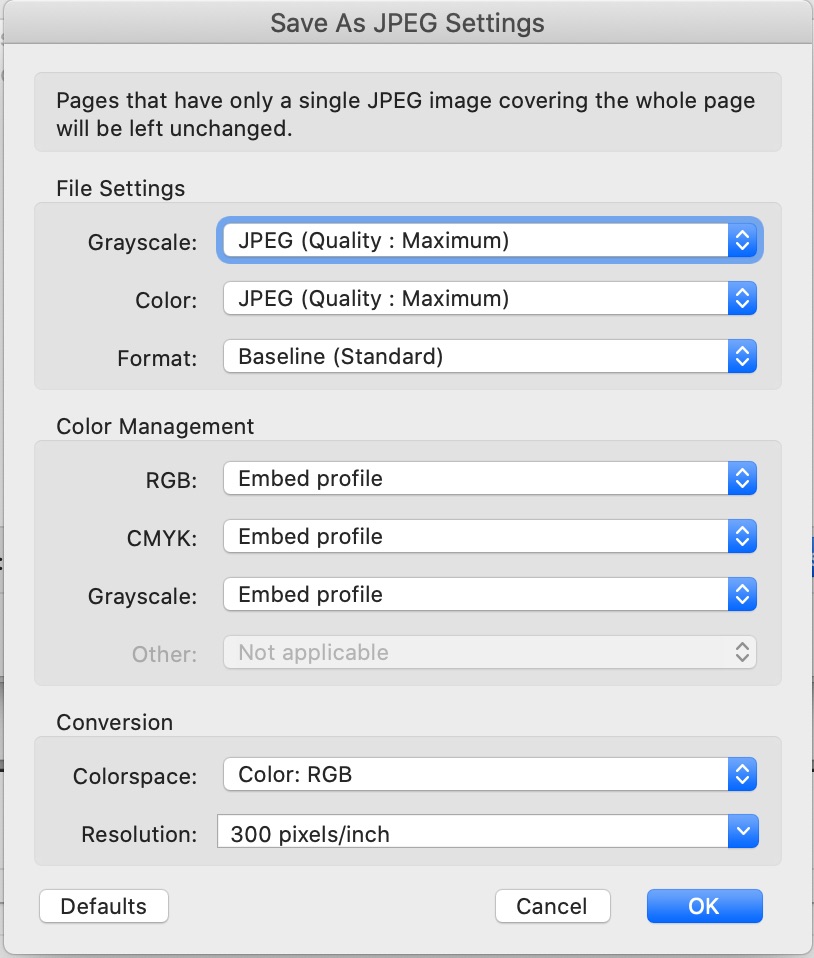
E) Make sure each of the following settings is correct and click “OK.”
F) Back in the dialog box from step D, click “Save.”
Back to Top