Login and Go To WP File Manager
A) Login to the Customers website and go to WP File Manager. You can go there directly by clicking this link.
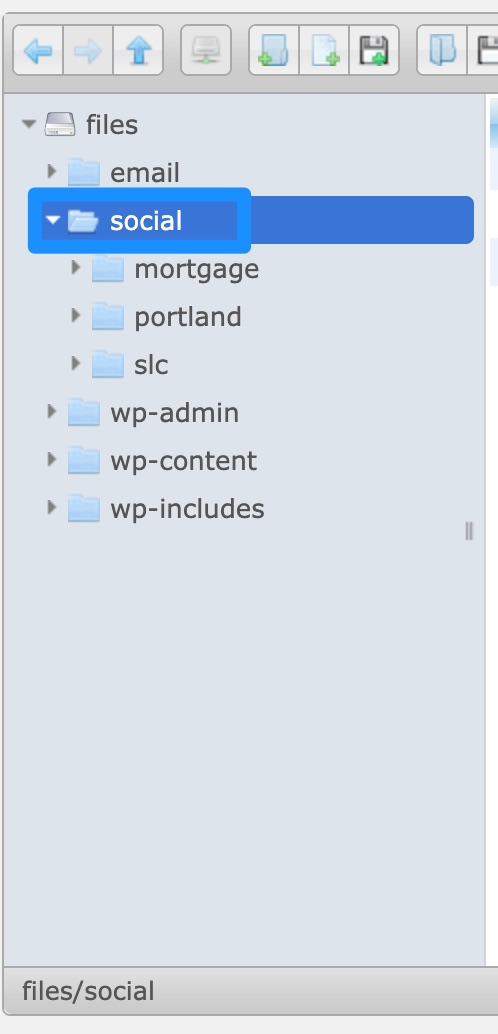
B) Click on the “Social” folder.
Create a New Folder
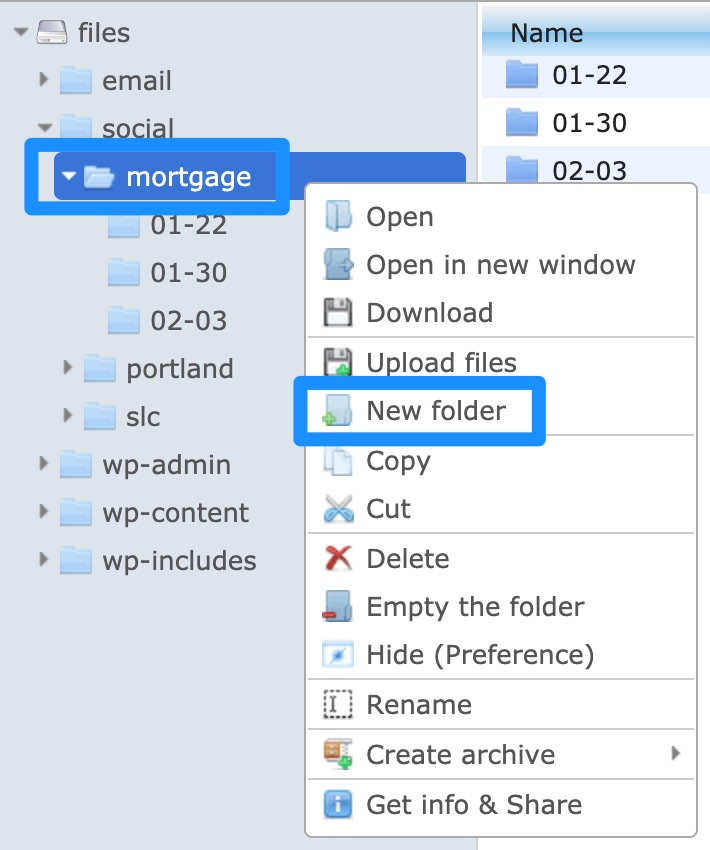
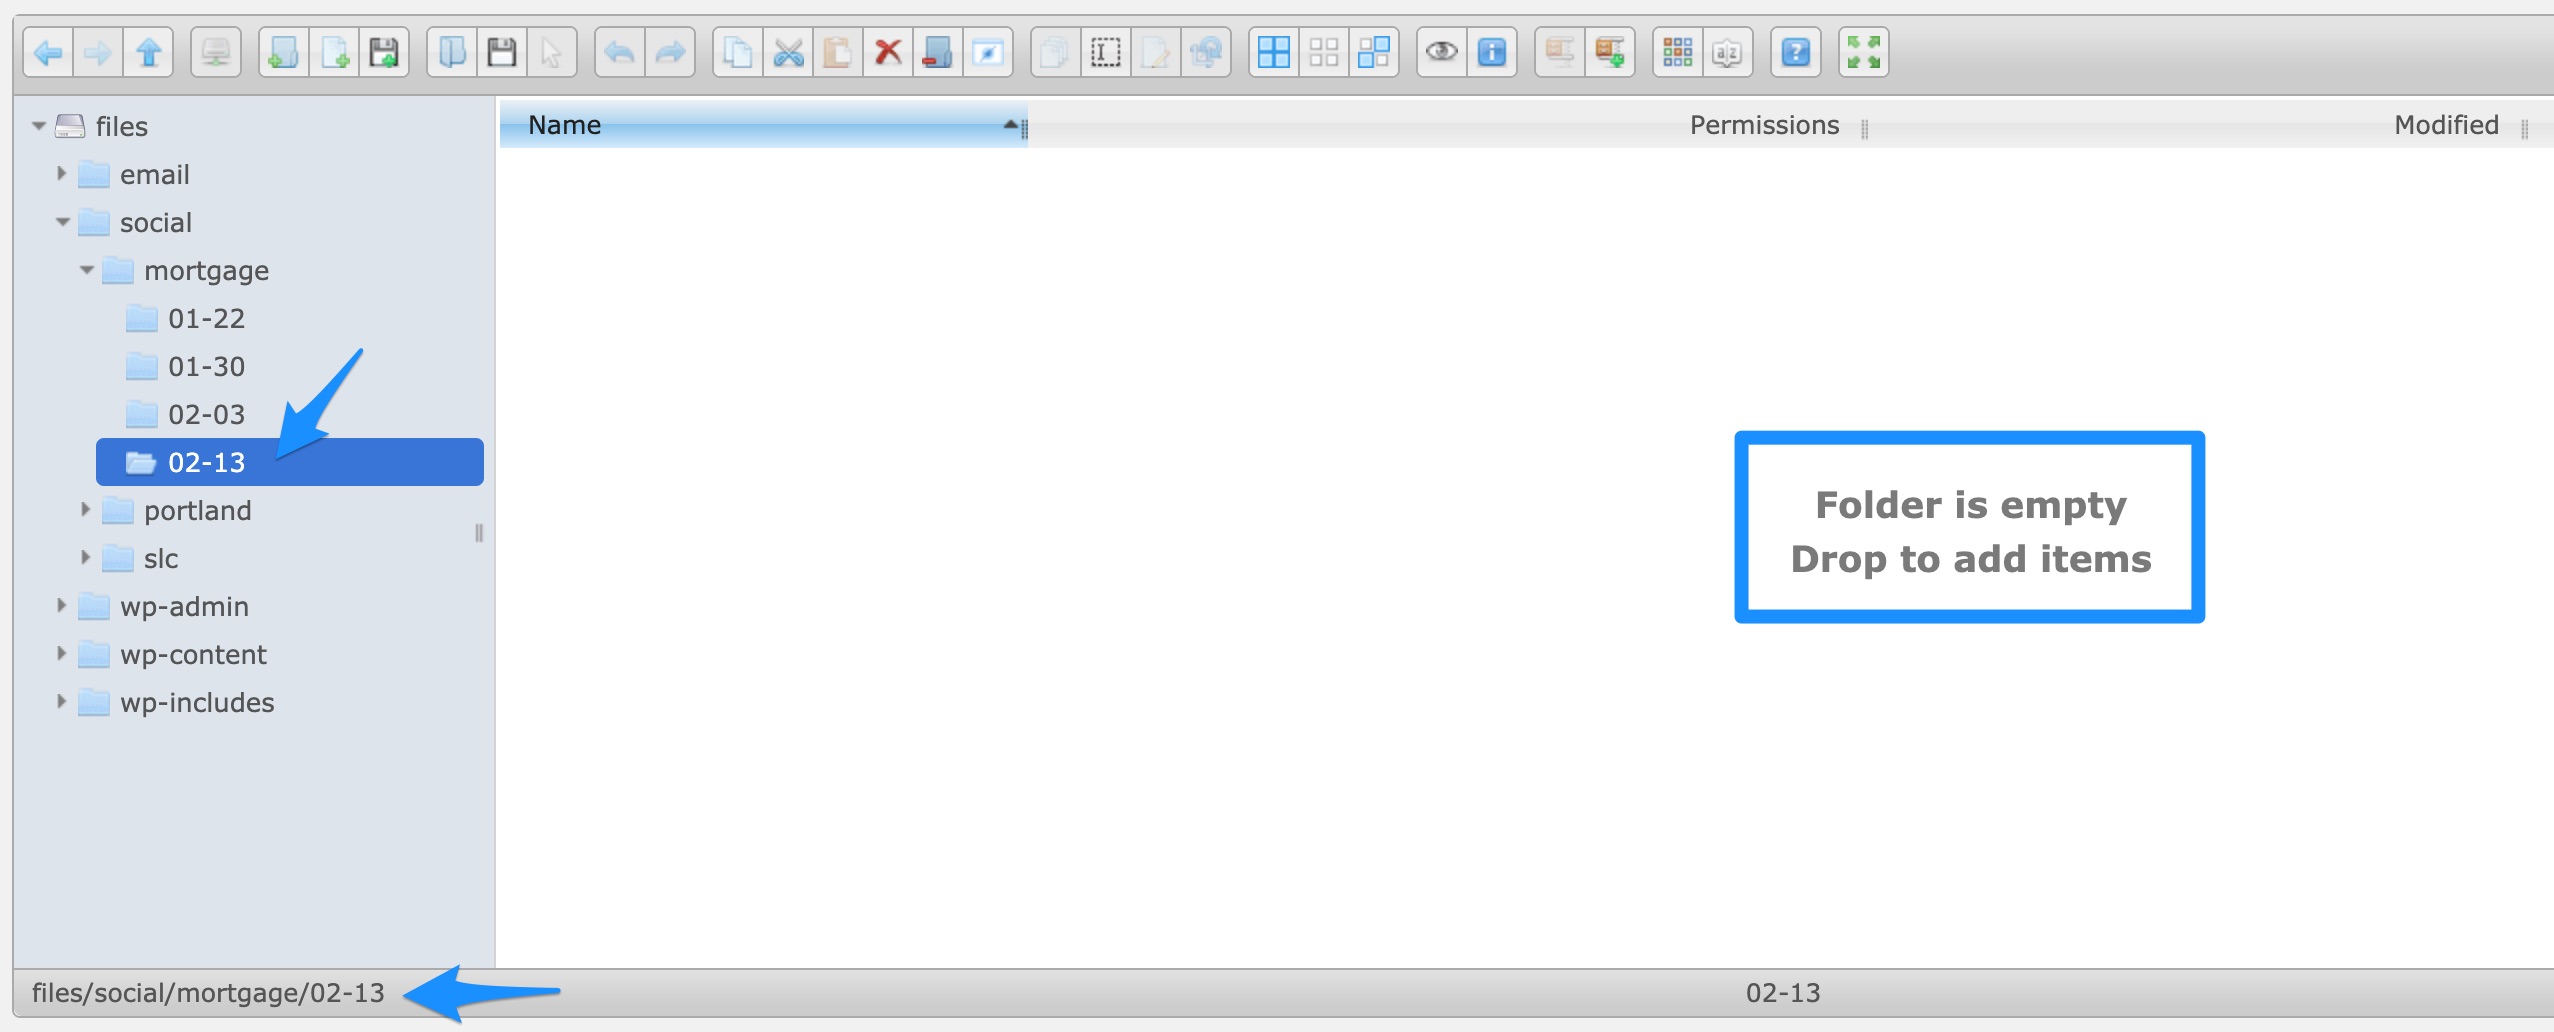
A) Right-click on the folder for the market listed in Airtable and click “New folder.”
Example: in Airtable, the Milestone’s market is “Mortgage” for this task, so I’ll right-click on the “mortgage” folder:

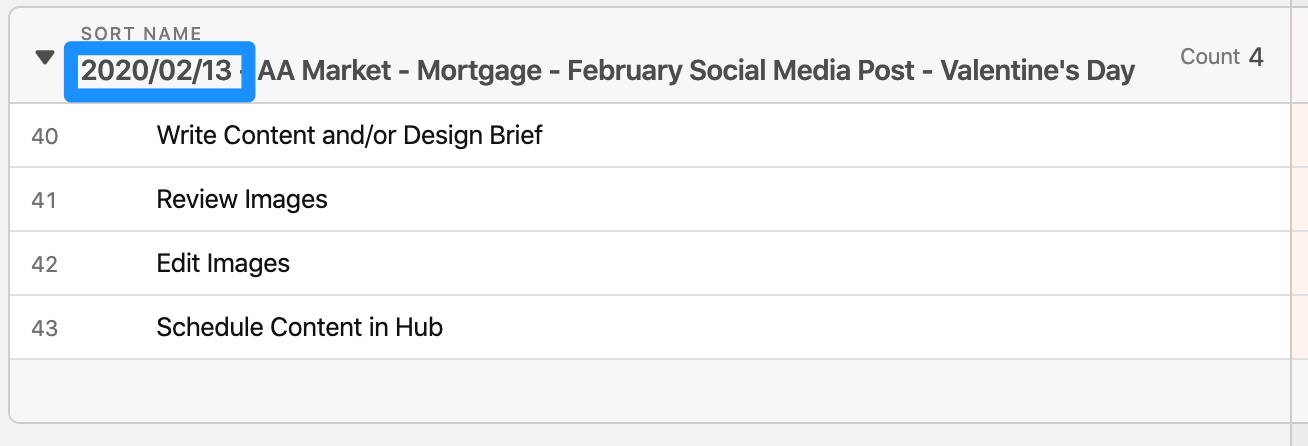
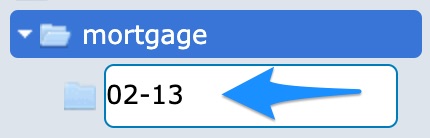
B) Next, give the folder a name that corresponds with the Milestone’s Due Date in Airtable and press “Enter” on your keyboard.
Example: if the Milestone’s Due Date in Airtable is 2020/02/13, you would name the folder “02-13.”
C) Click on the folder you just created. You should see the folder’s filepath in the bottom-left corner and the message should say “Folder is empty Drop to add items.”
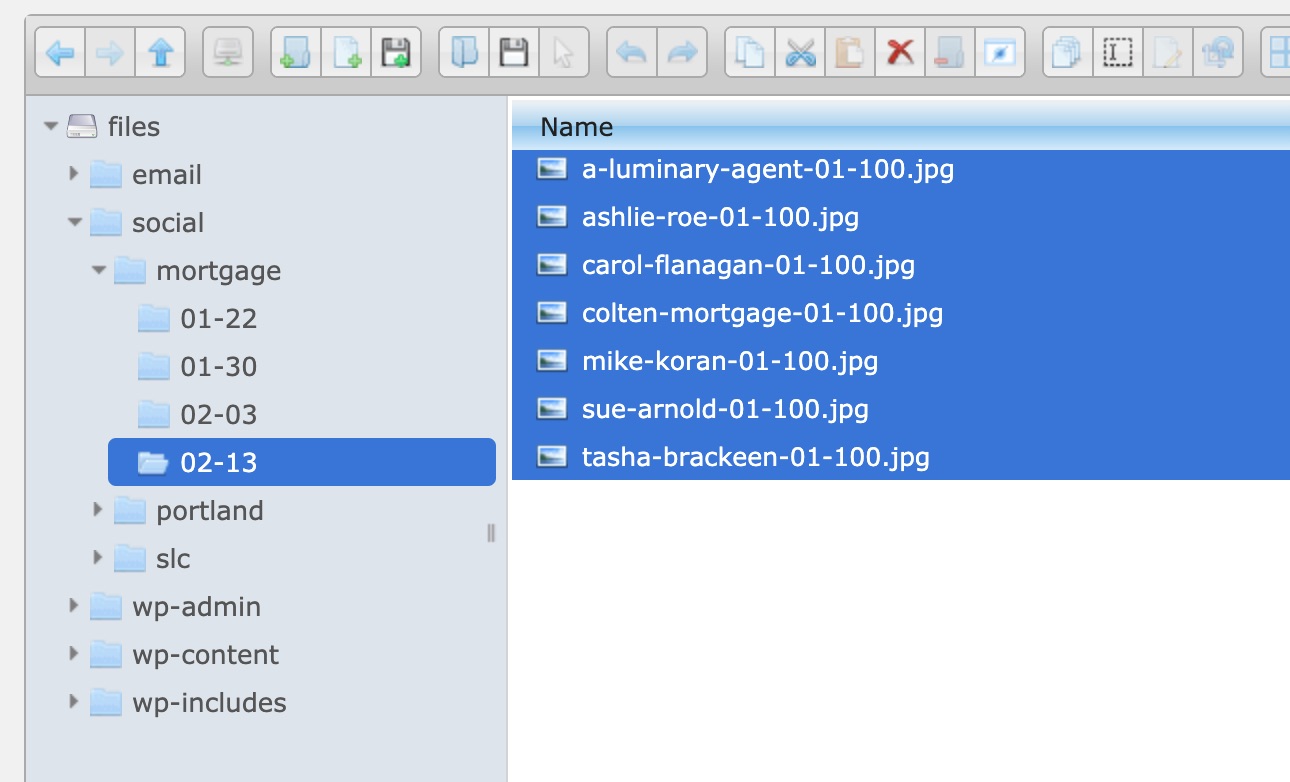
Find and Upload the Graphics
A) Find the graphics in Google Drive. They will be in the Product Illuminate shared drive under: Markets > Market – [PK Project’s Client] > Social > [Project’s End Date Year] > [Project’s End Date]_[Project’s Title].
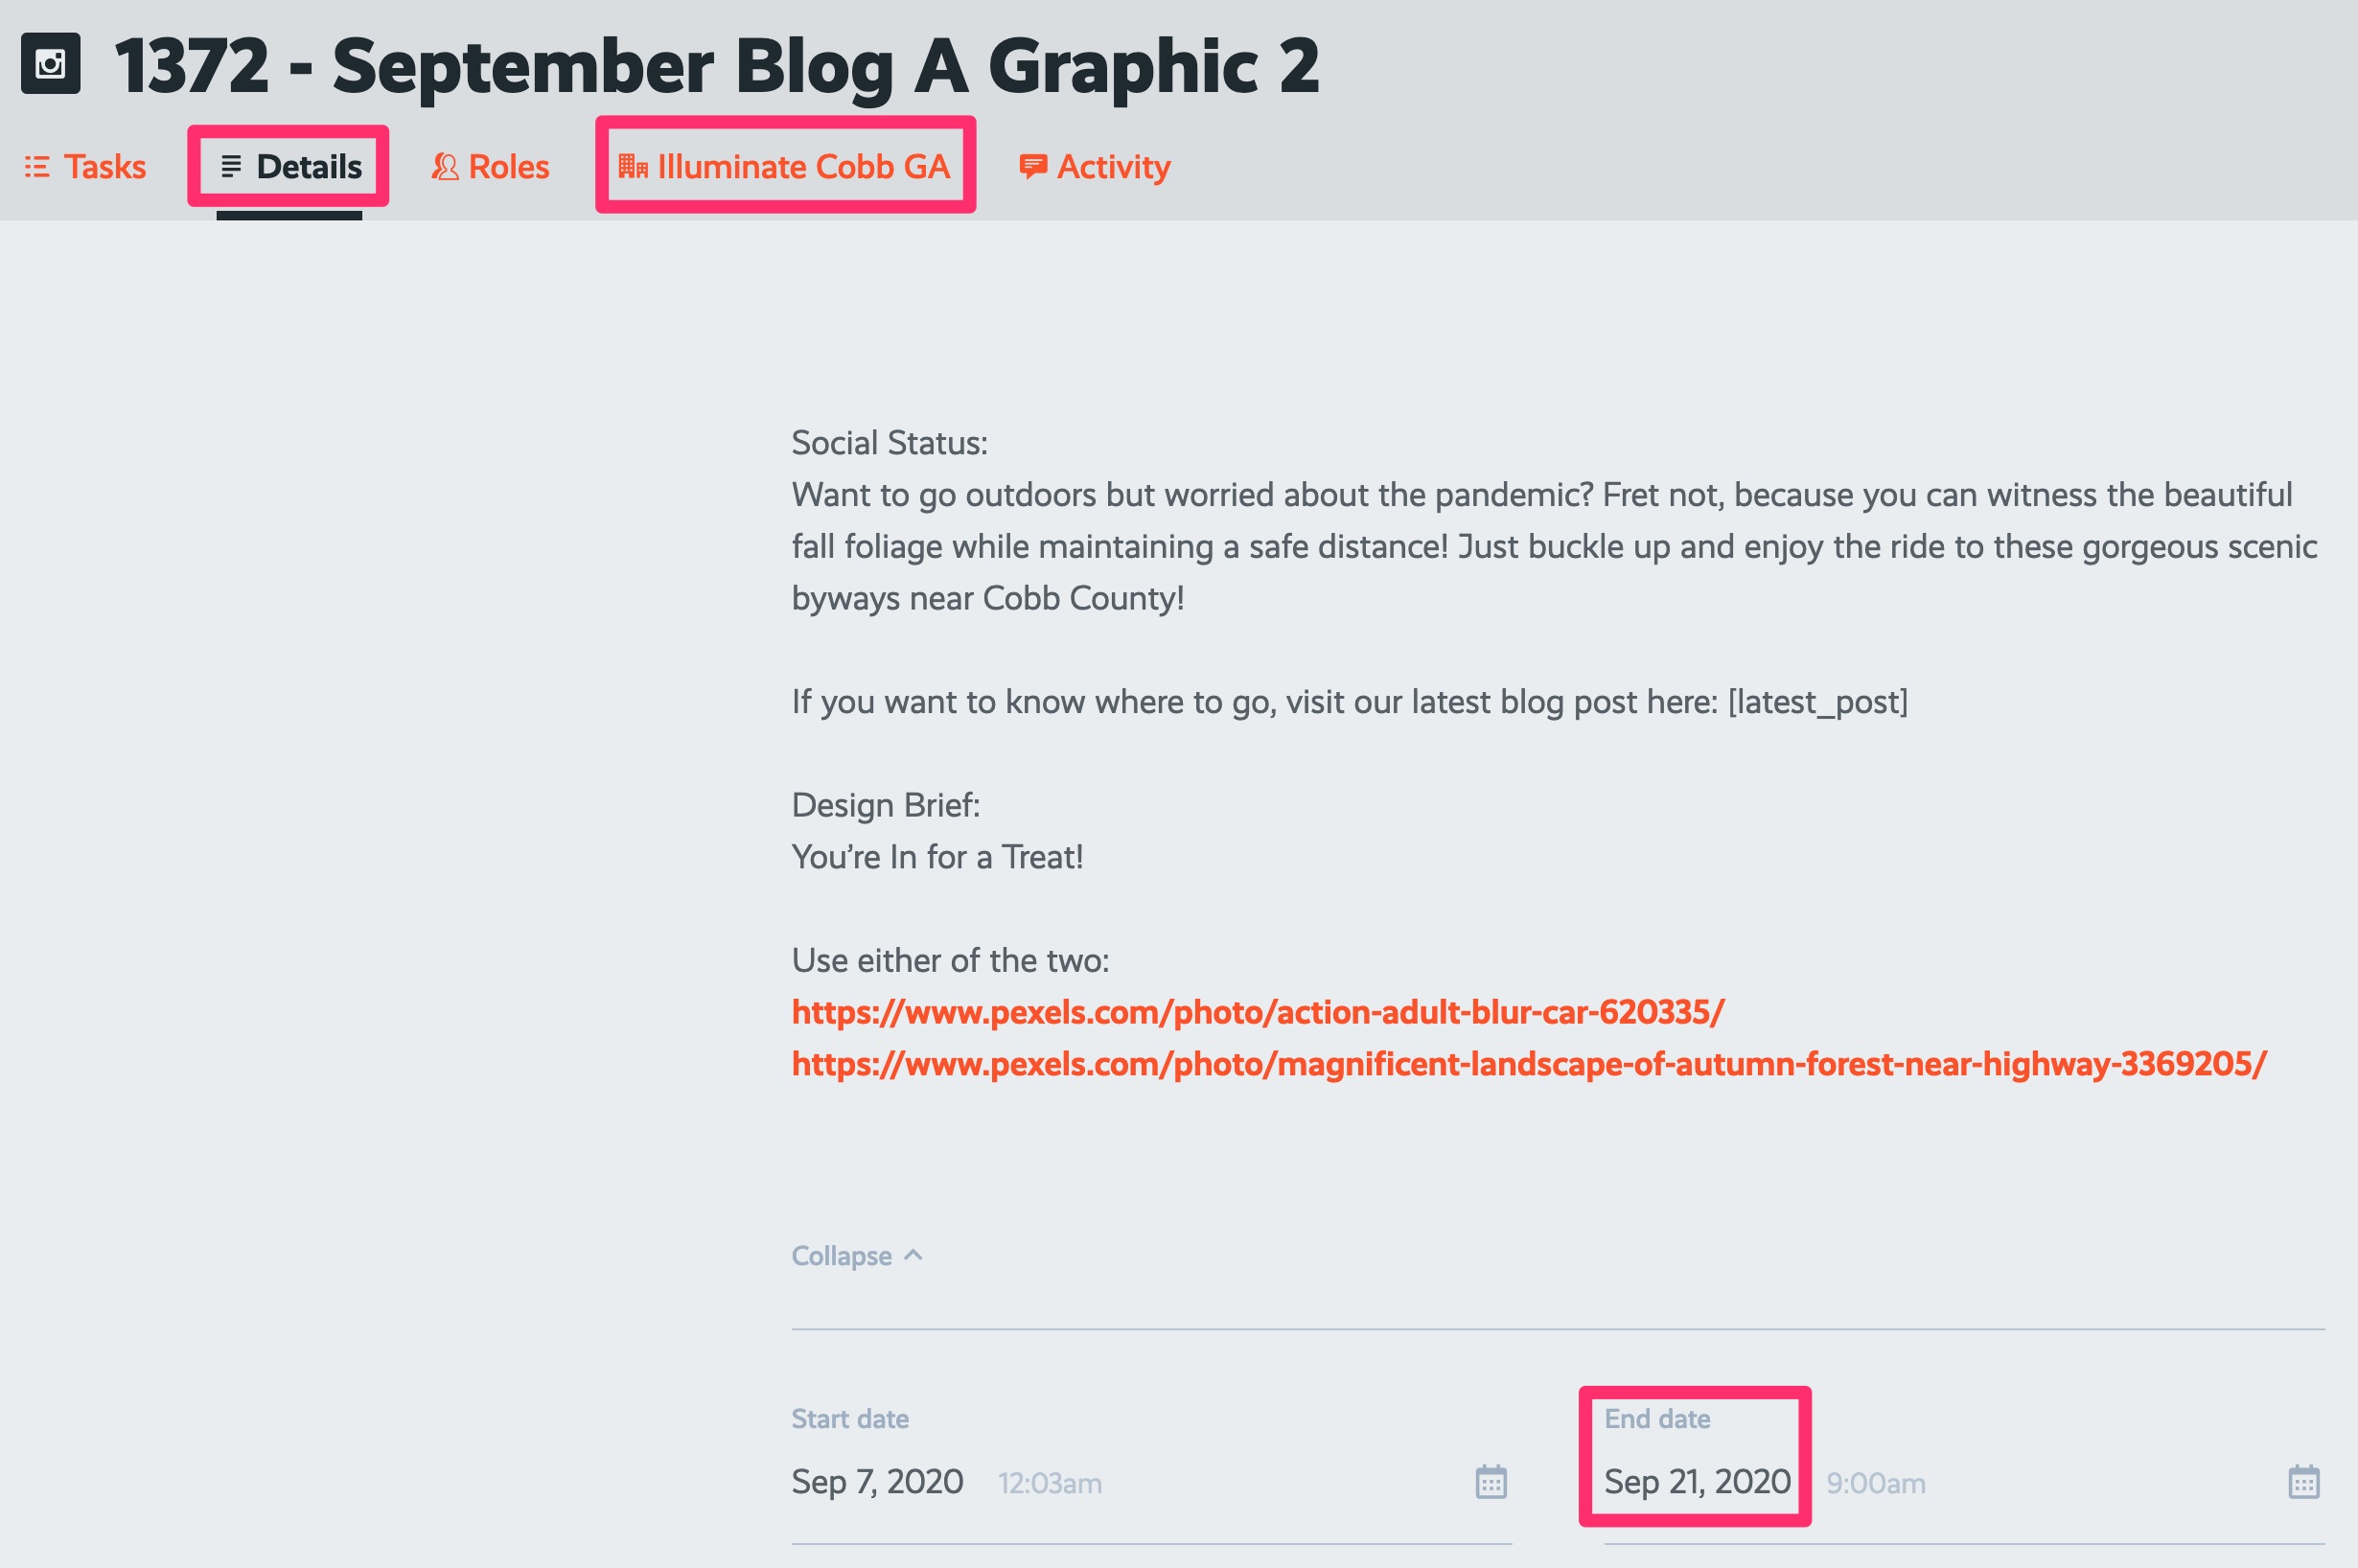
Example: for the following PK Project, here’s the filepath you would follow: Product Illuminate > Markets > Market – Cobb GA > Social > 2020 > 2020-09-21_1372 – September Blog A Graphic 2.
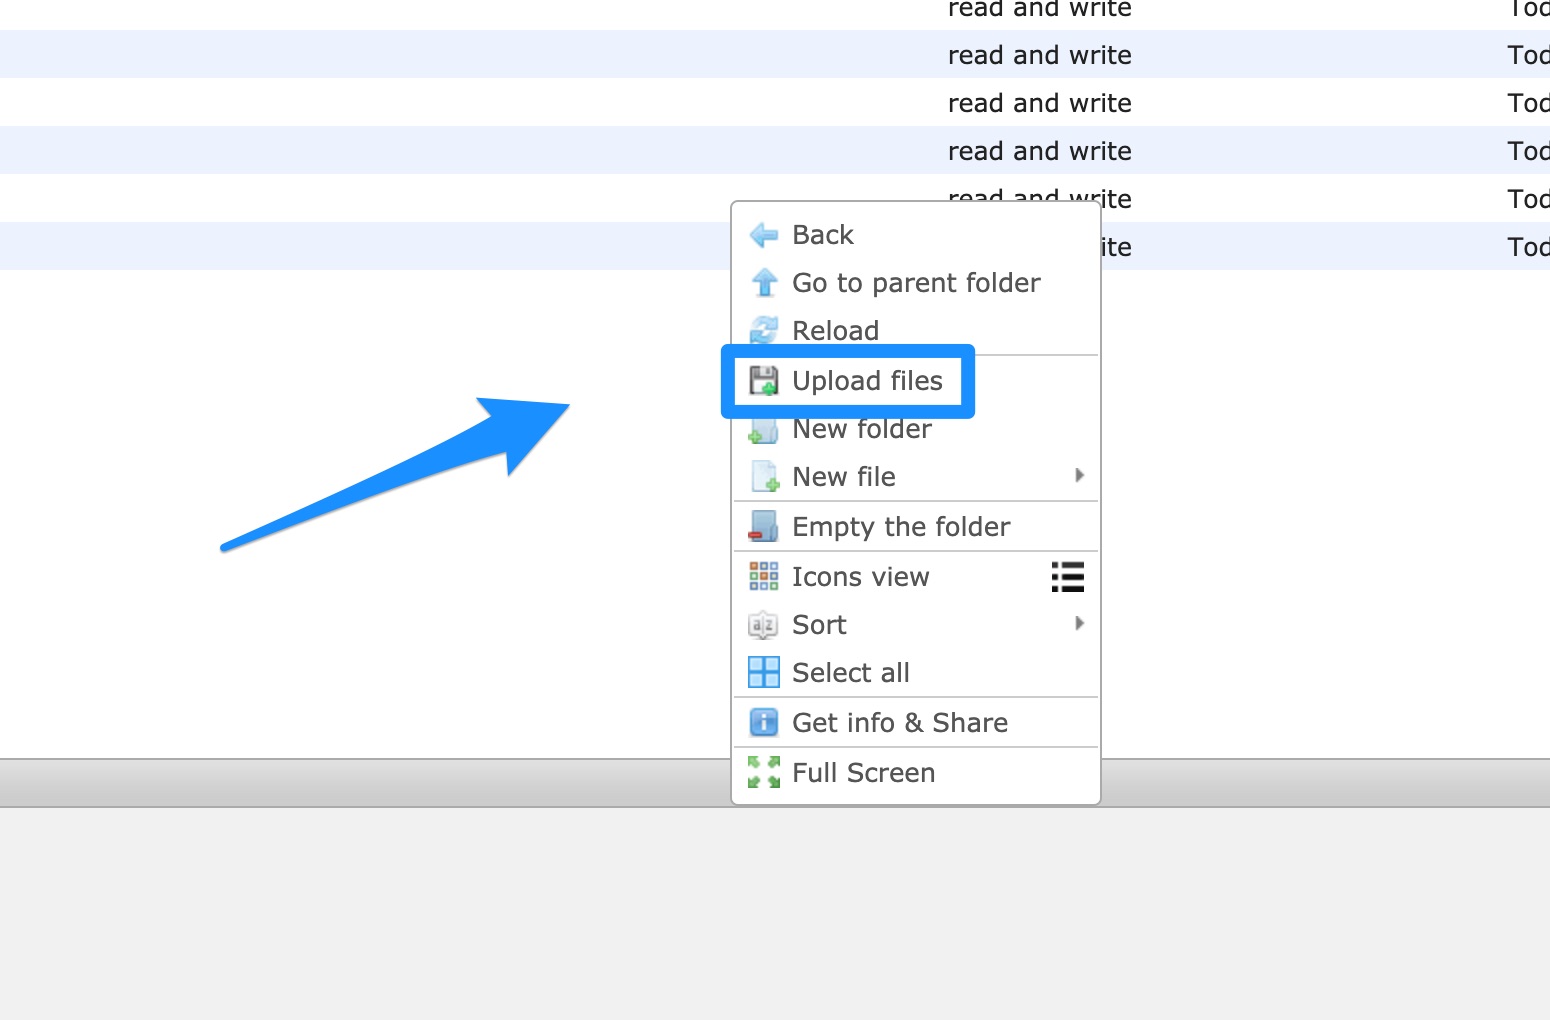
B) Upload the graphics from Google Drive into the folder you created in Step 3. You can do this by dragging and dropping, or you can right-click in the white area and click “Upload files.”
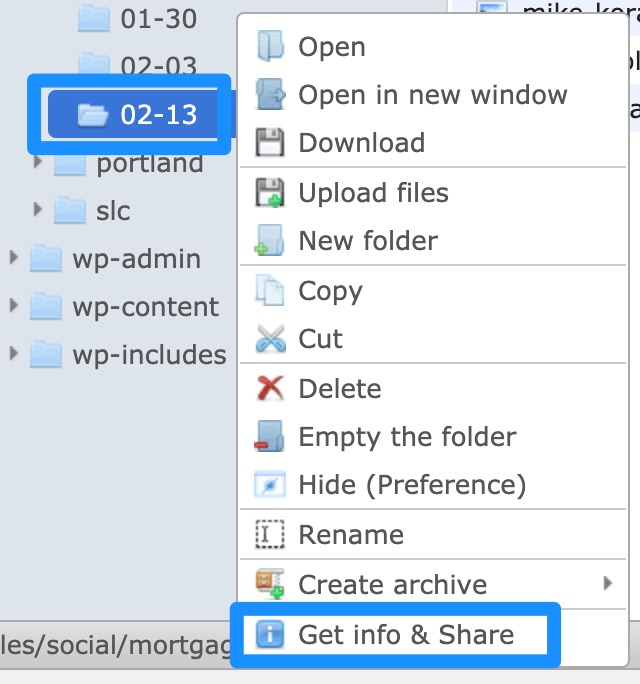
Copy the Filepath
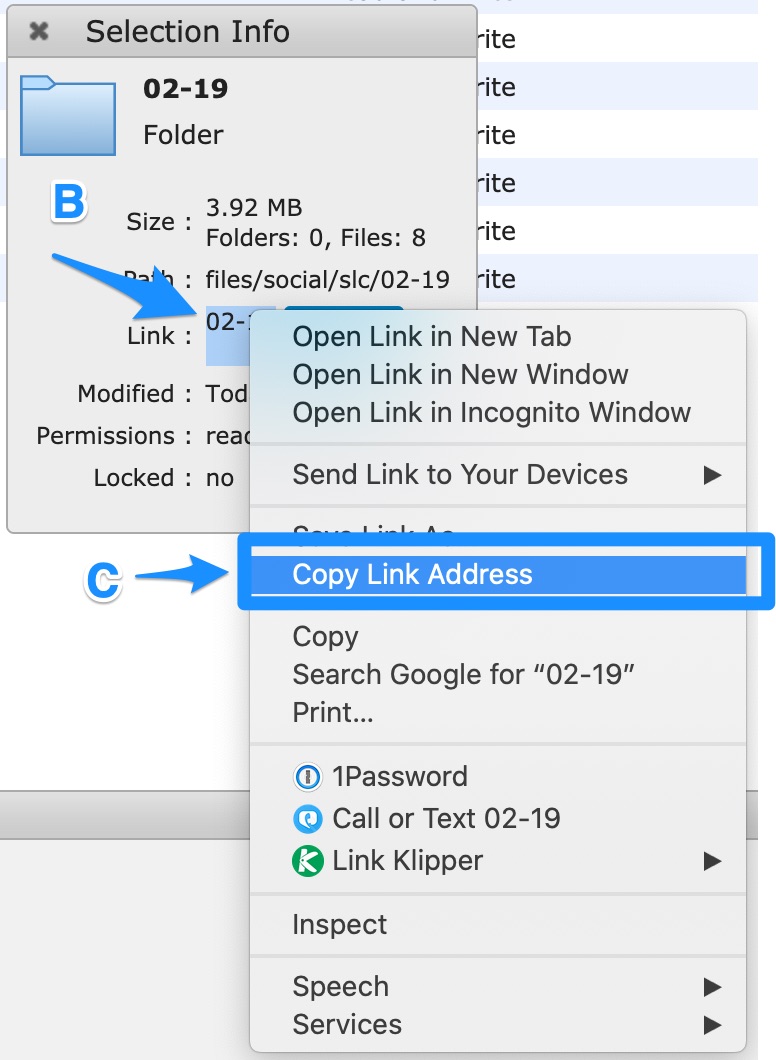
A) Right-click on the folder you created in step 3 and click “Get info & Share.”
B) Right-click on the link directly to the right of “Link:”
C) Copy this link address. You’ll need it.